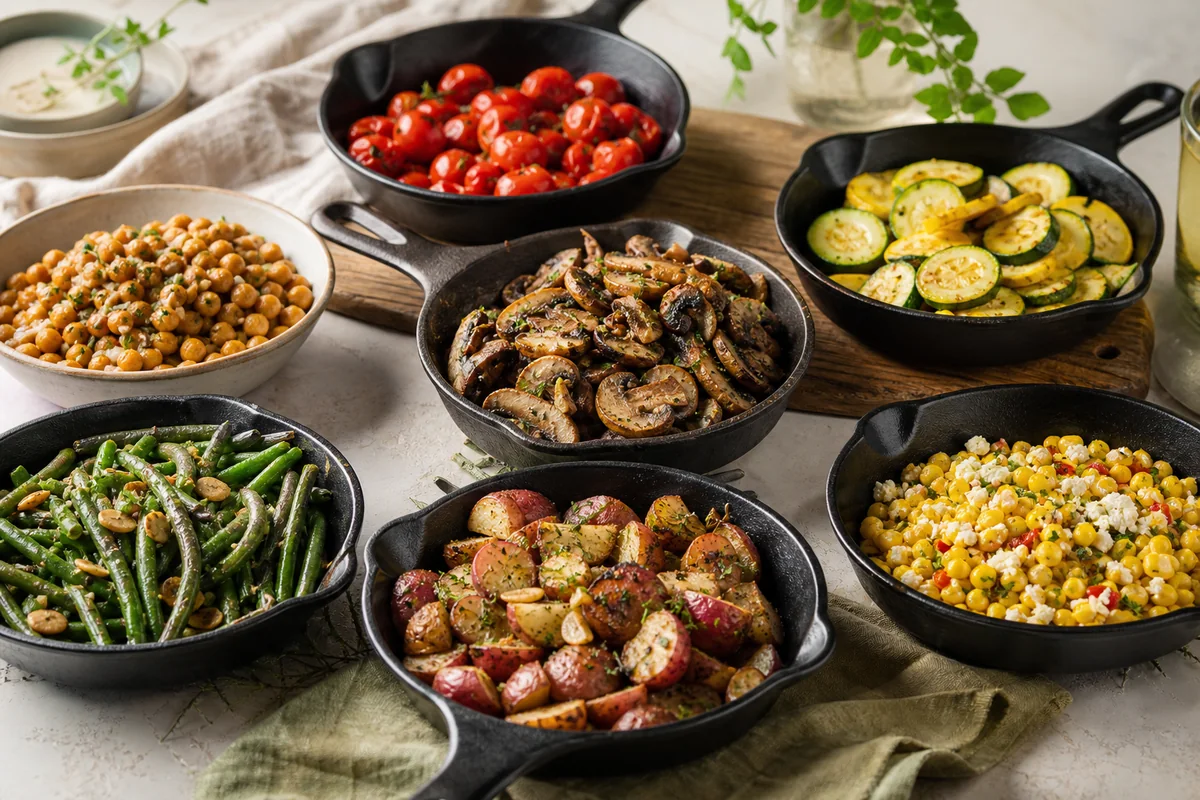
A single skillet is all you need to put a genuinely satisfying side dish on the table, and these 20 recipes prove it. From golden cast-iron cornbread to charred Brussels sprouts with bacon, every dish here cooks start-to-finish in one pan with minimal prep.
These are the sides that solve the weeknight question: flavorful enough to feel intentional, fast enough to actually happen.
Each recipe leans on real ingredients - fresh herbs, bright citrus, good cheese - rather than shortcuts that sacrifice flavor. If you regularly need quick options with few components, our 5-ingredient side dish ideas are worth bookmarking alongside this list.
One skillet also means one pan to wash. That alone makes these recipes worth keeping in rotation.
These 20 one-pan skillet side dishes cover everything from crispy cornbread and smashed potatoes to charred vegetables and creamy dips. Every recipe cooks in a single skillet, cuts cleanup significantly, and delivers bold, satisfying flavor with straightforward pantry ingredients.
1. One-Pan Cast-Iron Cornbread

Cast-iron skillet cornbread has a golden, crackling crust that you simply cannot get from a baking pan. The preheated iron sears the batter on contact, producing that signature crisp bottom while the interior stays moist and tender.
It pairs equally well with a bowl of smoky chili, a pot of soup, or a full barbecue spread, making it one of the most versatile sides in this collection.
Why This Recipe Works
This cornbread delivers a perfect crust-to-crumb ratio that standard baking dishes rarely achieve.
- Convenience: Everything mixes and bakes in one skillet, so cleanup takes about two minutes.
- Texture: The hot cast iron creates a deeply golden, crispy crust while keeping the crumb soft and slightly crumbly inside.
- Flavor balance: Lightly sweet with a savory edge, the classic cornmeal flavor complements both hearty stews and lighter proteins.
- Family-friendly appeal: Mild, familiar, and crowd-pleasing at everyday dinners and holiday tables alike.
Ingredient Swap Ideas
Swapping ingredients in this recipe can help accommodate preferences or dietary needs without losing the signature texture or flavor.
- Cornmeal type - Use stone-ground cornmeal for a coarser texture or fine cornmeal for smoother bread.
- Milk option - Substitute whole milk with buttermilk or a plant-based milk like almond for a twist in flavor and consistency.
- Fat choice - Swap butter with vegetable oil or bacon drippings for a different richness and flavor.
- Egg substitute - For an egg-free version, use flax or chia seed gel as a binder, keeping the cornbread moist and held together.
Ingredients
- 1 cup yellow cornmeal
- 1 cup all-purpose flour
- 1 tablespoon baking powder
- ½ teaspoon salt
- 1 cup whole milk
- 1 large egg
- 3 tablespoons unsalted butter
- 1 tablespoon granulated sugar
Instructions
- Preheat your oven to 425°F (220°C). Place a 10-inch cast-iron skillet in the oven while it heats to get the pan hot.
- In a large bowl, whisk together the cornmeal, flour, baking powder, salt, and sugar until evenly combined.
- In a separate bowl, mix the milk and egg. Pour the wet ingredients into the dry and stir just until combined-do not overmix to keep the texture light.
- Carefully remove the hot skillet from the oven and add 2 tablespoons of butter, swirling it around to coat the bottom and sides. Immediately pour the batter into the skillet and smooth the top.
- Bake the cornbread for 20 to 25 minutes until it's golden brown and a toothpick inserted into the center comes out clean. Let it cool slightly before slicing and serving.
2. Garlic Parmesan Smashed Potatoes

Par-boiled baby potatoes get smashed flat in the skillet, then pan-fried until the edges turn deeply crispy while the centers stay fluffy. Garlic butter soaks into every crevice, and a generous shower of Parmesan adds a salty, nutty finish.
This side feels a step above ordinary roasted potatoes without asking much more of your time or your pantry.
Why This Recipe Works
Par-boiling first shortens skillet time and guarantees a creamy center even when the outside crisps up hard.
- Convenience: The two-step method (boil, then smash and fry) is faster than oven roasting from raw.
- Flavor balance: Garlic butter and Parmesan create a savory, aromatic coating that clings to every rough edge.
- Texture: Shatteringly crispy outside, soft and creamy inside - the contrast is what makes this dish.
- Appeal: Works beside roast chicken, grilled steak, or a simple salad without competing with the main.
Ingredient Swap Ideas
Swapping certain ingredients can tailor the dish for dietary preferences or to vary the flavor while keeping the overall concept intact.
- Butter and oil - Use olive oil instead of butter to reduce dairy content and add a fruity note.
- Cheese - Substitute Parmesan with Pecorino Romano for a sharper tang or nutritional yeast for a vegan twist.
- Herbs - Add fresh rosemary or thyme in place of garlic for a different herbal aroma.
- Potatoes - Yukon gold or red potatoes can replace baby potatoes for different textures and sizes.
Ingredients
- 1 ½ pounds baby potatoes
- 3 tablespoons unsalted butter
- 3 cloves garlic
- ½ cup grated Parmesan cheese
- Salt
- Black pepper
- 2 tablespoons olive oil
- Fresh parsley
Instructions
- Bring a large pot of salted water to a boil. Add the baby potatoes and par-boil until just tender, about 15 minutes. Drain well and set aside to cool slightly.
- Preheat the oven to 425°F (220°C) and line a baking sheet with parchment paper or lightly grease it.
- Place the boiled potatoes on the baking sheet. Use a sturdy glass or potato masher to gently press down on each potato until it flattens but stays in one piece.
- In a small bowl, mix melted butter, minced garlic, salt, and pepper. Brush this mixture evenly over the smashed potatoes. Drizzle olive oil on top to help them crisp.
- Roast the potatoes for 20-25 minutes, turning once halfway through, until edges are golden and crisp. Sprinkle grated Parmesan over the potatoes in the last 5 minutes of roasting, so it melts and browns slightly.
- Remove from the oven and garnish with chopped fresh parsley before serving warm.
3. Lemon Almond Green Beans

Green beans stay snappy and bright when sautéed quickly over high heat, and toasted almonds add a nutty crunch that transforms this from a basic vegetable side into something worth repeating.
A squeeze of fresh lemon at the end cuts through the richness and lifts the whole dish.
For more ways to add crunch and brightness to your vegetable sides, our collection of broccoli sides that stay crisp-tender uses many of the same techniques.
Why This Recipe Works
High heat and a short cook time preserve the green beans' texture, so they never turn limp or dull.
- Convenience: Ready in under 12 minutes with minimal prep - trim, toss, and cook.
- Flavor balance: Savory, nutty, and citrusy notes layer without any single flavor taking over.
- Texture: Tender green beans against toasted almonds give every bite two distinct textures.
- Appeal: Goes with fish, chicken, pork, or tofu - a genuinely all-purpose vegetable side.
Ingredient Swap Ideas
Swapping ingredients here can easily accommodate dietary preferences or offer a new flavor twist. Adjusting key components keeps the dish accessible and fresh for different occasions.
- Green beans - Use blanched asparagus or snap peas for a similar crisp texture.
- Almonds - Substitute toasted pine nuts or walnuts for a different nutty profile.
- Lemon juice - Try lime juice to add a sharper citrus note or a splash of white wine vinegar for subtle acidity.
- Garlic - Use shallots or a small amount of finely chopped onion for a milder aromatics option.
Ingredients
- 1 pound fresh green beans
- 2 tablespoons olive oil
- 3 cloves garlic
- ¼ cup sliced almonds
- 1 tablespoon fresh lemon juice
- ½ teaspoon salt
- ¼ teaspoon black pepper
Instructions
- Bring a large pot of salted water to a boil. Add the green beans and cook until tender-crisp, about 3 to 4 minutes. Drain and immediately plunge into ice water to stop cooking and preserve color. Drain again and set aside.
- Heat olive oil in a large skillet over medium heat. Add the minced garlic and sauté until fragrant, about 1 minute, making sure it doesn't brown.
- Add the drained green beans to the skillet and toss to coat with the garlic oil. Cook for 2 to 3 minutes until heated through.
- Stir in the toasted almonds, then add fresh lemon juice, salt, and black pepper. Toss gently to combine all flavors.
- Remove from heat and transfer to a serving dish. Serve warm or at room temperature for a bright, tasty side.
4. Honey Butter Carrots

Honey butter carrots turn a humble root vegetable into a glossy, caramelized side that looks far more effort than it is.
The carrots cook until fork-tender with a thin glaze, and a few sprigs of fresh thyme add just enough herbal warmth to balance the sweetness.
These work on a Tuesday night alongside roast chicken, or dressed up on a holiday table with zero changes to the recipe.
Why This Recipe Works
The honey reduces in the pan to a sticky glaze that clings to each carrot slice rather than pooling at the bottom.
- Convenience: Requires only a few ingredients and roughly 15 minutes from start to plate.
- Flavor balance: Honey, butter, and thyme create sweet, rich, and herbal notes that work together cleanly.
- Texture: Tender throughout with a lightly shiny glaze that adds a pleasant softness to each bite.
- Family-friendly appeal: The mild sweetness makes this an easy sell for picky eaters of any age.
Ingredient Swap Ideas
Swapping ingredients here lets you easily adjust the taste or accommodate different dietary needs without losing the intended dish's character.
- Use maple syrup instead of honey for a vegan-friendly glaze with a similar sweetness.
- Replace butter with olive oil or vegan margarine to keep the dish dairy-free while maintaining richness.
- Switch fresh thyme for rosemary or sage if you're after a slightly different herbal fragrance.
- Try baby carrots instead of regular carrots for a faster-cooking option with a tender bite.
Ingredients
- 1 pound carrots
- 2 tablespoons unsalted butter
- 2 tablespoons honey
- ½ teaspoon salt
- ¼ teaspoon freshly ground black pepper
- 1 teaspoon fresh thyme leaves
Instructions
- Place the carrots in a medium saucepan and cover with water. Bring to a boil and cook for about 5 minutes or until just tender but still firm. Drain well.
- In the same saucepan, melt the butter over medium heat. Stir in the honey, salt, and pepper until combined and slightly bubbling.
- Add the drained carrots back to the pan and toss thoroughly in the honey butter mixture to coat evenly. Cook for 2 to 3 minutes, stirring occasionally, until the carrots are fully glazed and heated through.
- Remove from heat and transfer the carrots to a serving dish. Sprinkle with fresh thyme leaves for a pop of color and herbal flavor.
- Serve warm as a side dish alongside roasted meats, grains, or other vegetables.
5. Skillet Brussels Sprouts with Bacon & Balsamic

Brussels sprouts get a bad reputation, but cutting them in half and pressing them face-down in a hot skillet changes everything.
The flat sides caramelize and turn deeply golden, while crispy bacon bits and a splash of balsamic vinegar add smoky, tangy depth that wins over skeptics.
This is the Brussels sprouts recipe that consistently disappears first at the table.
Why This Recipe Works
Direct contact with the hot pan surface creates caramelization that oven roasting at lower temperatures rarely achieves as quickly.
- Convenience: One skillet, under 20 minutes, with no blanching required beforehand.
- Flavor balance: Sweet caramelized sprouts, smoky bacon, and tangy balsamic hit three distinct flavor notes at once.
- Texture: Crispy bacon bits contrast with sprouts that are tender inside and charred at the edges.
- Appeal: Strong enough in flavor for adults, approachable enough alongside familiar mains for a family dinner.
Ingredient Swap Ideas
Switching up ingredients lets you customize this recipe based on what you have or your dietary preferences. Some changes can keep the flavor close while adjusting textures or nutritional content.
- Bacon - Use turkey bacon or smoked tempeh strips for a leaner or vegetarian option.
- Balsamic vinegar - Substitute with apple cider vinegar mixed with a small drizzle of honey for a similar tangy sweetness.
- Brussels sprouts - Try halved green cabbage or broccolini for a different but related vegetable base.
- Sweetener - Add a sprinkle of brown sugar or maple syrup with the balsamic for extra caramelization and depth.
Ingredients
- 1 pound Brussels sprouts
- 4 ounces bacon
- 2 tablespoons olive oil
- 2 tablespoons balsamic vinegar
- ½ teaspoon salt
- ¼ teaspoon black pepper
Instructions
- Heat a large skillet over medium heat and add the diced bacon. Cook until crispy, about 5 to 7 minutes. Use a slotted spoon to transfer bacon to a paper towel-lined plate and drain excess fat, leaving about 1 tablespoon in the skillet.
- Add olive oil to the skillet with the bacon fat and then place the halved Brussels sprouts cut side down. Let them cook undisturbed for about 6 to 8 minutes until they are deeply browned and caramelized.
- Stir the sprouts and season with salt and pepper. Continue cooking for another 3 to 4 minutes until sprouts are tender but still have a slight bite.
- Return the cooked bacon to the skillet and toss everything together. Drizzle with balsamic vinegar and stir well to coat evenly.
- Remove from heat and serve warm as a savory side dish that pairs well with roasted meats or hearty grains.
6. Sweet Potato & Red Onion Hash

Sweet potato hash works at breakfast, lunch, or dinner without changing a single ingredient. The sweet potatoes develop crispy edges in the skillet while staying soft at the center, and the red onions slowly go jammy and sweet as they cook down alongside them.
If you want to round out a plant-forward dinner, bean-based sides pair exceptionally well with this hash for a complete, satisfying plate.
Why This Recipe Works
Letting the potatoes cook undisturbed for a few minutes at a time builds the crispy crust without any added breading or frying.
- Convenience: One pan, common ingredients, and about 20 minutes of mostly hands-off cooking.
- Flavor balance: Earthy sweet potato and sharp red onion create a savory-sweet contrast that needs no sauce.
- Texture: Crispy potato edges against soft, caramelized onion make every forkful interesting.
- Appeal: Naturally gluten-free and adaptable - add a fried egg on top and it becomes a full meal.
Ingredient Swap Ideas
Swapping ingredients can help tailor this hash to different tastes or dietary needs without changing its character. Small changes keep the dish fresh and adaptable.
- Sweet potatoes - Use regular potatoes or butternut squash for a different flavor and texture.
- Red onion - Substitute with yellow onion or shallots for a milder or sweeter profile.
- Oil - Replace olive oil with avocado or coconut oil depending on your preference or dietary requirements.
- Add-ins - Incorporate diced bell peppers or chopped kale to boost color and nutrients.
Ingredients
- 2 medium sweet potatoes
- 1 large red onion
- 2 tablespoons olive oil
- ½ teaspoon salt
- ¼ teaspoon black pepper
- ½ teaspoon smoked paprika
- 2 tablespoons fresh parsley
Instructions
- Heat the olive oil in a large skillet over medium heat until shimmering. Add the cubed sweet potatoes and spread them out in an even layer. Let cook without stirring for about 5 minutes to develop a crisp edge.
- Stir the sweet potatoes gently, then add the sliced red onions. Season with salt, pepper, and smoked paprika. Continue cooking, stirring occasionally, for another 10 to 12 minutes until the sweet potatoes are tender and both ingredients are caramelized.
- Taste and adjust seasoning if needed. Remove from heat and sprinkle with chopped parsley.
- Serve warm as a side dish or topped with a fried egg for a satisfying meal.
7. Creamed Spinach Skillet

Baby spinach wilts down significantly in the pan, so this dish uses a generous amount to produce a velvety, creamy result. The garlicky Parmesan cream sauce coats every leaf in rich, savory flavor without feeling heavy or overly thick.
It is ready in under 15 minutes and pairs cleanly with steak, roast chicken, or pan-seared fish.
Why This Recipe Works
Building the sauce directly in the skillet after sautéing the garlic picks up all the fond and keeps the flavor concentrated.
- Convenience: One skillet, 15 minutes total, and no separate sauce pan needed.
- Flavor balance: Garlic, Parmesan, and cream complement the mild, slightly bitter spinach without masking it.
- Texture: Silky sauce with tender spinach leaves - rich but not stodgy.
- Appeal: A steakhouse-classic side that works just as well on a Tuesday as it does for a dinner party.
Ingredient Swap Ideas
Swapping ingredients lets you adjust this dish for different diets or flavor preferences while maintaining its creamy, comforting quality.
- Spinach substitute - Use kale or Swiss chard for a heartier green with similar cooking times.
- Dairy alternative - Replace heavy cream with coconut cream or cashew cream for a dairy-free version.
- Cheese swap - Try nutritional yeast or a vegan Parmesan for a plant-based option.
- Garlic variation - Add shallots or onion powder for a milder aromatic touch if preferred.
Ingredients
- 2 tablespoons unsalted butter
- 3 cloves garlic
- 10 ounces baby spinach
- 1 cup heavy cream
- ½ cup grated Parmesan cheese
- Salt
- Freshly ground black pepper
Instructions
- Melt butter in a large skillet over medium heat until foaming. Add minced garlic and sauté for about 1 minute until fragrant but not browned.
- Add the baby spinach in batches, stirring constantly and allowing it to wilt down before adding more. Continue until all spinach is wilted.
- Pour in the heavy cream and bring the mixture to a gentle simmer. Stir occasionally until the sauce thickens slightly, about 3 to 4 minutes.
- Stir in grated Parmesan cheese and season with salt and pepper. Mix well until the cheese melts completely and the sauce coats the spinach evenly.
- Remove from heat and serve immediately as a warm, creamy side dish alongside your favorite entrée.
Do not overcrowd your skillet when cooking vegetables. Crowding traps steam and prevents browning - work in batches if needed to keep everything in a single layer.
8. Roasted Broccoli & Cauliflower

Broccoli and cauliflower florets roast in a very hot skillet until the edges turn dark and slightly charred, which develops a nutty, smoky flavor that plain steaming never delivers.
Garlic and a pinch of red pepper flakes go in toward the end so they bloom without burning.
This is the skillet side that converts people who think they do not like cauliflower. You can find even more inspiration in our roundup of cheesy vegetable sides everyone will eat.
Why This Recipe Works
High-heat pan-roasting achieves Maillard browning on the florets faster than most home ovens can manage with sheet pan roasting.
- Convenience: One pan, basic seasonings, and about 15 minutes of active cooking.
- Flavor balance: Charred vegetables, garlic, and red pepper build savory depth with gentle heat.
- Texture: Crispy, browned edges on the florets with a tender, not mushy, interior.
- Appeal: A healthy side that holds up next to bold mains like spiced lamb, grilled salmon, or roast pork.
Ingredient Swap Ideas
Adapting this recipe can help fit different tastes or dietary preferences without losing its core appeal. Here are a few straightforward swaps to consider.
- Broccoli and cauliflower - Use just one of the vegetables or add Brussels sprouts for variety.
- Garlic - Replace with garlic powder if fresh isn't available, or use shallots for a milder flavor.
- Red-pepper flakes - Adjust the heat by reducing the amount or substituting with smoked paprika for a smoky twist.
- Cooking fat - Substitute olive oil with avocado oil or melted butter for a richer taste.
Ingredients
- 2 cups broccoli florets
- 2 cups cauliflower florets
- 2 tablespoons olive oil
- 3 cloves garlic
- ¼ teaspoon red-pepper flakes
- Salt
- Freshly ground black pepper
Instructions
- Heat olive oil in a large skillet over medium-high heat until shimmering. Add the broccoli and cauliflower florets, spreading them out evenly. Let them cook undisturbed for about 4 minutes until the bottoms start to brown.
- Stir the vegetables, then add minced garlic and red-pepper flakes. Cook for another 5 to 7 minutes, stirring occasionally, until the florets are just tender and nicely charred in spots.
- Season with salt and freshly ground black pepper to taste, stirring to distribute the seasoning evenly.
- Remove from heat and transfer to a serving dish. Serve warm as a side or toss into salads and grain bowls.
9. Garlic Butter Mushrooms

Browning the butter before adding the mushrooms is the move that makes this dish. The nutty, toasted butter coats the mushrooms as they cook, and the combination of garlic and fresh thyme turns what could be a plain sauté into something deeply savory and aromatic.
These mushrooms are ready in about 10 minutes and work as a side, a steak topping, or spooned over crusty bread as a starter.
Why This Recipe Works
Cooking the mushrooms without stirring too often allows moisture to evaporate and the edges to caramelize, rather than steam and stay pale.
- Convenience: 10 minutes total, one pan, five ingredients - a genuinely fast side.
- Flavor balance: Browned butter, garlic, and thyme create layered savoriness without any single ingredient dominating.
- Texture: Tender mushrooms with caramelized, slightly chewy edges that hold up on the fork.
- Appeal: Versatile enough to pair with steak, pasta, eggs, or a simple green salad.
Ingredient Swap Ideas
Swapping ingredients here can easily tailor the dish for different preferences or diets without losing its character. These options adjust things like fat sources and flavors while staying close to the original idea.
- Butter substitute - Use olive oil or vegan butter if avoiding dairy.
- Mushroom variety - Replace button mushrooms with cremini, shiitake, or oyster mushrooms for different textures.
- Herb alternatives - Swap fresh thyme for rosemary or sage to vary the herbal notes.
- Garlic intensity - Use garlic powder instead of fresh for a milder taste.
Ingredients
- 12 ounces button or cremini mushrooms
- 3 tablespoons unsalted butter
- 3 cloves garlic
- 1 teaspoon fresh thyme leaves
- Salt
- Freshly ground black pepper
Instructions
- Heat 2 tablespoons of butter in a large skillet over medium-high heat until foaming and just beginning to brown.
- Add the mushrooms in a single layer and cook without stirring for 3 minutes to encourage browning.
- Stir the mushrooms, then add the minced garlic and thyme, cooking for another 3 to 4 minutes until mushrooms are tender and fragrant.
- Season with salt and black pepper, then add the remaining tablespoon of butter and stir until melted and coating the mushrooms.
- Remove from heat and serve immediately, garnished with extra thyme if desired.
10. Zucchini & Tomato Gratin

Layered zucchini slices and juicy cherry tomatoes soften as they cook, releasing their moisture into the pan while the breadcrumb and cheese topping turns golden and crispy.
The contrast between the silky vegetables below and the crunchy crust on top is exactly what makes this gratin worth making.
It is light enough to serve alongside grilled chicken, and satisfying enough to stand alone as a light main. If you want more ideas built around tangy cheese, sides made with feta cheese offer a similar fresh, savory approach.
Why This Recipe Works
Cooking the vegetables through before adding the topping prevents a soggy crust - the key step most gratins skip.
- Convenience: Minimal prep and a short bake time make this achievable on a weeknight.
- Flavor balance: Mild zucchini and acidic cherry tomatoes balance each other, with cheese adding richness.
- Texture: Soft, tender vegetables under a crisped breadcrumb crust - two textures in every bite.
- Appeal: Bright colors and fresh ingredients make this a natural choice for spring and summer meals.
Ingredient Swap Ideas
Swapping ingredients in this recipe can help accommodate preferences or dietary needs without losing the signature texture or flavor.
- Cornmeal type - Use stone-ground cornmeal for a coarser texture or fine cornmeal for smoother bread.
- Milk option - Substitute whole milk with buttermilk or a plant-based milk like almond for a twist in flavor and consistency.
- Fat choice - Swap butter with vegetable oil or bacon drippings for a different richness and flavor.
- Egg substitute - For an egg-free version, use flax or chia seed gel as a binder, keeping the cornbread moist and held together.
Ingredients
- 1 cup yellow cornmeal
- 1 cup all-purpose flour
- 1 tablespoon baking powder
- ½ teaspoon salt
- 1 cup whole milk
- 1 large egg
- 3 tablespoons unsalted butter
- 1 tablespoon granulated sugar
Instructions
- Preheat your oven to 425°F (220°C). Place a 10-inch cast-iron skillet in the oven while it heats to get the pan hot.
- In a large bowl, whisk together the cornmeal, flour, baking powder, salt, and sugar until evenly combined.
- In a separate bowl, mix the milk and egg. Pour the wet ingredients into the dry and stir just until combined-do not overmix to keep the texture light.
- Carefully remove the hot skillet from the oven and add 2 tablespoons of butter, swirling it around to coat the bottom and sides. Immediately pour the batter into the skillet and smooth the top.
- Bake the cornbread for 20 to 25 minutes until it's golden brown and a toothpick inserted into the center comes out clean. Let it cool slightly before slicing and serving.
11. Parmesan Asparagus

Pan-roasting asparagus in olive oil and garlic takes about 8 minutes and produces spears with lightly charred tips and a tender stem. A handful of freshly grated Parmesan goes on at the end, melting slightly against the hot asparagus for a salty, nutty finish.
This side is simple enough for a Tuesday and polished enough for company - few sides manage both as efficiently.
Why This Recipe Works
A hot skillet keeps the asparagus moving quickly through the Maillard zone, giving color and flavor without overcooking the interior.
- Convenience: Trim the woody ends, toss with oil and garlic, and cook - under 10 minutes total.
- Flavor balance: Nutty Parmesan and garlic enhance the grassy freshness of asparagus rather than covering it.
- Texture: Tender with a slight bite at the stem and a lightly caramelized tip.
- Appeal: Elegant presentation for minimal effort - works beside fish, chicken, or pasta equally well.
Ingredient Swap Ideas
Swapping ingredients in this recipe can help accommodate preferences or dietary needs without losing the signature texture or flavor.
- Cornmeal type - Use stone-ground cornmeal for a coarser texture or fine cornmeal for smoother bread.
- Milk option - Substitute whole milk with buttermilk or a plant-based milk like almond for a twist in flavor and consistency.
- Fat choice - Swap butter with vegetable oil or bacon drippings for a different richness and flavor.
- Egg substitute - For an egg-free version, use flax or chia seed gel as a binder, keeping the cornbread moist and held together.
Ingredients
- 1 cup yellow cornmeal
- 1 cup all-purpose flour
- 1 tablespoon baking powder
- ½ teaspoon salt
- 1 cup whole milk
- 1 large egg
- 3 tablespoons unsalted butter
- 1 tablespoon granulated sugar
Instructions
- Preheat your oven to 425°F (220°C). Place a 10-inch cast-iron skillet in the oven while it heats to get the pan hot.
- In a large bowl, whisk together the cornmeal, flour, baking powder, salt, and sugar until evenly combined.
- In a separate bowl, mix the milk and egg. Pour the wet ingredients into the dry and stir just until combined-do not overmix to keep the texture light.
- Carefully remove the hot skillet from the oven and add 2 tablespoons of butter, swirling it around to coat the bottom and sides. Immediately pour the batter into the skillet and smooth the top.
- Bake the cornbread for 20 to 25 minutes until it's golden brown and a toothpick inserted into the center comes out clean. Let it cool slightly before slicing and serving.
12. Mexican Street Corn (Elote) Salad

Charring the corn in a dry, screaming-hot skillet is the step that separates this from a basic corn salad. The kernels develop smoky, slightly sweet char marks before getting tossed with mayo, lime juice, chili powder, and crumbled cotija cheese.
You can use canned corn here for a year-round version, and our guide to canned corn sides that brighten any meal has more inspiration for getting serious flavor from a pantry staple.
Why This Recipe Works
Charring the corn dry - without oil - prevents steaming and creates genuine browning on the kernels in just a few minutes.
- Convenience: Uses canned or fresh corn and comes together in about 15 minutes start to finish.
- Flavor balance: Creamy mayo, tangy lime, salty cotija, and smoky chili powder hit every flavor note at once.
- Texture: Charred, slightly chewy corn kernels in a creamy dressing with crumbly cheese throughout.
- Appeal: A crowd-pleasing side that works at cookouts, taco nights, or alongside grilled proteins.
Ingredient Swap Ideas
Swapping ingredients in this recipe can help accommodate preferences or dietary needs without losing the signature texture or flavor.
- Cornmeal type - Use stone-ground cornmeal for a coarser texture or fine cornmeal for smoother bread.
- Milk option - Substitute whole milk with buttermilk or a plant-based milk like almond for a twist in flavor and consistency.
- Fat choice - Swap butter with vegetable oil or bacon drippings for a different richness and flavor.
- Egg substitute - For an egg-free version, use flax or chia seed gel as a binder, keeping the cornbread moist and held together.
Ingredients
- 1 cup yellow cornmeal
- 1 cup all-purpose flour
- 1 tablespoon baking powder
- ½ teaspoon salt
- 1 cup whole milk
- 1 large egg
- 3 tablespoons unsalted butter
- 1 tablespoon granulated sugar
Instructions
- Preheat your oven to 425°F (220°C). Place a 10-inch cast-iron skillet in the oven while it heats to get the pan hot.
- In a large bowl, whisk together the cornmeal, flour, baking powder, salt, and sugar until evenly combined.
- In a separate bowl, mix the milk and egg. Pour the wet ingredients into the dry and stir just until combined-do not overmix to keep the texture light.
- Carefully remove the hot skillet from the oven and add 2 tablespoons of butter, swirling it around to coat the bottom and sides. Immediately pour the batter into the skillet and smooth the top.
- Bake the cornbread for 20 to 25 minutes until it's golden brown and a toothpick inserted into the center comes out clean. Let it cool slightly before slicing and serving.
For the elote salad, add the creamy dressing only after the corn has cooled slightly. Tossing hot corn with mayo causes the sauce to break and go greasy rather than staying thick and coating the kernels evenly.
13. Caramelized Onions & Bell Peppers

Thinly sliced onions and tri-color bell peppers need low, patient heat to become truly jammy and sweet. Rushing this over high heat browns them unevenly and leaves a slightly bitter edge - the slow cook is the actual technique here.
Once done, these go on burgers, grilled sausages, sandwiches, or any protein that benefits from a sweet, savory topping.
Why This Recipe Works
Low-and-slow cooking converts the natural sugars in both vegetables into a concentrated, deeply sweet jammy texture that no shortcut can replicate.
- Convenience: Mostly hands-off once the heat is set - stir occasionally and let the skillet do the work.
- Flavor balance: Caramelized onions and sweet peppers add a rich, mellow sweetness that complements savory mains.
- Texture: Soft and silky, with none of the raw sharpness that undercooked onions leave behind.
- Versatility: Works equally well as a topping, a filling, or a standalone side dish with crusty bread.
Ingredient Swap Ideas
Swapping ingredients in this recipe can help accommodate preferences or dietary needs without losing the signature texture or flavor.
- Cornmeal type - Use stone-ground cornmeal for a coarser texture or fine cornmeal for smoother bread.
- Milk option - Substitute whole milk with buttermilk or a plant-based milk like almond for a twist in flavor and consistency.
- Fat choice - Swap butter with vegetable oil or bacon drippings for a different richness and flavor.
- Egg substitute - For an egg-free version, use flax or chia seed gel as a binder, keeping the cornbread moist and held together.
Ingredients
- 1 cup yellow cornmeal
- 1 cup all-purpose flour
- 1 tablespoon baking powder
- ½ teaspoon salt
- 1 cup whole milk
- 1 large egg
- 3 tablespoons unsalted butter
- 1 tablespoon granulated sugar
Instructions
- Preheat your oven to 425°F (220°C). Place a 10-inch cast-iron skillet in the oven while it heats to get the pan hot.
- In a large bowl, whisk together the cornmeal, flour, baking powder, salt, and sugar until evenly combined.
- In a separate bowl, mix the milk and egg. Pour the wet ingredients into the dry and stir just until combined-do not overmix to keep the texture light.
- Carefully remove the hot skillet from the oven and add 2 tablespoons of butter, swirling it around to coat the bottom and sides. Immediately pour the batter into the skillet and smooth the top.
- Bake the cornbread for 20 to 25 minutes until it's golden brown and a toothpick inserted into the center comes out clean. Let it cool slightly before slicing and serving.
14. Pan-Fried Okra with Cornmeal

Sliced okra gets dredged in seasoned cornmeal and pan-fried until each piece develops a snappy, golden crust while the interior stays slightly tender. This is the technique that removes any sliminess concern and turns okra into something even skeptics reach for.
It is a classic Southern side that comes together in about 15 minutes and pairs naturally with grilled pork, fried chicken, or a bowl of slow-cooked beans.
Why This Recipe Works
The cornmeal coating absorbs surface moisture from the okra, which is exactly what creates the crisp exterior during frying.
- Convenience: Quick prep and fast frying make this a reliable weeknight side with no special equipment needed.
- Flavor balance: Seasoned cornmeal adds lightly spiced, savory notes that work with the earthy, mild flavor of okra.
- Texture: Crispy cornmeal crust against a tender interior - the contrast is the whole point of this dish.
- Family-friendly: A well-known way to get kids interested in eating okra without any negotiation required.
Ingredient Swap Ideas
Swapping ingredients in this recipe can help accommodate preferences or dietary needs without losing the signature texture or flavor.
- Cornmeal type - Use stone-ground cornmeal for a coarser texture or fine cornmeal for smoother bread.
- Milk option - Substitute whole milk with buttermilk or a plant-based milk like almond for a twist in flavor and consistency.
- Fat choice - Swap butter with vegetable oil or bacon drippings for a different richness and flavor.
- Egg substitute - For an egg-free version, use flax or chia seed gel as a binder, keeping the cornbread moist and held together.
Ingredients
- 1 cup yellow cornmeal
- 1 cup all-purpose flour
- 1 tablespoon baking powder
- ½ teaspoon salt
- 1 cup whole milk
- 1 large egg
- 3 tablespoons unsalted butter
- 1 tablespoon granulated sugar
Instructions
- Preheat your oven to 425°F (220°C). Place a 10-inch cast-iron skillet in the oven while it heats to get the pan hot.
- In a large bowl, whisk together the cornmeal, flour, baking powder, salt, and sugar until evenly combined.
- In a separate bowl, mix the milk and egg. Pour the wet ingredients into the dry and stir just until combined-do not overmix to keep the texture light.
- Carefully remove the hot skillet from the oven and add 2 tablespoons of butter, swirling it around to coat the bottom and sides. Immediately pour the batter into the skillet and smooth the top.
- Bake the cornbread for 20 to 25 minutes until it's golden brown and a toothpick inserted into the center comes out clean. Let it cool slightly before slicing and serving.
15. Cheddar Polenta Cakes

Pre-cooked polenta slices into rounds that crisp up quickly in a hot skillet, developing a golden, firm crust while the center stays creamy and soft. Sharp cheddar melted into the mixture adds a tangy richness that the mild corn base really benefits from.
These cakes work as a side beside braised meats, or topped with a fried egg and sautéed greens for a fast vegetarian dinner. For a fiber-forward companion dish, high-fiber sides that actually taste good pair well with these polenta cakes.
Why This Recipe Works
Using pre-cooked polenta eliminates 30 minutes of stovetop stirring and still delivers the same creamy, golden result.
- Convenience: Pre-cooked polenta cuts active cooking time dramatically - slice, season, and sear.
- Flavor balance: Sharp cheddar and mild corn polenta balance each other - rich without being heavy.
- Texture: Crispy exterior with a tender, almost custardy center that holds together on the plate.
- Appeal: Works as a side, appetizer, or base for toppings - genuinely multi-purpose on the plate.
Ingredient Swap Ideas
Swapping ingredients in this recipe can help accommodate preferences or dietary needs without losing the signature texture or flavor.
- Cornmeal type - Use stone-ground cornmeal for a coarser texture or fine cornmeal for smoother bread.
- Milk option - Substitute whole milk with buttermilk or a plant-based milk like almond for a twist in flavor and consistency.
- Fat choice - Swap butter with vegetable oil or bacon drippings for a different richness and flavor.
- Egg substitute - For an egg-free version, use flax or chia seed gel as a binder, keeping the cornbread moist and held together.
Ingredients
- 1 cup yellow cornmeal
- 1 cup all-purpose flour
- 1 tablespoon baking powder
- ½ teaspoon salt
- 1 cup whole milk
- 1 large egg
- 3 tablespoons unsalted butter
- 1 tablespoon granulated sugar
Instructions
- Preheat your oven to 425°F (220°C). Place a 10-inch cast-iron skillet in the oven while it heats to get the pan hot.
- In a large bowl, whisk together the cornmeal, flour, baking powder, salt, and sugar until evenly combined.
- In a separate bowl, mix the milk and egg. Pour the wet ingredients into the dry and stir just until combined-do not overmix to keep the texture light.
- Carefully remove the hot skillet from the oven and add 2 tablespoons of butter, swirling it around to coat the bottom and sides. Immediately pour the batter into the skillet and smooth the top.
- Bake the cornbread for 20 to 25 minutes until it's golden brown and a toothpick inserted into the center comes out clean. Let it cool slightly before slicing and serving.
16. Herbed Cauliflower Rice

Cauliflower rice cooks in under 8 minutes in a hot skillet, and the key is keeping the heat high enough to evaporate moisture quickly rather than steaming the florets into mush.
Garlic, flat-leaf parsley, and a squeeze of lemon give the rice bright, clean flavor that makes it feel like an active choice rather than a compromise.
This side is low-carb and genuinely satisfying alongside grilled proteins or saucy mains that need something to absorb extra liquid.
Why This Recipe Works
High heat and a wide skillet are the two factors that prevent soggy cauliflower rice - both give moisture somewhere to go.
- Convenience: Cooks in under 8 minutes and requires no pre-draining or pressing of the cauliflower.
- Flavor balance: Garlic, parsley, and lemon layer savory and bright notes without overwhelming the mild cauliflower base.
- Texture: Light and slightly firm, not waterlogged - it holds up as a base for proteins and sauces.
- Versatility: Works as a straight side dish or as the base layer for grain bowls and protein plates.
Ingredient Swap Ideas
Swapping ingredients in this recipe can help accommodate preferences or dietary needs without losing the signature texture or flavor.
- Cornmeal type - Use stone-ground cornmeal for a coarser texture or fine cornmeal for smoother bread.
- Milk option - Substitute whole milk with buttermilk or a plant-based milk like almond for a twist in flavor and consistency.
- Fat choice - Swap butter with vegetable oil or bacon drippings for a different richness and flavor.
- Egg substitute - For an egg-free version, use flax or chia seed gel as a binder, keeping the cornbread moist and held together.
Ingredients
- 1 cup yellow cornmeal
- 1 cup all-purpose flour
- 1 tablespoon baking powder
- ½ teaspoon salt
- 1 cup whole milk
- 1 large egg
- 3 tablespoons unsalted butter
- 1 tablespoon granulated sugar
Instructions
- Preheat your oven to 425°F (220°C). Place a 10-inch cast-iron skillet in the oven while it heats to get the pan hot.
- In a large bowl, whisk together the cornmeal, flour, baking powder, salt, and sugar until evenly combined.
- In a separate bowl, mix the milk and egg. Pour the wet ingredients into the dry and stir just until combined-do not overmix to keep the texture light.
- Carefully remove the hot skillet from the oven and add 2 tablespoons of butter, swirling it around to coat the bottom and sides. Immediately pour the batter into the skillet and smooth the top.
- Bake the cornbread for 20 to 25 minutes until it's golden brown and a toothpick inserted into the center comes out clean. Let it cool slightly before slicing and serving.
17. Spinach & Artichoke Dip Skillet

This skillet version of the classic dip uses canned artichoke hearts and baby spinach combined with cream cheese, sour cream, and mozzarella - all melted together in one pan until bubbly and golden at the edges.
It is the side that doubles as an appetizer the moment you put out some crusty bread or pita alongside it.
Prep takes about 5 minutes, and the skillet handles everything from there. If you want to plan ahead, make-ahead side dishes that hold well include several similar warm dips and casseroles worth considering.
Why This Recipe Works
Cooking the dip directly in the serving skillet keeps it warm throughout the meal without needing a warming dish underneath.
- Convenience: All ingredients go in one skillet - no layering, no separate sauce, no fuss.
- Flavor balance: Creamy cheese, tangy artichoke, and fresh spinach create a rich base with enough brightness to stay balanced.
- Texture: Smooth and velvety throughout, with tender chunks of artichoke and wilted spinach in every scoop.
- Appeal: Works for casual family dinners and easy entertaining - serve directly from the skillet.
Ingredient Swap Ideas
Swapping ingredients in this recipe can help accommodate preferences or dietary needs without losing the signature texture or flavor.
- Cornmeal type - Use stone-ground cornmeal for a coarser texture or fine cornmeal for smoother bread.
- Milk option - Substitute whole milk with buttermilk or a plant-based milk like almond for a twist in flavor and consistency.
- Fat choice - Swap butter with vegetable oil or bacon drippings for a different richness and flavor.
- Egg substitute - For an egg-free version, use flax or chia seed gel as a binder, keeping the cornbread moist and held together.
Ingredients
- 1 cup yellow cornmeal
- 1 cup all-purpose flour
- 1 tablespoon baking powder
- ½ teaspoon salt
- 1 cup whole milk
- 1 large egg
- 3 tablespoons unsalted butter
- 1 tablespoon granulated sugar
Instructions
- Preheat your oven to 425°F (220°C). Place a 10-inch cast-iron skillet in the oven while it heats to get the pan hot.
- In a large bowl, whisk together the cornmeal, flour, baking powder, salt, and sugar until evenly combined.
- In a separate bowl, mix the milk and egg. Pour the wet ingredients into the dry and stir just until combined-do not overmix to keep the texture light.
- Carefully remove the hot skillet from the oven and add 2 tablespoons of butter, swirling it around to coat the bottom and sides. Immediately pour the batter into the skillet and smooth the top.
- Bake the cornbread for 20 to 25 minutes until it's golden brown and a toothpick inserted into the center comes out clean. Let it cool slightly before slicing and serving.
18. Herb Butter Baby Potatoes

Baby potatoes roast in garlic herb butter in the skillet until they turn golden and crispy on the outside with a fluffy, creamy center.
The butter carries the herb flavors into every crack and crevice, so the seasoning reaches through to the interior rather than sitting on the surface.
This is the potato side that fits any main course - roast chicken, grilled steak, baked fish - without fighting for attention on the plate.
Why This Recipe Works
Starting the potatoes cut-side down in cold butter, then heating everything together, builds flavor in the butter before it coats the potatoes.
- Convenience: No par-boiling required - the skillet handles everything from raw to golden in one step.
- Flavor balance: Garlic and fresh herbs in browned butter enhance the potatoes' natural sweetness without masking it.
- Texture: Crispy, golden exterior with a soft, fluffy interior that holds together on the fork.
- Appeal: A reliable crowd-pleaser that needs no sauce, no garnish, and no explanation.
Ingredient Swap Ideas
Swapping ingredients in this recipe can help accommodate preferences or dietary needs without losing the signature texture or flavor.
- Cornmeal type - Use stone-ground cornmeal for a coarser texture or fine cornmeal for smoother bread.
- Milk option - Substitute whole milk with buttermilk or a plant-based milk like almond for a twist in flavor and consistency.
- Fat choice - Swap butter with vegetable oil or bacon drippings for a different richness and flavor.
- Egg substitute - For an egg-free version, use flax or chia seed gel as a binder, keeping the cornbread moist and held together.
Ingredients
- 1 cup yellow cornmeal
- 1 cup all-purpose flour
- 1 tablespoon baking powder
- ½ teaspoon salt
- 1 cup whole milk
- 1 large egg
- 3 tablespoons unsalted butter
- 1 tablespoon granulated sugar
Instructions
- Preheat your oven to 425°F (220°C). Place a 10-inch cast-iron skillet in the oven while it heats to get the pan hot.
- In a large bowl, whisk together the cornmeal, flour, baking powder, salt, and sugar until evenly combined.
- In a separate bowl, mix the milk and egg. Pour the wet ingredients into the dry and stir just until combined-do not overmix to keep the texture light.
- Carefully remove the hot skillet from the oven and add 2 tablespoons of butter, swirling it around to coat the bottom and sides. Immediately pour the batter into the skillet and smooth the top.
- Bake the cornbread for 20 to 25 minutes until it's golden brown and a toothpick inserted into the center comes out clean. Let it cool slightly before slicing and serving.
19. Skillet Kale Chips

Kale chips in a skillet crisp up faster than oven versions, and you have more control over the heat, which matters because the line between perfectly crispy and burned is narrow.
A light coating of olive oil and a pinch of sea salt is all that is needed - the kale's natural bitterness mellows significantly as it crisps and becomes almost nutty in flavor.
These chips pack genuine nutritional value alongside the crunch, and for more fiber-rich options that do not compromise on flavor, lentil sides worth trying round out a plant-forward meal beautifully.
Why This Recipe Works
Medium heat with constant movement gives the kale even crispness without hot spots burning individual leaves.
- Convenience: Faster than oven-baked kale chips - ready in about 5 minutes on the stovetop.
- Texture: Crispy, papery edges with just enough tender center to give each chip structure.
- Flavor balance: Olive oil and sea salt let the kale's naturally earthy, slightly bitter flavor come through cleanly.
- Healthy appeal: Naturally gluten-free, high in vitamins K and C, and a genuinely satisfying snack or garnish.
Ingredient Swap Ideas
Swapping ingredients in this recipe can help accommodate preferences or dietary needs without losing the signature texture or flavor.
- Cornmeal type - Use stone-ground cornmeal for a coarser texture or fine cornmeal for smoother bread.
- Milk option - Substitute whole milk with buttermilk or a plant-based milk like almond for a twist in flavor and consistency.
- Fat choice - Swap butter with vegetable oil or bacon drippings for a different richness and flavor.
- Egg substitute - For an egg-free version, use flax or chia seed gel as a binder, keeping the cornbread moist and held together.
Ingredients
- 1 cup yellow cornmeal
- 1 cup all-purpose flour
- 1 tablespoon baking powder
- ½ teaspoon salt
- 1 cup whole milk
- 1 large egg
- 3 tablespoons unsalted butter
- 1 tablespoon granulated sugar
Instructions
- Preheat your oven to 425°F (220°C). Place a 10-inch cast-iron skillet in the oven while it heats to get the pan hot.
- In a large bowl, whisk together the cornmeal, flour, baking powder, salt, and sugar until evenly combined.
- In a separate bowl, mix the milk and egg. Pour the wet ingredients into the dry and stir just until combined-do not overmix to keep the texture light.
- Carefully remove the hot skillet from the oven and add 2 tablespoons of butter, swirling it around to coat the bottom and sides. Immediately pour the batter into the skillet and smooth the top.
- Bake the cornbread for 20 to 25 minutes until it's golden brown and a toothpick inserted into the center comes out clean. Let it cool slightly before slicing and serving.
20. Sweet Corn Fritters

Sweet corn fritters cook in a single skillet and produce golden, crispy-edged rounds studded with fresh corn kernels and sliced green onions.
The batter is light enough that the corn stays the star - sweet, juicy kernels that burst through the thin, crisp crust in every bite.
Serve them as a side with grilled proteins, or stack them with sour cream and salsa as a casual starter.
If you want a different angle on one-pan vegetable sides, our sheet pan side dishes offer a similar hands-off, single-vessel approach with a wider range of vegetables.
Why This Recipe Works
A light batter with enough structure to hold the corn together creates fritters that are crispy on the outside without turning doughy or dense at the center.
- Convenience: Common pantry ingredients, one skillet, and about 15 minutes from batter to plate.
- Flavor balance: Sweet corn and savory green onions in a lightly seasoned batter need no heavy sauce to taste complete.
- Texture: Crisp, golden edges contrast with a soft, moist corn-studded center - the textural sweet spot of a good fritter.
- Appeal: Kid-friendly and flexible - works as a side, a snack, or a casual appetizer with dipping sauce.
Ingredient Swap Ideas
Swapping certain ingredients can tailor the dish for dietary preferences or to vary the flavor while keeping the overall concept intact.
- Butter and oil - Use olive oil instead of butter to reduce dairy content and add a fruity note.
- Cheese - Substitute Parmesan with Pecorino Romano for a sharper tang or nutritional yeast for a vegan twist.
- Herbs - Add fresh rosemary or thyme in place of garlic for a different herbal aroma.
- Potatoes - Yukon gold or red potatoes can replace baby potatoes for different textures and sizes.
Ingredients
- 1 ½ pounds baby potatoes
- 3 tablespoons unsalted butter
- 3 cloves garlic
- ½ cup grated Parmesan cheese
- Salt
- Black pepper
- 2 tablespoons olive oil
- Fresh parsley
Instructions
- Bring a large pot of salted water to a boil. Add the baby potatoes and par-boil until just tender, about 15 minutes. Drain well and set aside to cool slightly.
- Preheat the oven to 425°F (220°C) and line a baking sheet with parchment paper or lightly grease it.
- Place the boiled potatoes on the baking sheet. Use a sturdy glass or potato masher to gently press down on each potato until it flattens but stays in one piece.
- In a small bowl, mix melted butter, minced garlic, salt, and pepper. Brush this mixture evenly over the smashed potatoes. Drizzle olive oil on top to help them crisp.
- Roast the potatoes for 20-25 minutes, turning once halfway through, until edges are golden and crisp. Sprinkle grated Parmesan over the potatoes in the last 5 minutes of roasting, so it melts and browns slightly.
- Remove from the oven and garnish with chopped fresh parsley before serving warm.
Frequently Asked Questions
What should I serve with these skillet sides for weeknight dinners?
Most of these sides pair well with simple proteins: roast chicken, pan-seared pork chops, grilled fish, or a braised beef dish. Starchy sides like cornbread and smashed potatoes anchor heavier mains, while lighter vegetable sides like lemon almond green beans or herbed cauliflower rice work best with leaner proteins.
Which skillet side pairs best with beef or pork mains?
Garlic butter mushrooms are the classic pairing for beef - the browned butter and savory depth complement steak directly. For pork, honey butter carrots or caramelized onions and peppers add a sweet contrast that balances the richness of the meat.
Can I freeze skillet side dishes after cooking?
Starchy sides like cheddar polenta cakes and sweet corn fritters freeze well for up to 2 months - reheat them in a dry skillet to restore crispness. Vegetable sides with high water content, like creamed spinach or zucchini gratin, do not freeze well and are better stored in the refrigerator for up to 3 days.
How can I reheat skillet sides without losing texture?
A dry skillet over medium heat for 3-5 minutes is the best method for crispy sides like smashed potatoes, kale chips, okra, and fritters. Creamy sides like spinach skillet or artichoke dip reheat well on low heat with a splash of cream or milk stirred in to loosen the sauce.
Are these skillet sides adaptable for picky eaters?
Several are naturally mild and kid-tested: honey butter carrots, garlic Parmesan smashed potatoes, herb butter baby potatoes, and sweet corn fritters all have familiar flavors with no heat or strong spice. For bolder sides like Brussels sprouts with balsamic, simply omit the bacon or reduce the vinegar for a milder result.
Save This for Later
Pin this 20 easy one-pan skillet side dishes guide so you always have it when you need it.

Carrie is a food writer and editor with more than 15 years of experience. She has worked for some of the biggest names in the food industry, including Bon Appétit, Food & Wine, and Martha Stewart Living.
As the Editor in Chief of EpicureDelight, Carrie oversees all of the content on the site. She also manages the team of contributing writers and editors, who help to create delicious recipes, helpful tips, and informative articles that you’ll find on the site.
A native of the Chicago area, Carrie is passionate about all things food. She loves trying new restaurants and experimenting with new recipes in her kitchen. She’s also a graduate of the Culinary Institute of America, so she knows a thing or two about food!