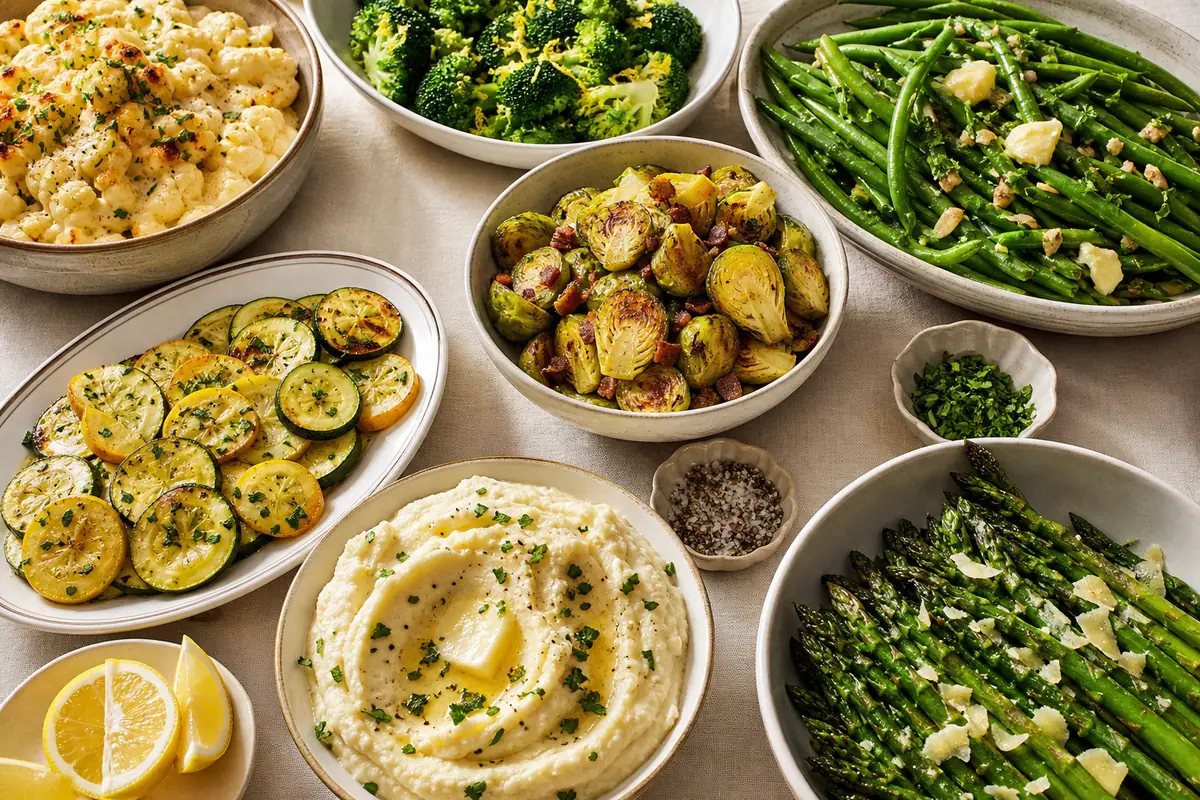
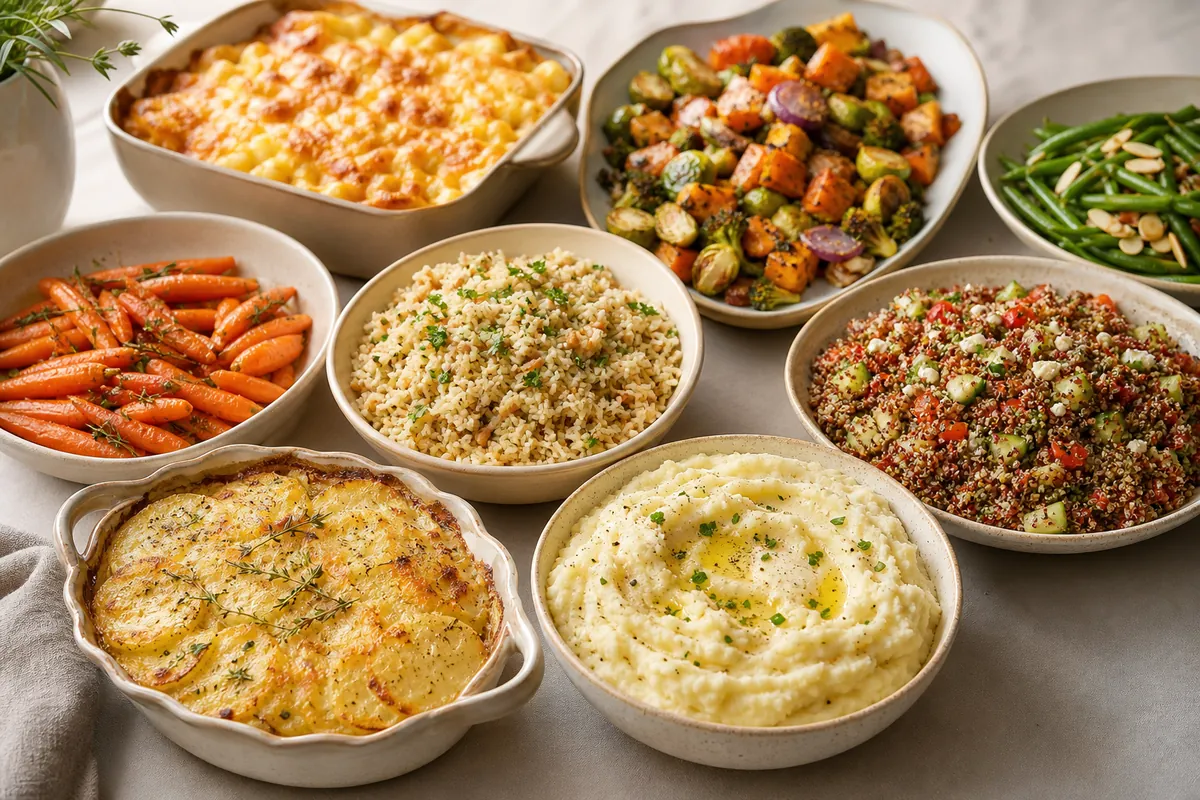
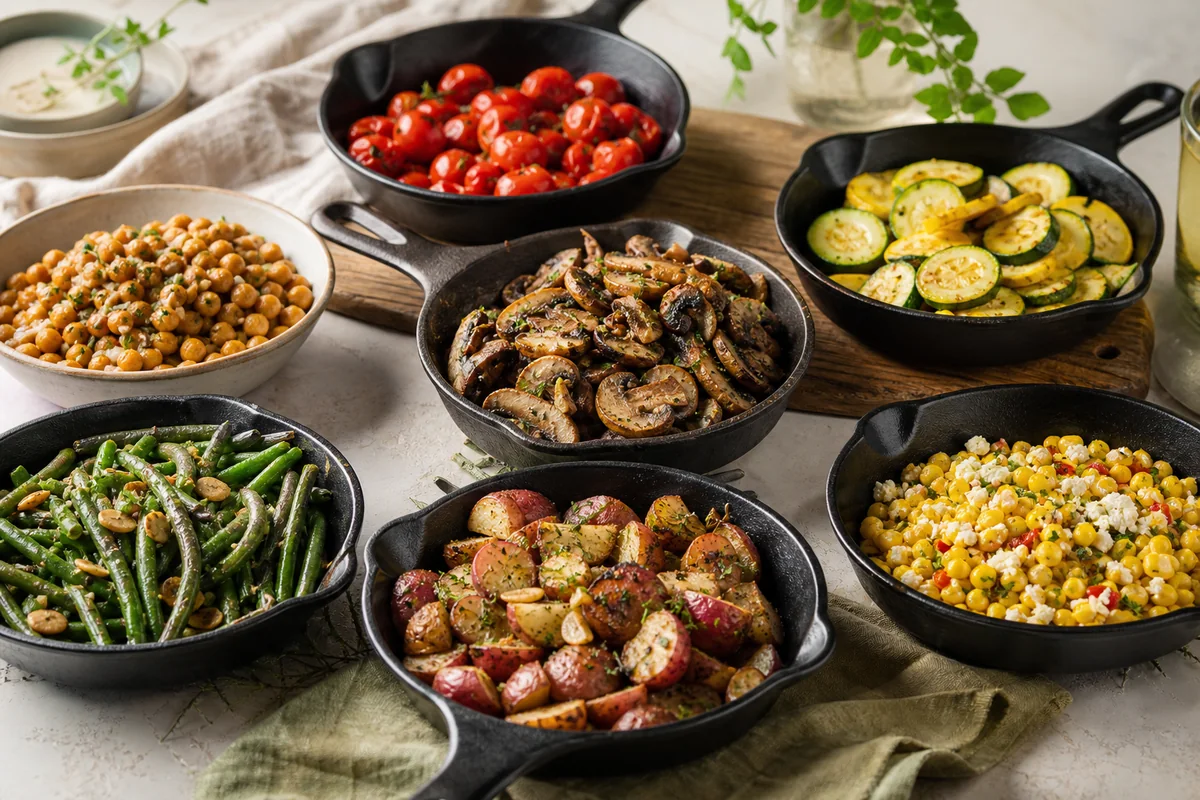
Mediterranean side dishes are some of the most practical recipes you can have in your rotation. They rely on a short list of everyday ingredients - olive oil, fresh herbs, citrus, legumes - yet deliver layered, satisfying flavors every time.
This collection covers 20 recipes that span the full range of what Mediterranean cooking does best. Crisp salads, smoky dips, hearty bean dishes, and golden roasted vegetables all have a place here.
Many of these sides take under 20 minutes to pull together. Several improve after a night in the fridge, which makes them natural choices for meal prep or hosting.
If you are building a spread, mix a few dips with a grain salad and a roasted vegetable. These dishes pair well with what goes with Mediterranean chicken and work equally well alongside fish, lamb, or a simple vegetarian main.
Whether you are feeding a crowd or just adding something fresh to a weeknight plate, this list has a recipe for the moment.
These 20 Mediterranean side dishes cover dips, salads, roasted vegetables, and bean dishes. Built around olive oil, fresh herbs, and citrus, most come together in under 30 minutes and many taste better the next day, making them ideal for both weeknights and entertaining.
1. Classic Tabbouleh

Tabbouleh is one of those salads that looks simple and tastes surprisingly complete. Fine bulgur wheat soaks in lemon juice for about 20 minutes rather than cooking, then gets tossed with mountains of flat-leaf parsley, fresh mint, diced tomato, and cucumber.
The result is bright, herbaceous, and lightly chewy. It pairs cleanly with grilled lamb or chicken, and it holds up well at room temperature for a few hours - which makes it a reliable choice for a mezze table or a backyard gathering.
Use far more parsley than you think you need. Authentic tabbouleh is a parsley salad with bulgur, not a bulgur salad with parsley. The ratio should be roughly 3:1 parsley to grain.
Why This Recipe Works
Tabbouleh requires zero cooking and comes together in about 30 minutes, most of which is passive soaking time.
The herb-forward Mediterranean veggie combinations in this style of cooking rely on balance, and tabbouleh nails it - tangy lemon, grassy parsley, sweet tomato, and earthy bulgur all in one bowl.
- Convenience: Bulgur softens in lemon juice and water with no stovetop required.
- Flavor balance: Zesty citrus and fresh herbs keep every forkful tasting clean and bright.
- Texture: Bulgur adds gentle chew while tomato and cucumber stay crisp.
- Appeal: Works at potlucks, weeknight dinners, and healthy lunch prep.
- Make-ahead friendly: Flavors deepen over several hours in the fridge.
Ingredient Swap Ideas
Swapping certain ingredients can accommodate dietary needs or bring new flavors without changing the essence of this salad.
- Bulgur replacement - Use quinoa for a gluten-free alternative with similar texture.
- Herbs variation - Swap mint for cilantro or basil for a different herbal note.
- Vegetables - Add finely diced bell peppers or radishes for extra crunch.
- Acid choice - Substitute lemon juice with apple cider vinegar for a milder tang.
Ingredients
- 1 cup bulgur wheat - Coarse or fine, rinsed and soaked or cooked according to package instructions.
- 2 cups fresh parsley - Finely chopped, packed.
- ½ cup fresh mint leaves - Finely chopped.
- 2 medium tomatoes - Diced.
- 1 medium cucumber - Peeled, seeded, and diced.
- 3 tablespoons fresh lemon juice - About one large lemon.
- ¼ cup extra-virgin olive oil - For dressing.
- ½ teaspoon salt - Or to taste.
- ¼ teaspoon black pepper - Freshly ground.
Instructions
- Prepare the bulgur wheat by soaking it in hot water or cooking it briefly until tender. Drain any excess water and let cool.
- In a large bowl, combine the chopped parsley, mint, tomatoes, and cucumber. Mix well to distribute the ingredients evenly.
- Add the cooled bulgur to the vegetable and herb mixture. Toss gently to combine all components.
- In a small bowl, whisk together the lemon juice, olive oil, salt, and pepper. Pour this dressing over the salad and toss thoroughly to coat everything evenly.
- Let the tabbouleh rest for at least 15 minutes before serving to allow the flavors to meld. Adjust seasoning if needed and serve chilled or at room temperature.
2. Greek Village Salad (Horiatiki)
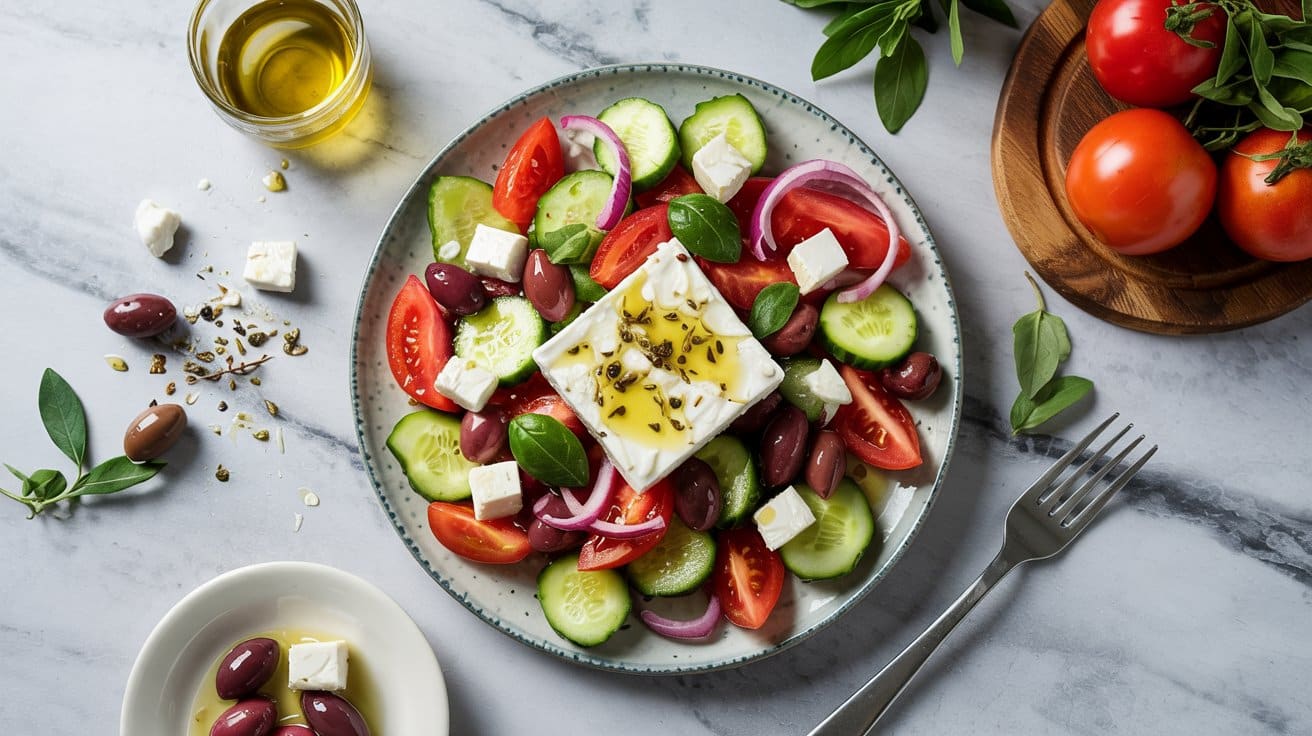
Horiatiki is not a chopped salad - it is built in large, rustic chunks. Thick wedges of ripe tomato, half-moon slices of cucumber, strips of green pepper, and whole Kalamata olives go into the bowl without any fine knife work.
A slab of feta sits on top rather than being crumbled through.
The dressing is nothing more than good olive oil and dried oregano. No vinegar, no lemon - just the natural acidity of the tomatoes doing the work.
This is the version you find at tavernas across Greece, and it is ready in under 10 minutes.
Why This Recipe Works
The salad relies entirely on ingredient quality. Use ripe summer tomatoes and a block of proper brined feta - avoid pre-crumbled feta, which is drier and less creamy.
These roasted vegetable side techniques remind us that Mediterranean cooking is about respecting the ingredient, and Horiatiki takes that principle to its simplest form.
- Convenience: Ready in under 10 minutes with no cooking required.
- Flavor balance: Sweet tomato acidity meets briny olives and creamy, salty feta.
- Texture: Crisp vegetables and a firm feta slab create a satisfying contrast.
- Appeal: Fits everyday dinners and summer gatherings with equal ease.
- Simple presentation: No tossing required - assemble and serve directly from the bowl.
Ingredient Swap Ideas
Adjusting this recipe to fit what you have on hand or your preferences is easy and keeps the core taste intact.
- Feta cheese - Substitute with grilled halloumi or fresh mozzarella for a different texture and milder flavor.
- Kalamata olives - Use green olives or Castelvetrano olives if you prefer a less briny option.
- Peppers - Swap sweet bell peppers for mild banana peppers or omit if not available.
- Herb seasoning - Instead of dried oregano, use fresh oregano or a sprinkle of dried thyme for a slightly different herbal note.
Ingredients
- 4 ripe tomatoes - Chunky cut into wedges.
- 1 large cucumber - Peeled and sliced into thick rounds or half-moons.
- 1 green bell pepper - Sliced into thin rings or strips.
- 1 small red onion - Thinly sliced for a sharp contrast.
- ½ cup Kalamata olives - Pitted and whole.
- 1 thick slab of feta cheese - About 4 ounces, not crumbled.
- ¼ cup extra-virgin olive oil - For drizzling generously.
- 1 teaspoon dried oregano - Sprinkled over the top.
- Salt and freshly ground black pepper - To taste.
Instructions
- Prepare all vegetables by washing and chopping the tomatoes, cucumber, green pepper, and red onion into their respective sizes. Arrange them loosely on a large serving plate or salad bowl.
- Scatter Kalamata olives evenly over the vegetables, ensuring every serving can enjoy some olives.
- Place the thick slab of feta on top of the salad without crumbling it, preserving its presentation and creaminess.
- Drizzle the extra-virgin olive oil generously over the entire salad, then sprinkle dried oregano evenly across the feta and vegetables.
- Season with salt and a few grinds of black pepper according to taste. Serve the salad immediately, inviting everyone to break the feta into pieces as they eat.
3. Creamy Tzatziki
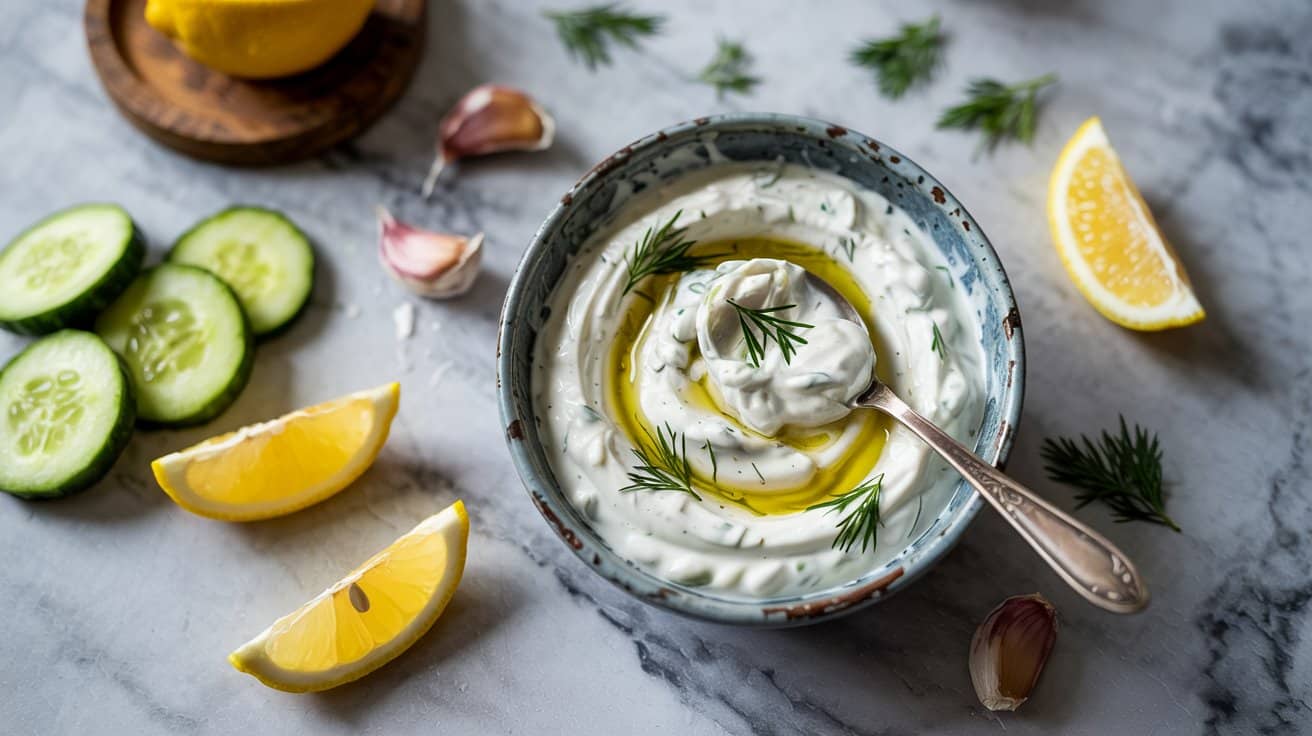
Good tzatziki starts with properly drained cucumber. Grate it, salt it, and squeeze out as much water as possible before mixing it into the yogurt - skipping this step leads to a watery dip within an hour.
Thick Greek yogurt, garlic, fresh dill, a splash of lemon juice, and a drizzle of olive oil round out the recipe.
The finished dip is cool, tangy, and faintly garlicky. It works as a sauce for grilled meats, a dip for warm pita, or a spread inside wraps.
It also holds well in the fridge for up to three days.
Why This Recipe Works
Tzatziki is one of the most versatile sauces in Mediterranean cooking. A drizzle over roasted lamb, a spoonful alongside falafel, or a dip for raw vegetables - it handles all of these roles.
If you enjoy pairing tangy sauces with proteins, the ideas on what sauces work with rich meats follow similar balancing logic.
- Convenience: Uses common ingredients and comes together in about 10 minutes.
- Flavor balance: Tangy yogurt, fresh cucumber, and bright lemon work in clean harmony.
- Texture: Thick and creamy with small cucumber pieces adding a light crunch.
- Appeal: Suitable as a dip, spread, or sauce across a wide range of dishes.
- Make-ahead: Flavors deepen after at least an hour of chilling before serving.
Ingredient Swap Ideas
Swapping ingredients in this recipe can adjust it to suit dietary needs or personal preferences without losing its essence.
- Greek yogurt - Substitute with dairy-free yogurt made from coconut or almond milk for a vegan version.
- Fresh dill - Use mint or parsley instead if you prefer a different herb flavor.
- Garlic - Replace fresh garlic with roasted garlic for a milder, sweeter taste.
- Lemon juice - Use white wine vinegar or apple cider vinegar for a different kind of acidity.
Ingredients
- 2 cups strained Greek yogurt - Thick and creamy, the base of the dip.
- 1 medium cucumber - Peeled, grated, and excess water squeezed out for freshness.
- 2 cloves garlic - Minced finely for a punch of savory flavor.
- 2 tablespoons fresh dill - Chopped finely for a bright herb note.
- 1 tablespoon fresh lemon juice - Adds brightness and acidity.
- ½ teaspoon salt - To enhance all the flavors.
- ¼ teaspoon black pepper - Adds a subtle hint of spice.
Instructions
- Grate the cucumber and place it in a clean kitchen towel or cheesecloth. Squeeze firmly to remove excess moisture. This keeps the dip from becoming watery.
- In a medium bowl, combine the strained Greek yogurt with the grated cucumber, minced garlic, chopped dill, and lemon juice. Stir gently to blend everything evenly.
- Season the mixture with salt and black pepper. Taste and adjust the seasoning if needed.
- Cover the bowl and refrigerate the tzatziki for at least 30 minutes. Chilling allows the flavors to meld and intensify.
- Serve cold as a dip with fresh vegetables, pita bread, or alongside grilled meats for a cooling contrast.
4. Smooth Hummus
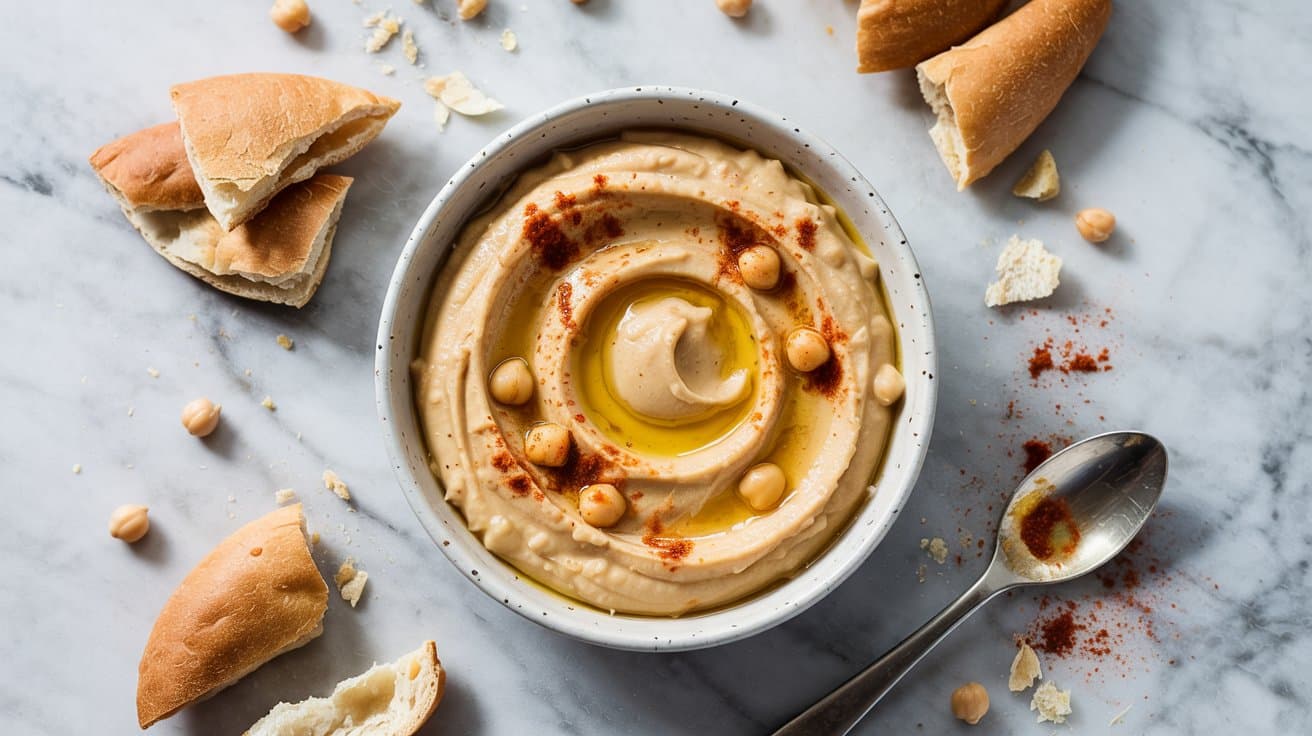
The secret to silky hummus is blending for longer than you think necessary. Three to four minutes in a food processor with ice-cold water produces a noticeably smoother result than a quick 30-second blitz.
Quality tahini matters too - it should smell nutty, not bitter.
Chickpeas, tahini, lemon juice, garlic, and olive oil are all you need. Serve it warm with a puddle of olive oil and a pinch of paprika on top, or use it as a spread in sandwiches and grain bowls throughout the week.
Why This Recipe Works
Homemade hummus is ready in under 10 minutes using canned chickpeas and consistently outperforms store-bought in both flavor and texture. It is naturally vegan, high in plant protein, and works across breakfast, lunch, and dinner contexts.
For anyone building a full Mediterranean spread, hummus anchors the dip section alongside baba ganoush and tzatziki.
- Convenience: Ready in under 10 minutes using pantry staples.
- Flavor balance: Creamy tahini and olive oil meet bright lemon acidity in every bite.
- Texture: Silky-smooth and thick enough for dipping or spreading on toast.
- Appeal: Works at parties, in lunchboxes, or as a quick weekday appetizer.
- No cooking required: Canned chickpeas eliminate all stovetop time.
Ingredient Swap Ideas
Swapping ingredients helps tailor the hummus to different dietary needs or preferences without losing its essential character.
- Tahini - Use sunflower seed butter for a nut-free alternative or almond butter for a milder flavor.
- Lemon juice - Substitute with lime juice to add a fresh twist.
- Chickpeas - Try white beans, like cannellini, for a lighter taste and similar texture.
- Garlic - Roast the garlic first to mellow its sharpness and deepen the flavor.
Ingredients
- 1 can (15 ounces) chickpeas - drained and rinsed for a creamy base.
- 3 tablespoons tahini - adds a rich, nutty creaminess.
- 2 tablespoons fresh lemon juice - gives a bright, tangy kick.
- 2 cloves garlic - minced, for pungent depth.
- ¼ cup extra-virgin olive oil - smooths and enriches the texture.
- ½ teaspoon salt - to enhance the flavors.
- 2 to 3 tablespoons cold water - to adjust consistency as needed.
- Optional garnish: paprika, chopped parsley, or a drizzle of olive oil.
Instructions
- Place the chickpeas, tahini, lemon juice, minced garlic, salt, and half of the olive oil into a food processor. Blend until the mixture is creamy and fairly smooth.
- While processing, slowly add cold water one tablespoon at a time until the hummus reaches a smooth, spreadable consistency.
- Taste and adjust the seasoning with more salt or lemon juice as desired.
- Transfer the hummus to a serving bowl and drizzle with the remaining olive oil. Garnish with paprika or parsley if you like.
- Serve with warm pita bread or fresh vegetable sticks for dipping. Store any leftovers in an airtight container in the refrigerator for up to 4 days.
5. Muhammara (Roasted Red Pepper & Walnut Dip)
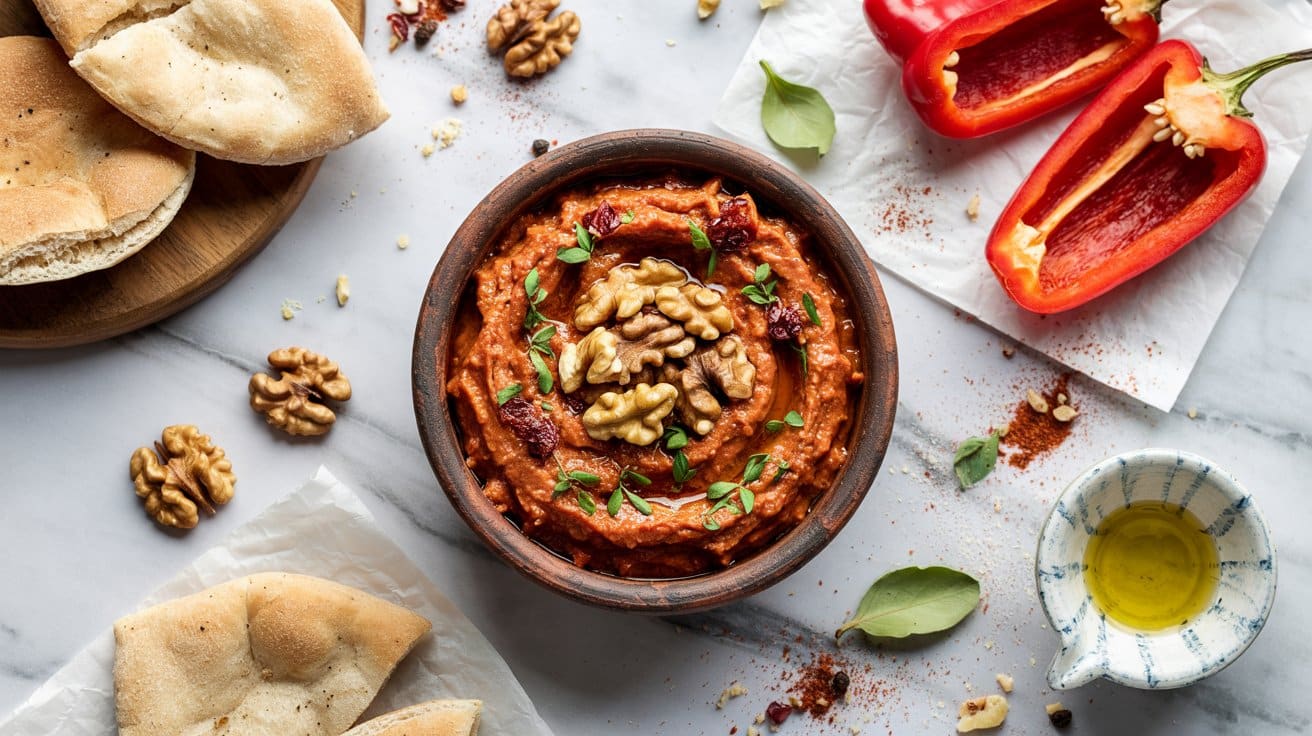
Muhammara is a Syrian dip that deserves far more attention than it gets. Toasted walnuts and roasted red peppers form the base, blended together until the texture is somewhere between chunky and smooth.
Pomegranate molasses adds a tart sweetness that cuts through the richness of the nuts.
Aleppo pepper gives it a gentle, fruity heat - noticeably milder than cayenne but with more complexity. The whole thing comes together in a blender and improves after a few hours in the fridge, making it ideal to prepare the day before a gathering.
Why This Recipe Works
Muhammara hits smoky, sweet, nutty, and mildly spicy all at once, which makes it more interesting than most single-note dips. It pairs well with warm flatbread, grilled chicken skewers, or roasted cauliflower.
If you enjoy pairing savory dishes with fruit-forward flavors, the pomegranate molasses in this dip follows that same principle beautifully.
- Convenience: Made entirely in a blender using pantry-friendly ingredients.
- Flavor balance: Smoky, nutty, sweet, and spiced notes layer into a complex dip.
- Texture: Creamy base with pleasant walnut texture throughout.
- Appeal: Works as a dip, sandwich spread, or sauce for grilled proteins.
- Make-ahead: Flavor deepens significantly after chilling overnight.
Ingredient Swap Ideas
Switching up some ingredients can tailor this dip to your preferences or dietary needs without losing its character.
- Walnuts - Replace with almonds or pecans for a different nutty flavor and texture.
- Aleppo pepper - Use smoked paprika or mild chili flakes for a similar warmth and color.
- Pomegranate molasses - Substitute with a mix of balsamic vinegar and a touch of honey to mimic the sweet-tart profile.
- Breadcrumbs - Use gluten-free breadcrumbs or skip entirely for a grain-free version.
Ingredients
- 3 large roasted red peppers - peeled and roughly chopped, you can roast fresh or use jarred roasted peppers.
- ¾ cup toasted walnuts - lightly toasted to bring out the flavor.
- ¼ cup fine breadcrumbs - adds body and slightly thickens the dip.
- 2 tablespoons pomegranate molasses - provides a bright, tangy sweetness.
- 1 tablespoon lemon juice - adds fresh acidity.
- 2 cloves garlic - minced for pungency.
- 1 teaspoon ground cumin - adds warm, earthy notes.
- ½ to 1 teaspoon Aleppo pepper - adjust for heat preference.
- ¼ teaspoon salt - to enhance all flavors.
- ¼ cup extra virgin olive oil - for richness and smooth texture.
Instructions
- Place the roasted red peppers, toasted walnuts, breadcrumbs, garlic, lemon juice, pomegranate molasses, cumin, Aleppo pepper, and salt into a food processor. Pulse until coarsely blended.
- With the processor running, slowly drizzle in the olive oil until the mixture reaches a creamy yet slightly chunky consistency. You can add a little more olive oil if needed for smoothness.
- Taste and adjust seasoning by adding more salt, lemon juice, or Aleppo pepper as desired.
- Transfer the muhammara to a serving bowl and chill for at least 30 minutes to allow the flavors to meld.
- Serve with warm pita, fresh vegetables, or as a spread on toast or sandwiches.
6. Smoky Baba Ganoush
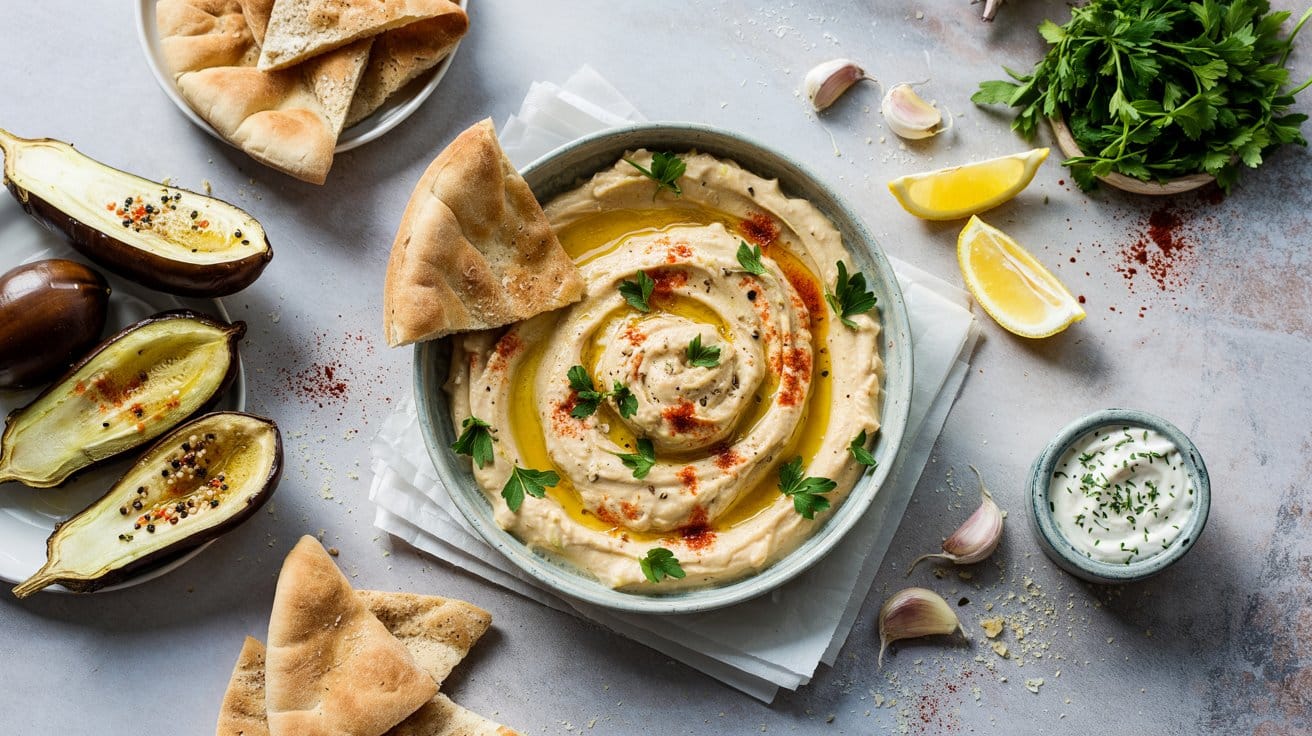
The smokiness in baba ganoush is non-negotiable. Char the eggplant directly over a gas flame or under the broiler until the skin is completely blackened and the inside collapses - this is where the signature flavor comes from.
Peeling away the charred skin reveals soft, smoky flesh that blends effortlessly with tahini, lemon, and garlic.
Avoid over-processing it. A rough mash with a fork gives a more interesting texture than a fully smooth puree.
Finish with a drizzle of olive oil and a pinch of smoked paprika before serving.
Why This Recipe Works
Baba ganoush fills a different role than hummus - it is lighter, smokier, and slightly more complex. Together they cover the richness and the subtlety sides of a dip spread.
This dip also pairs naturally with the air-fried vegetable sides that share the same roasted, caramelized character.
- Convenience: The broiler does most of the work with minimal hands-on involvement.
- Flavor balance: Bright lemon and garlic cut through the rich, smoky eggplant and tahini.
- Texture: Rustic and slightly chunky - more interesting than a fully pureed dip.
- Appeal: A crowd-pleasing vegetarian option that stands alongside or replaces hummus.
- Versatile serving: Works as a dip, sandwich spread, or base for a grain bowl.
Ingredient Swap Ideas
Sometimes ingredients need to be adjusted based on availability or dietary preferences, and that's easy with this recipe.
- Eggplant - Use roasted zucchini or roasted red peppers for a different base with similar creaminess.
- Tahini - Swap with almond butter or cashew butter if tahini isn't available or for a milder flavor.
- Garlic - Use roasted garlic to add a sweeter, softer garlic flavor.
- Lemon juice - Substitute with a splash of white wine vinegar for a slightly different tang.
Ingredients
- 2 medium eggplants - Char-grilled or roasted until soft with smoky flavor.
- 3 tablespoons tahini - Adds a creamy, nutty base to the spread.
- 2 cloves garlic - Minced finely for a fresh, sharp kick.
- 3 tablespoons fresh lemon juice - Brightens and balances the richness.
- ¼ cup extra-virgin olive oil - Smooths the texture and adds richness.
- ½ teaspoon ground cumin - Provides warm, subtle earthiness.
- ½ teaspoon salt - Enhances all flavors.
- Fresh parsley for garnish - Adds fresh color and mild herbal note.
Instructions
- Char-grill the eggplants over an open flame, on a grill, or under the broiler, turning occasionally until the skin is blackened and the flesh is very soft, about 15 to 20 minutes. Let cool slightly.
- Peel the charred skin from the eggplants, then scoop the soft flesh into a bowl. Discard the skin.
- Add tahini, minced garlic, fresh lemon juice, olive oil, ground cumin, and salt to the eggplant. Mash and mix with a fork or potato masher until smooth but still slightly chunky.
- Taste and adjust seasoning with additional salt or lemon juice if needed.
- Transfer the baba ganoush to a serving bowl, drizzle with a little extra olive oil, and garnish with chopped fresh parsley. Serve with pita bread, fresh vegetables, or your favorite crackers.
7. Dolmades (Stuffed Grape Leaves)
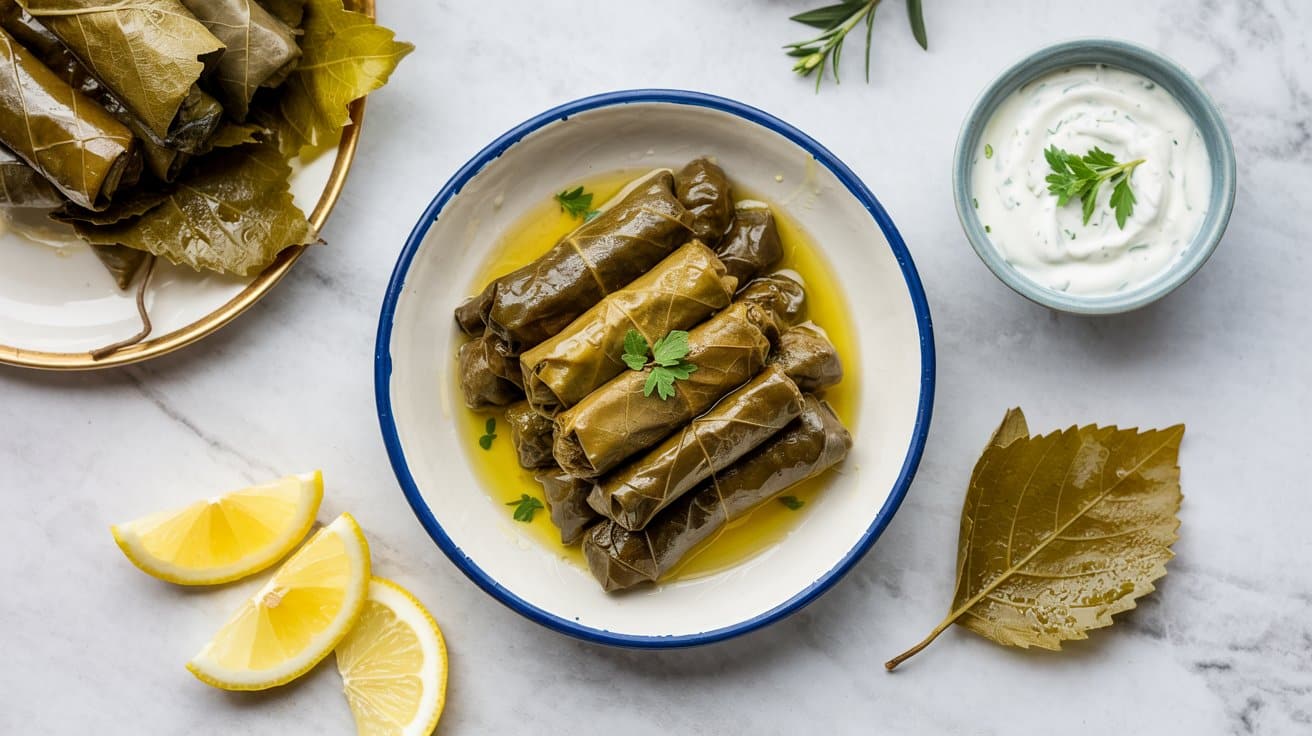
Dolmades take patience, not skill. Each grape leaf gets a small spoonful of herbed rice filling - typically long-grain rice with parsley, mint, dill, and lemon zest - then rolled tightly and packed snugly into the pot so they do not unravel during cooking.
They simmer in a lemony broth for about 45 minutes until the rice is tender and the leaves turn silky.
Served warm or at room temperature with a wedge of lemon, they hold up well in the fridge for three days and actually taste better the next day.
Why This Recipe Works
Rolling dolmades is methodical work, but each step is straightforward. The reward is a side dish that feels special without requiring any elaborate technique.
They suit a mezze spread as much as a sit-down dinner and travel well to potlucks.
- Convenience: Prepare the filling and roll in advance - simmer just before serving.
- Flavor balance: Herb-infused rice with lemon juice delivers a clean, fresh tang in every bite.
- Texture: Silky grape leaves wrap a firm, tender rice filling that holds its shape well.
- Appeal: Impressive at gatherings yet approachable enough for a weeknight project.
- Make-ahead: Stores refrigerated for three days and serves equally well cold or warm.
Ingredient Swap Ideas
Adjusting ingredients can customize dolmades to your preferences or dietary needs without losing their essence.
- Rice - Use brown rice or quinoa for a nuttier, heartier filling with more fiber.
- Herbs - Swap or add fresh dill, mint, or parsley to vary the herbal notes and freshness.
- Vine leaves - If grape leaves are unavailable, Swiss chard or spinach leaves can be used as a wrapping alternative.
- Lemon juice - Substitute with a mix of lime juice and a bit of vinegar for similar acidity and brightness.
Ingredients
- 40 grape leaves, jarred or fresh, rinsed and drained if jarred
- 1 cup long-grain rice, rinsed
- 1 medium onion, finely chopped
- ½ cup fresh dill, chopped
- ½ cup fresh parsley, chopped
- ¼ cup fresh mint, chopped
- ⅓ cup olive oil, plus extra for drizzling
- Juice of 2 lemons
- 1 teaspoon salt
- ½ teaspoon black pepper
- 2 cups vegetable broth or water
- 1 tablespoon pine nuts (optional, for texture and flavor)
Instructions
- Heat 2 tablespoons of olive oil in a skillet over medium heat. Add the chopped onion and sauté until soft and translucent, about 5 minutes. Stir in the rice and pine nuts, cooking for an additional 2 minutes to toast lightly.
- Remove from heat and transfer the mixture to a bowl. Add the dill, parsley, mint, salt, and pepper. Pour in half of the lemon juice and the remaining olive oil, then stir to combine.
- Lay one grape leaf flat, vein side up. Place about 1 tablespoon of the rice filling near the stem end of the leaf. Fold the sides over the filling and roll tightly from the stem end toward the tip to form a neat parcel. Repeat with remaining leaves and filling.
- Arrange the stuffed leaves seam-side down in a large pot, packing them snugly in layers. Pour the vegetable broth and remaining lemon juice over the dolmades. Place a heatproof plate on top to keep them submerged.
- Cover the pot and simmer gently over low heat for 45 minutes to 1 hour, until the rice is cooked and tender. Allow cooling slightly before serving, either warm or chilled. Drizzle additional olive oil if desired.
8. Spinach & Feta Spanakopita Triangles
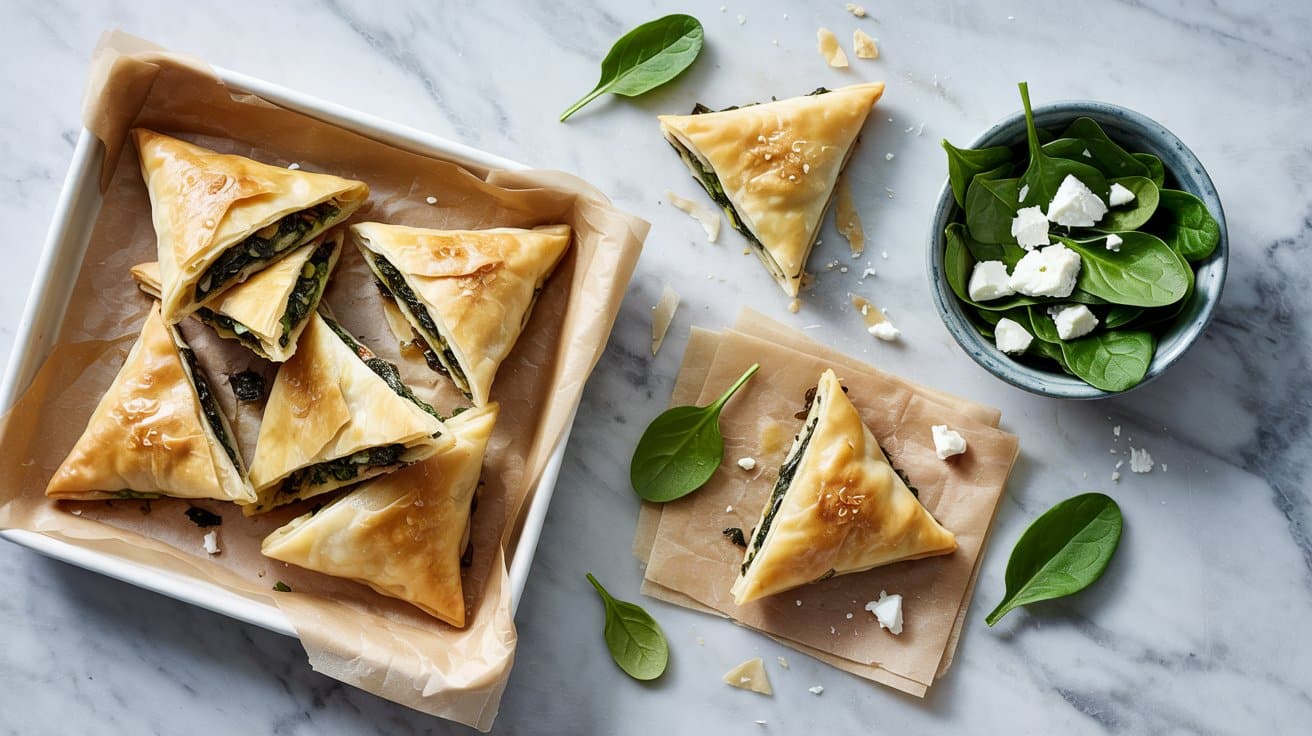
Spanakopita triangles are the portable version of the classic Greek pie. Each parcel holds a filling of wilted spinach, crumbled feta, scallions, and fresh dill, all wrapped in buttered phyllo sheets and folded into a tight triangle.
They bake at 375°F for about 25 minutes until deeply golden and audibly crisp.
The key to flaky phyllo is keeping the unused sheets covered with a damp towel while you work - they dry out within minutes and crack when dry. Once baked, these triangles hold their crispness for a couple of hours, making them reliable for parties.
Why This Recipe Works
The contrast between the shatteringly crisp phyllo and the warm, creamy filling is what makes these irresistible. They also freeze beautifully before baking - assemble a full batch, freeze on a tray, and bake directly from frozen at 375°F for 30 minutes.
These pair naturally alongside a variety of vegetable-forward side dishes when building a larger spread.
- Convenience: Freeze unbaked triangles and bake on demand without any thawing.
- Flavor balance: Salty feta, fresh dill, and mild spinach create a well-rounded savory filling.
- Texture: Shattering crisp phyllo against a soft, creamy interior.
- Appeal: Perfect for parties, packed lunches, or alongside a simple salad for dinner.
- Make-ahead friendly: Assemble days ahead and refrigerate or freeze until needed.
Ingredient Swap Ideas
Swapping a few ingredients can adapt this recipe to suit different dietary needs or flavor preferences without losing its essence.
- Feta cheese - Use a plant-based feta or ricotta for a vegetarian or vegan option.
- Spinach - Substitute with kale, Swiss chard, or even collard greens for varied texture and flavor.
- Scallions - Replace with finely chopped leeks or mild onions if scallions aren't available.
- Phyllo pastry - Use puff pastry or crescent roll dough for a quicker alternative with a different texture.
Ingredients
- 2 tablespoons olive oil - For sautéing the vegetables and brushing the phyllo.
- 1 bunch fresh spinach - Washed, stems removed, and chopped (about 10 ounces).
- 3 scallions - Thinly sliced, white and green parts separated.
- ¼ cup fresh dill - Chopped finely.
- 7 ounces feta cheese - Crumbled.
- 1 large egg - Beaten, to bind the filling.
- 8 sheets phyllo pastry - Thawed according to package instructions.
- Butter or olive oil - For brushing the phyllo sheets.
Instructions
- Heat the olive oil in a large skillet over medium heat. Add the white parts of the scallions and cook until softened, about 2 minutes. Add the chopped spinach and cook, stirring, until wilted and most of the moisture has evaporated, about 5 minutes. Remove from heat and stir in the dill, crumbled feta, and beaten egg. Season lightly with salt and freshly ground black pepper.
- Preheat the oven to 375°F (190°C) and line a baking sheet with parchment paper. Carefully lay one sheet of phyllo on a clean surface and brush lightly with melted butter or olive oil. Place a second sheet on top and brush again.
- Cut the layered phyllo sheets into 3 strips widthwise. Place about 2 tablespoons of the spinach and feta filling at one end of each strip. Fold the strip over the filling to form a triangle, then continue folding the strip in a triangle shape until you reach the end. Repeat with remaining phyllo and filling.
- Arrange the spanakopita triangles on the prepared baking sheet. Brush the tops with more butter or olive oil to help them brown. Bake for 20 to 25 minutes, or until golden and crisp.
- Allow to cool slightly before serving. These are delicious warm or at room temperature and pair well with a simple yogurt dip or a fresh salad.
9. Grilled Halloumi with Lemon & Oregano
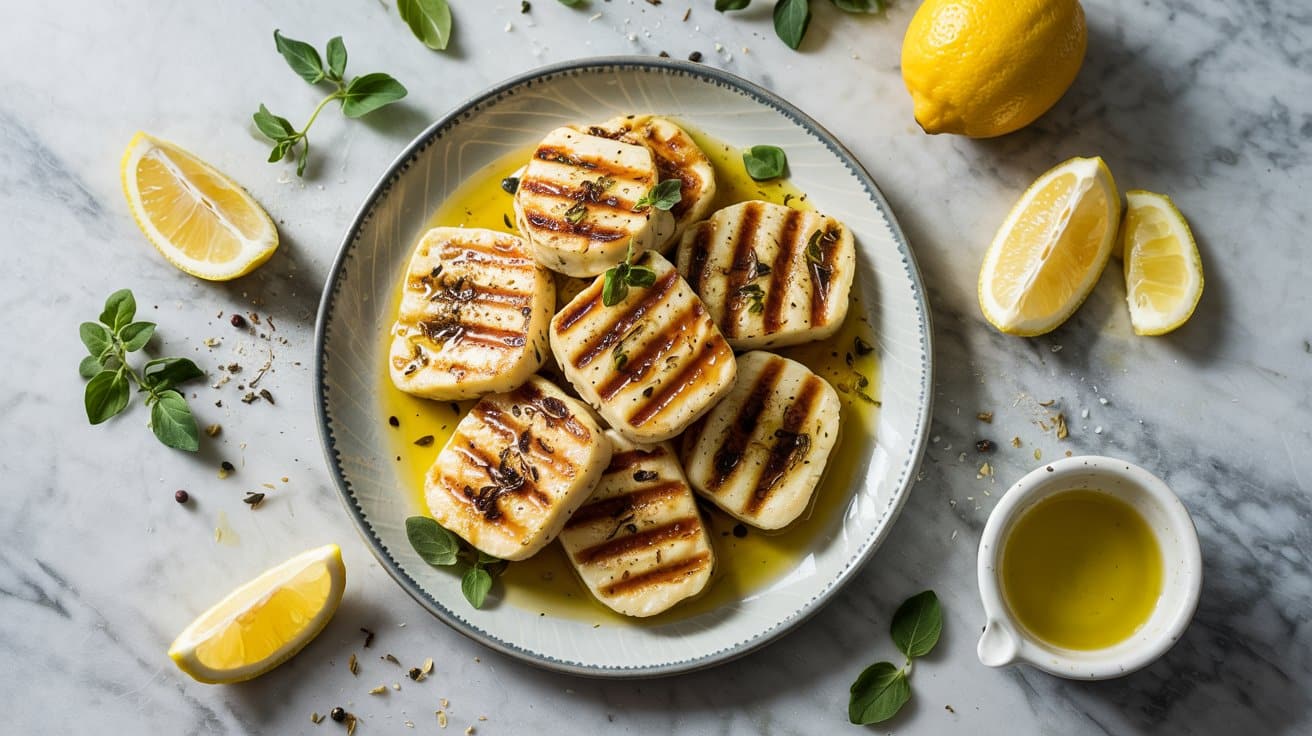
Halloumi has a high melting point, which means it holds its shape on a hot grill or skillet instead of turning into a puddle.
Slice it about half an inch thick and cook over high heat for two minutes per side - the goal is a deep golden crust with distinct char marks and a warm, squeaky center.
A quick dressing of lemon juice, olive oil, dried oregano, and a pinch of chili flakes goes on immediately after it comes off the heat. The warm cheese absorbs the dressing and the result is salty, tangy, and faintly herbal.
Ready in under 15 minutes.
Why This Recipe Works
Grilled halloumi is one of the fastest hot sides in Mediterranean cooking. It needs almost no prep and delivers on texture in a way that few other quick sides can match.
It works as a vegetarian main, a mezze component, or a protein addition to grain bowls and salads.
- Convenience: Ready in under 15 minutes from fridge to plate.
- Flavor balance: Salty cheese, tangy lemon, and herby oregano land in clean balance.
- Texture: Golden, crisp exterior with a warm and squeaky center.
- Appeal: A satisfying vegetarian option that holds attention on any plate.
- Simple seasoning: Just lemon, olive oil, and dried oregano - nothing more needed.
Ingredient Swap Ideas
Making simple swaps can help tailor this dish to different preferences or dietary requirements while keeping its essence intact.
- Cheese alternative - Use a firm, grillable cheese like paneer if halloumi is unavailable.
- Herb variation - Substitute oregano with thyme or rosemary for a different herbal twist.
- Citrus options - Replace lemon juice with lime juice for a slightly different acidity profile.
- Additions - Toss in sliced cherry tomatoes or cucumbers for extra freshness and crunch.
Ingredients
- 8 ounces halloumi cheese - sliced into ½-inch thick pieces.
- 1 tablespoon extra-virgin olive oil - for brushing the grill or pan.
- 1 lemon - juiced, plus thin slices for garnish.
- 1 tablespoon fresh oregano leaves - chopped.
- Freshly ground black pepper - to taste.
- Optional garnish: fresh parsley - chopped, for added color and freshness.
Instructions
- Preheat a grill pan or grill to medium-high heat. Lightly brush the halloumi slices with olive oil on both sides to prevent sticking.
- Place the halloumi on the grill and cook for about 2 to 3 minutes per side until each slice is golden brown with distinct grill marks.
- While the cheese cooks, combine the lemon juice, chopped oregano, and a pinch of black pepper in a small bowl.
- Remove the halloumi from the grill and arrange on a serving plate. Drizzle the lemon and oregano dressing over the warm cheese.
- Garnish with lemon slices and fresh parsley if desired. Serve immediately for the best texture and flavor.
10. Marinated Olives & Citrus Peel
Marinating olives transforms them from a plain pantry staple into something genuinely worth setting out.
Mixed olives - Kalamata, Castelvetrano, and Cerignola work well together - go into warm olive oil with strips of lemon and orange peel, smashed garlic, rosemary, and a pinch of red pepper flakes.
The oil infuses over low heat for about 10 minutes, then everything cools together. After a few hours at room temperature or overnight in the fridge, the olives are deeply fragrant and layered with citrus and herb flavor.
They keep refrigerated for up to two weeks.
Use a peeler to strip wide ribbons of citrus peel instead of zesting. The larger pieces release flavor slowly into the oil and look appealing in the jar.
Why This Recipe Works
This is the side dish that requires almost no active time but makes a mezze board look intentional. Set them out with hummus, sliced halloumi, and warm pita and you have a full spread assembled in minutes.
For ideas on building spreads that skip the oven entirely, the oven-free holiday side dishes collection covers similar no-cook assembly strategies.
- Convenience: Assembly takes 10 minutes, then the fridge does the rest.
- Flavor balance: Briny olives, aromatic herbs, and bright citrus peel layer together perfectly.
- Texture: Firm, juicy olives with a slight chew and tender strips of peel.
- Appeal: Anchor for cheese boards, antipasto platters, or pre-dinner nibbles.
- Versatility: Swap herbs and citrus to change the flavor profile each time.
Ingredient Swap Ideas
Swapping certain ingredients can accommodate dietary needs or bring new flavors without changing the essence of this salad.
- Bulgur replacement - Use quinoa for a gluten-free alternative with similar texture.
- Herbs variation - Swap mint for cilantro or basil for a different herbal note.
- Vegetables - Add finely diced bell peppers or radishes for extra crunch.
- Acid choice - Substitute lemon juice with apple cider vinegar for a milder tang.
Ingredients
- 1 cup bulgur wheat - Coarse or fine, rinsed and soaked or cooked according to package instructions.
- 2 cups fresh parsley - Finely chopped, packed.
- ½ cup fresh mint leaves - Finely chopped.
- 2 medium tomatoes - Diced.
- 1 medium cucumber - Peeled, seeded, and diced.
- 3 tablespoons fresh lemon juice - About one large lemon.
- ¼ cup extra-virgin olive oil - For dressing.
- ½ teaspoon salt - Or to taste.
- ¼ teaspoon black pepper - Freshly ground.
Instructions
- Prepare the bulgur wheat by soaking it in hot water or cooking it briefly until tender. Drain any excess water and let cool.
- In a large bowl, combine the chopped parsley, mint, tomatoes, and cucumber. Mix well to distribute the ingredients evenly.
- Add the cooled bulgur to the vegetable and herb mixture. Toss gently to combine all components.
- In a small bowl, whisk together the lemon juice, olive oil, salt, and pepper. Pour this dressing over the salad and toss thoroughly to coat everything evenly.
- Let the tabbouleh rest for at least 15 minutes before serving to allow the flavors to meld. Adjust seasoning if needed and serve chilled or at room temperature.
11. Lebanese Fattoush Salad
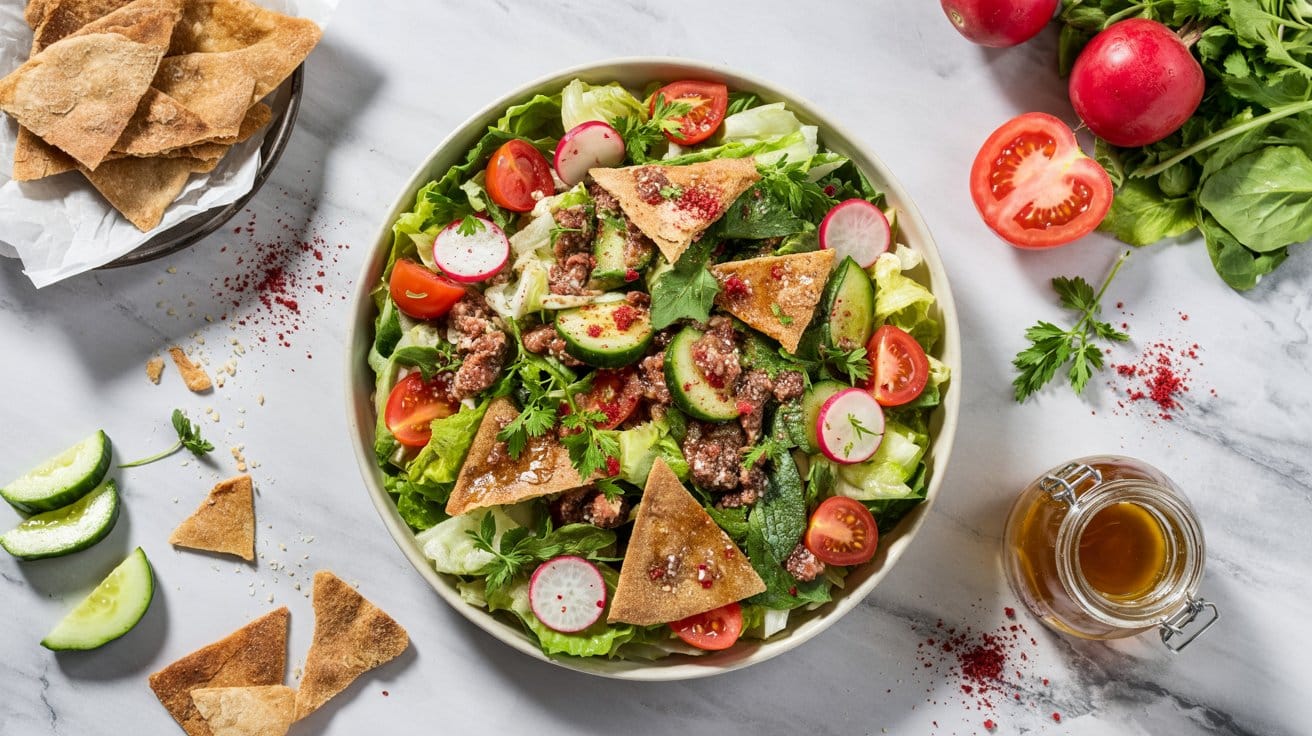
Fattoush is a Lebanese bread salad built around toasted or fried pita pieces that absorb the dressing without going completely soggy.
The vegetables - romaine, tomato, cucumber, radish, and scallion - stay in larger pieces than a typical chopped salad, which gives every forkful more character.
Sumac is the ingredient that defines this salad. It goes into the dressing and gets sprinkled on top, delivering a tart, almost berry-like tang that no other spice replicates.
Add the pita right before serving to preserve some crunch.
Why This Recipe Works
Fattoush solves the problem of stale pita bread in the most satisfying way possible. It is also a practical way to use up surplus vegetables - the dressing is forgiving and works with most combinations of fresh produce.
To see how bold dressings interact with different ingredients, fish-friendly salad dressings use similar acid-forward techniques.
- Convenience: No cooking required beyond toasting the pita for a few minutes.
- Flavor balance: Tangy sumac dressing ties together sweet tomato, crisp radish, and herby greens.
- Texture: Crunchy pita, snappy radishes, and juicy tomatoes create real contrast.
- Appeal: A colorful salad that looks as good as it tastes at the table.
- Light and fresh: Works well in warm weather or as a bright counterpoint to richer mains.
Ingredient Swap Ideas
Swapping certain ingredients can accommodate dietary needs or bring new flavors without changing the essence of this salad.
- Bulgur replacement - Use quinoa for a gluten-free alternative with similar texture.
- Herbs variation - Swap mint for cilantro or basil for a different herbal note.
- Vegetables - Add finely diced bell peppers or radishes for extra crunch.
- Acid choice - Substitute lemon juice with apple cider vinegar for a milder tang.
Ingredients
- 1 cup bulgur wheat - Coarse or fine, rinsed and soaked or cooked according to package instructions.
- 2 cups fresh parsley - Finely chopped, packed.
- ½ cup fresh mint leaves - Finely chopped.
- 2 medium tomatoes - Diced.
- 1 medium cucumber - Peeled, seeded, and diced.
- 3 tablespoons fresh lemon juice - About one large lemon.
- ¼ cup extra-virgin olive oil - For dressing.
- ½ teaspoon salt - Or to taste.
- ¼ teaspoon black pepper - Freshly ground.
Instructions
- Prepare the bulgur wheat by soaking it in hot water or cooking it briefly until tender. Drain any excess water and let cool.
- In a large bowl, combine the chopped parsley, mint, tomatoes, and cucumber. Mix well to distribute the ingredients evenly.
- Add the cooled bulgur to the vegetable and herb mixture. Toss gently to combine all components.
- In a small bowl, whisk together the lemon juice, olive oil, salt, and pepper. Pour this dressing over the salad and toss thoroughly to coat everything evenly.
- Let the tabbouleh rest for at least 15 minutes before serving to allow the flavors to meld. Adjust seasoning if needed and serve chilled or at room temperature.
12. Lemon Couscous with Mint & Feta
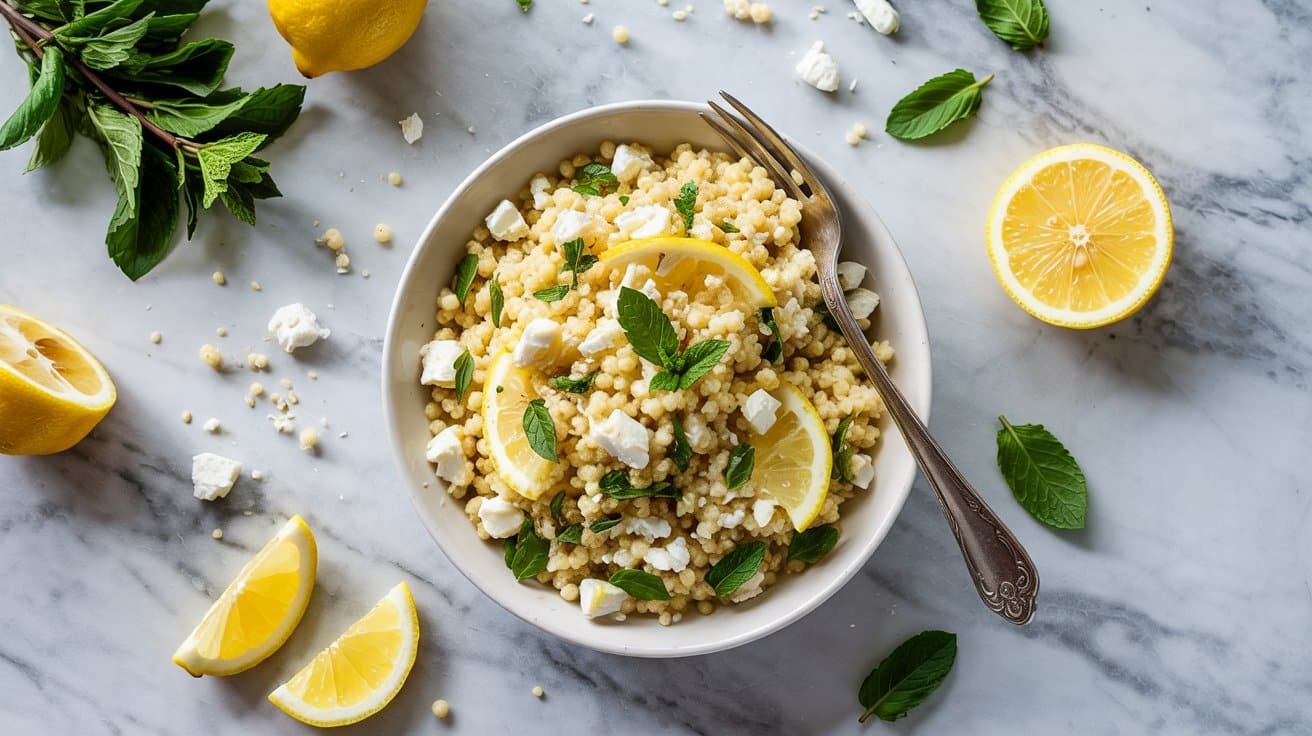
Couscous is one of the fastest grain sides available. Pour boiling salted water over the dry couscous at a 1:1 ratio, cover the bowl, and leave it for five minutes.
The grains steam perfectly without any stovetop monitoring. Fluff with a fork, then toss with lemon zest, lemon juice, chopped mint, and crumbled feta.
The key is seasoning generously while the couscous is still warm - it absorbs flavors better at this stage. Serve it warm alongside grilled chicken or fish, or let it cool to room temperature and pack it as a picnic side.
Why This Recipe Works
Lemon couscous is the kind of side that disappears fast at a dinner table. It is light enough not to compete with the main dish, but the feta and mint give it enough personality to hold its own.
For grain sides with a more substantial profile, the roasted root vegetable medley makes a hearty companion to this style of couscous.
- Convenience: Couscous is ready in five minutes with no stovetop cooking required.
- Flavor balance: Bright lemon zest, cool mint, and salty feta hit different notes in every bite.
- Texture: Fluffy, separate grains with soft feta crumbles throughout.
- Versatility: Pairs with grilled fish, chicken, or roasted vegetables without clashing.
- Make-ahead friendly: Holds well at room temperature for up to two hours.
Ingredient Swap Ideas
Swapping certain ingredients can accommodate dietary needs or bring new flavors without changing the essence of this salad.
- Bulgur replacement - Use quinoa for a gluten-free alternative with similar texture.
- Herbs variation - Swap mint for cilantro or basil for a different herbal note.
- Vegetables - Add finely diced bell peppers or radishes for extra crunch.
- Acid choice - Substitute lemon juice with apple cider vinegar for a milder tang.
Ingredients
- 1 cup bulgur wheat - Coarse or fine, rinsed and soaked or cooked according to package instructions.
- 2 cups fresh parsley - Finely chopped, packed.
- ½ cup fresh mint leaves - Finely chopped.
- 2 medium tomatoes - Diced.
- 1 medium cucumber - Peeled, seeded, and diced.
- 3 tablespoons fresh lemon juice - About one large lemon.
- ¼ cup extra-virgin olive oil - For dressing.
- ½ teaspoon salt - Or to taste.
- ¼ teaspoon black pepper - Freshly ground.
Instructions
- Prepare the bulgur wheat by soaking it in hot water or cooking it briefly until tender. Drain any excess water and let cool.
- In a large bowl, combine the chopped parsley, mint, tomatoes, and cucumber. Mix well to distribute the ingredients evenly.
- Add the cooled bulgur to the vegetable and herb mixture. Toss gently to combine all components.
- In a small bowl, whisk together the lemon juice, olive oil, salt, and pepper. Pour this dressing over the salad and toss thoroughly to coat everything evenly.
- Let the tabbouleh rest for at least 15 minutes before serving to allow the flavors to meld. Adjust seasoning if needed and serve chilled or at room temperature.
13. Orzo Salad with Cherry Tomatoes & Basil
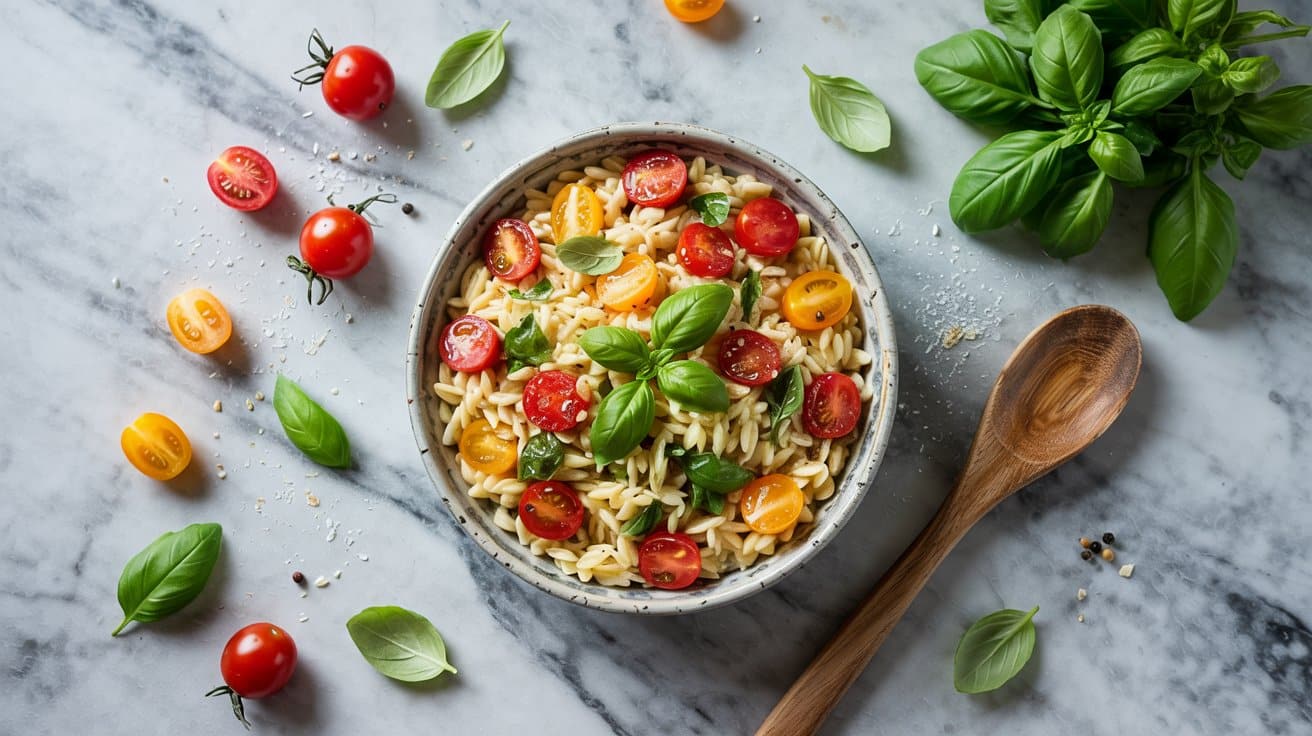
Orzo sits somewhere between pasta and a grain, which makes it ideal for salads - it has enough body to stand up to dressing without turning mushy. Cook it in well-salted boiling water for eight minutes, drain, and rinse with cold water to stop the cooking immediately.
Toss while still slightly warm with olive oil, garlic, halved cherry tomatoes, and torn basil.
The olive oil coating prevents the orzo from clumping in the fridge. Add a splash of white wine vinegar for brightness, then taste and adjust the seasoning.
This salad keeps refrigerated for three days.
Why This Recipe Works
Orzo salad travels well and is forgiving about timing - it can sit for an hour before serving without losing texture. It works as a side alongside grilled proteins or as a base for a more substantial bowl topped with olives, feta, and greens.
- Convenience: Ready in 20 minutes including cooking and cooling time.
- Flavor balance: Sweet cherry tomatoes, garlicky olive oil, and fragrant basil in clean balance.
- Texture: Tender orzo against the juicy burst of halved cherry tomatoes.
- Appeal: Works as a side, a picnic dish, or a base for a meal prep bowl.
- Make-ahead: Refrigerates well for up to three days without losing quality.
Ingredient Swap Ideas
Swapping certain ingredients can accommodate dietary needs or bring new flavors without changing the essence of this salad.
- Bulgur replacement - Use quinoa for a gluten-free alternative with similar texture.
- Herbs variation - Swap mint for cilantro or basil for a different herbal note.
- Vegetables - Add finely diced bell peppers or radishes for extra crunch.
- Acid choice - Substitute lemon juice with apple cider vinegar for a milder tang.
Ingredients
- 1 cup bulgur wheat - Coarse or fine, rinsed and soaked or cooked according to package instructions.
- 2 cups fresh parsley - Finely chopped, packed.
- ½ cup fresh mint leaves - Finely chopped.
- 2 medium tomatoes - Diced.
- 1 medium cucumber - Peeled, seeded, and diced.
- 3 tablespoons fresh lemon juice - About one large lemon.
- ¼ cup extra-virgin olive oil - For dressing.
- ½ teaspoon salt - Or to taste.
- ¼ teaspoon black pepper - Freshly ground.
Instructions
- Prepare the bulgur wheat by soaking it in hot water or cooking it briefly until tender. Drain any excess water and let cool.
- In a large bowl, combine the chopped parsley, mint, tomatoes, and cucumber. Mix well to distribute the ingredients evenly.
- Add the cooled bulgur to the vegetable and herb mixture. Toss gently to combine all components.
- In a small bowl, whisk together the lemon juice, olive oil, salt, and pepper. Pour this dressing over the salad and toss thoroughly to coat everything evenly.
- Let the tabbouleh rest for at least 15 minutes before serving to allow the flavors to meld. Adjust seasoning if needed and serve chilled or at room temperature.
14. Provençal Ratatouille
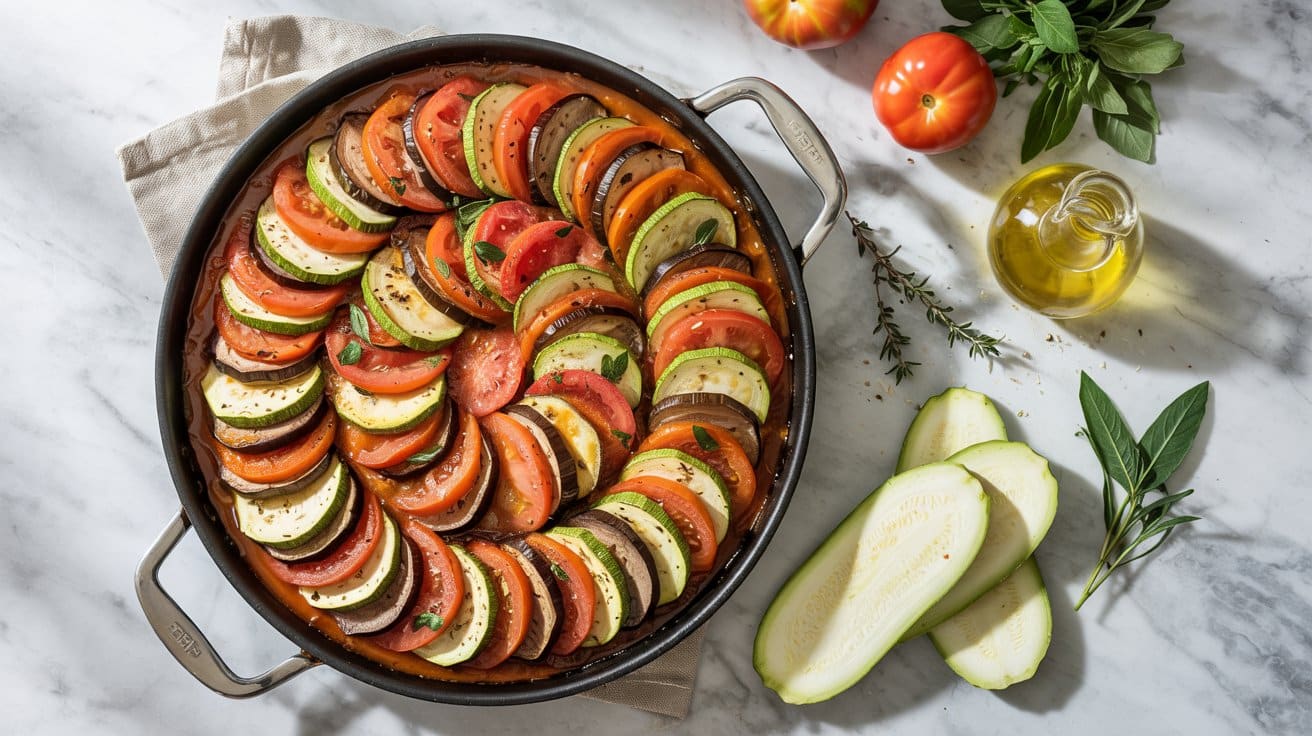
Ratatouille rewards patience. The vegetables - zucchini, eggplant, bell pepper, and tomato - cook down slowly in olive oil with garlic and thyme until they are completely tender and the flavors have merged into a rich, cohesive sauce.
Rushing the process on high heat steams rather than concentrates the vegetables.
Use a wide, heavy pan and cook in batches if needed to avoid crowding. The finished dish should have a deep, savory base with a natural sweetness from the tomatoes.
It tastes even better reheated the next day, making it one of the best make-ahead vegetable sides available.
Why This Recipe Works
Ratatouille is naturally vegan, gluten-free, and works alongside almost any protein. It is also a practical way to use up surplus summer vegetables.
The slow-cooked technique is similar to other low-effort, high-reward roasting methods covered in the roasted vegetable sides guide.
- Convenience: Uses basic fresh vegetables with a mostly hands-off cooking process.
- Flavor balance: Garlic and thyme deepen the natural sweetness of the vegetables and tomato.
- Texture: Tender, soft vegetables with slightly caramelized edges throughout.
- Appeal: A crowd-pleasing vegetable dish that works for mixed dietary groups.
- Make-ahead: Flavor improves overnight - reheat gently before serving.
Ingredient Swap Ideas
Swapping certain ingredients can accommodate dietary needs or bring new flavors without changing the essence of this salad.
- Bulgur replacement - Use quinoa for a gluten-free alternative with similar texture.
- Herbs variation - Swap mint for cilantro or basil for a different herbal note.
- Vegetables - Add finely diced bell peppers or radishes for extra crunch.
- Acid choice - Substitute lemon juice with apple cider vinegar for a milder tang.
Ingredients
- 1 cup bulgur wheat - Coarse or fine, rinsed and soaked or cooked according to package instructions.
- 2 cups fresh parsley - Finely chopped, packed.
- ½ cup fresh mint leaves - Finely chopped.
- 2 medium tomatoes - Diced.
- 1 medium cucumber - Peeled, seeded, and diced.
- 3 tablespoons fresh lemon juice - About one large lemon.
- ¼ cup extra-virgin olive oil - For dressing.
- ½ teaspoon salt - Or to taste.
- ¼ teaspoon black pepper - Freshly ground.
Instructions
- Prepare the bulgur wheat by soaking it in hot water or cooking it briefly until tender. Drain any excess water and let cool.
- In a large bowl, combine the chopped parsley, mint, tomatoes, and cucumber. Mix well to distribute the ingredients evenly.
- Add the cooled bulgur to the vegetable and herb mixture. Toss gently to combine all components.
- In a small bowl, whisk together the lemon juice, olive oil, salt, and pepper. Pour this dressing over the salad and toss thoroughly to coat everything evenly.
- Let the tabbouleh rest for at least 15 minutes before serving to allow the flavors to meld. Adjust seasoning if needed and serve chilled or at room temperature.
15. Caprese Salad Skewers
Caprese skewers reduce the classic salad to its three essential elements - fresh mozzarella pearls, ripe cherry tomatoes, and basil leaves - threaded onto small picks in alternating order.
A balsamic glaze drizzled over the top at serving time adds just enough sweetness and acidity to tie everything together without drowning the fresh flavors.
Use room-temperature mozzarella for the best flavor. Cold cheese straight from the fridge mutes the creaminess that makes this combination work.
These skewers take about 10 minutes to assemble and hold well for up to two hours before serving.
Why This Recipe Works
The skewer format solves the portability problem of a traditional Caprese salad. Individual portions mean no serving spoon needed and no awkward slicing at the table.
They are the right call for cocktail parties, outdoor gatherings, and grazing boards.
- Convenience: No cooking required - assembly takes about 10 minutes.
- Flavor balance: Sweet tomato, creamy mozzarella, aromatic basil, and tangy balsamic in every bite.
- Appeal: Visually striking with the red, white, and green contrast on each skewer.
- Serving ease: Individual portions eliminate the need for serving utensils or plates.
- Portable: Travel-friendly for picnics or finger food spreads at events.
Ingredient Swap Ideas
Swapping certain ingredients can accommodate dietary needs or bring new flavors without changing the essence of this salad.
- Bulgur replacement - Use quinoa for a gluten-free alternative with similar texture.
- Herbs variation - Swap mint for cilantro or basil for a different herbal note.
- Vegetables - Add finely diced bell peppers or radishes for extra crunch.
- Acid choice - Substitute lemon juice with apple cider vinegar for a milder tang.
Ingredients
- 1 cup bulgur wheat - Coarse or fine, rinsed and soaked or cooked according to package instructions.
- 2 cups fresh parsley - Finely chopped, packed.
- ½ cup fresh mint leaves - Finely chopped.
- 2 medium tomatoes - Diced.
- 1 medium cucumber - Peeled, seeded, and diced.
- 3 tablespoons fresh lemon juice - About one large lemon.
- ¼ cup extra-virgin olive oil - For dressing.
- ½ teaspoon salt - Or to taste.
- ¼ teaspoon black pepper - Freshly ground.
Instructions
- Prepare the bulgur wheat by soaking it in hot water or cooking it briefly until tender. Drain any excess water and let cool.
- In a large bowl, combine the chopped parsley, mint, tomatoes, and cucumber. Mix well to distribute the ingredients evenly.
- Add the cooled bulgur to the vegetable and herb mixture. Toss gently to combine all components.
- In a small bowl, whisk together the lemon juice, olive oil, salt, and pepper. Pour this dressing over the salad and toss thoroughly to coat everything evenly.
- Let the tabbouleh rest for at least 15 minutes before serving to allow the flavors to meld. Adjust seasoning if needed and serve chilled or at room temperature.
16. Lemony Green Beans Almondine
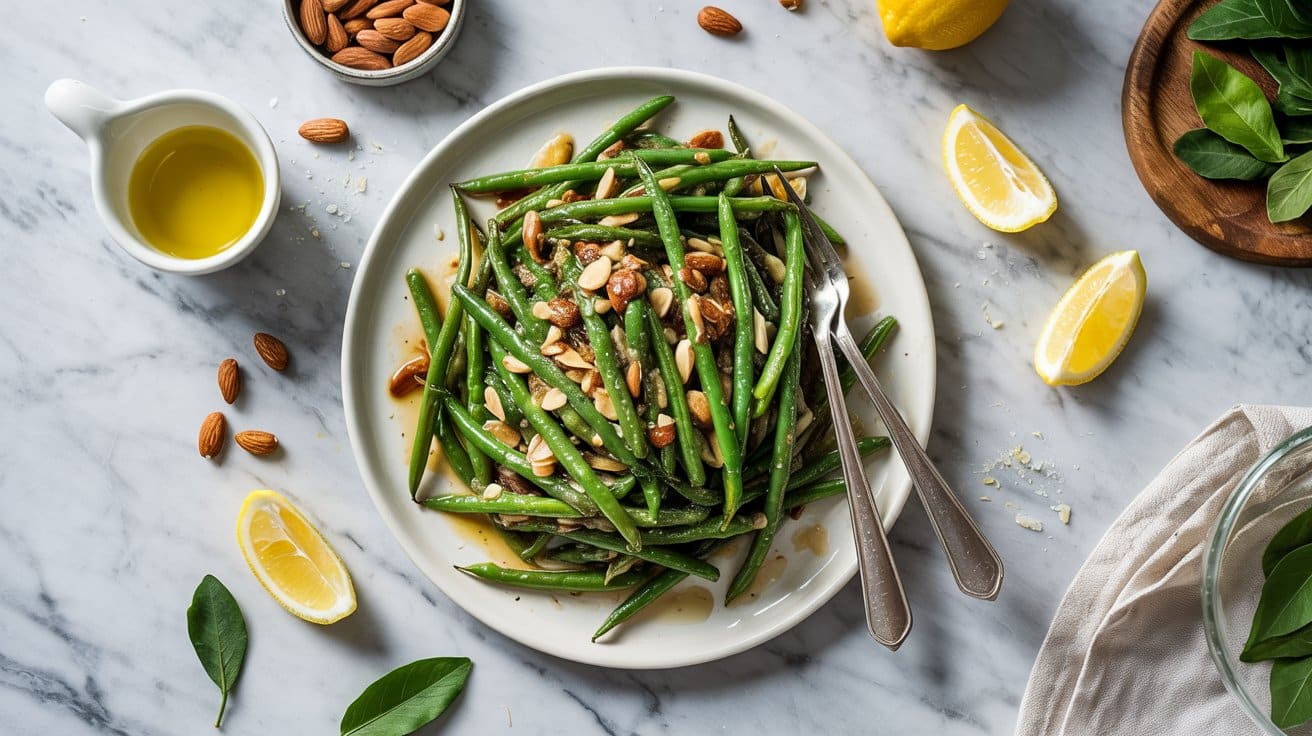
Green beans almondine is a French bistro classic that works perfectly in a Mediterranean context. Blanch the green beans in heavily salted boiling water for three minutes, then shock them in ice water to lock in the bright green color and snappy texture.
Toast sliced almonds in butter until golden, add garlic for 30 seconds, then toss in the drained beans with a squeeze of lemon.
The whole dish comes together in under 20 minutes. The almonds add a rich, nutty crunch that contrasts with the crisp beans, and the lemon keeps the butter from feeling heavy.
Why This Recipe Works
This side hits multiple textural notes at once - snappy beans, crunchy almonds, and a light butter sauce. It is elegant enough for a dinner party and fast enough for a Tuesday night.
The lemon and garlic profile also fits naturally alongside the other herb-forward sides in this collection.
- Convenience: Ready in under 20 minutes from start to finish.
- Flavor balance: Zesty lemon and garlic cut through the richness of toasted butter and almonds.
- Texture: Crisp blanched beans against crunchy toasted almonds.
- Appeal: Refined enough for entertaining, easy enough for weeknights.
- Healthy: Green beans are high in fiber and vitamin K - a nutritious base for this dish.
Ingredient Swap Ideas
Swapping certain ingredients can accommodate dietary needs or bring new flavors without changing the essence of this salad.
- Bulgur replacement - Use quinoa for a gluten-free alternative with similar texture.
- Herbs variation - Swap mint for cilantro or basil for a different herbal note.
- Vegetables - Add finely diced bell peppers or radishes for extra crunch.
- Acid choice - Substitute lemon juice with apple cider vinegar for a milder tang.
Ingredients
- 1 cup bulgur wheat - Coarse or fine, rinsed and soaked or cooked according to package instructions.
- 2 cups fresh parsley - Finely chopped, packed.
- ½ cup fresh mint leaves - Finely chopped.
- 2 medium tomatoes - Diced.
- 1 medium cucumber - Peeled, seeded, and diced.
- 3 tablespoons fresh lemon juice - About one large lemon.
- ¼ cup extra-virgin olive oil - For dressing.
- ½ teaspoon salt - Or to taste.
- ¼ teaspoon black pepper - Freshly ground.
Instructions
- Prepare the bulgur wheat by soaking it in hot water or cooking it briefly until tender. Drain any excess water and let cool.
- In a large bowl, combine the chopped parsley, mint, tomatoes, and cucumber. Mix well to distribute the ingredients evenly.
- Add the cooled bulgur to the vegetable and herb mixture. Toss gently to combine all components.
- In a small bowl, whisk together the lemon juice, olive oil, salt, and pepper. Pour this dressing over the salad and toss thoroughly to coat everything evenly.
- Let the tabbouleh rest for at least 15 minutes before serving to allow the flavors to meld. Adjust seasoning if needed and serve chilled or at room temperature.
17. Gigantes Plaki (Greek Baked Giant Beans)
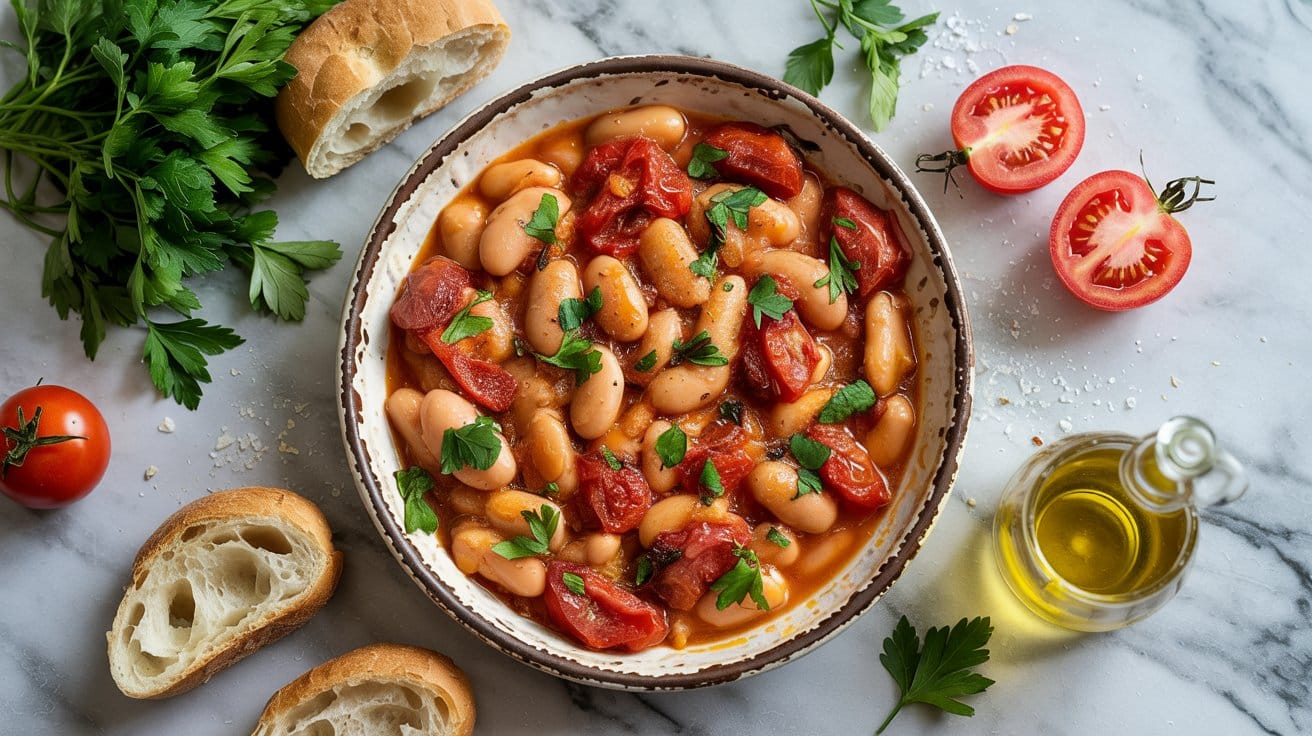
Gigantes plaki is a slow-baked Greek bean dish that rewards minimal effort with maximum flavor.
Giant butter beans - either soaked dried beans or canned - go into a rich tomato sauce with onion, garlic, carrot, and herbs, then bake uncovered at 350°F for about an hour until the sauce thickens and the top develops a slightly caramelized crust.
The beans absorb the tomato and herb flavors completely during baking, turning from plain legumes into something deeply savory and satisfying. Serve with crusty bread for scooping.
This dish is naturally vegan and gluten-free.
If using dried giant beans, soak them for at least 12 hours and boil until just tender before baking. Under-cooked dried beans will not fully soften in the tomato sauce - the acid can prevent them from becoming creamy.
Why This Recipe Works
Gigantes plaki is the kind of dish that makes plant-based eating feel genuinely satisfying rather than like a compromise. The beans provide protein and fiber, and the sauce is rich enough that no one misses meat.
It reheats beautifully and keeps refrigerated for four days.
- Convenience: Mostly hands-off baking after a quick prep and sauté.
- Flavor balance: Garlic, herbs, and natural tomato sweetness enhance the earthy beans.
- Texture: Creamy beans with a slightly thickened, caramelized sauce on top.
- Appeal: Naturally vegan and gluten-free - suitable for varied dietary needs.
- Make-ahead: Ideal for batch cooking - flavors improve on day two.
Ingredient Swap Ideas
Swapping certain ingredients can accommodate dietary needs or bring new flavors without changing the essence of this salad.
- Bulgur replacement - Use quinoa for a gluten-free alternative with similar texture.
- Herbs variation - Swap mint for cilantro or basil for a different herbal note.
- Vegetables - Add finely diced bell peppers or radishes for extra crunch.
- Acid choice - Substitute lemon juice with apple cider vinegar for a milder tang.
Ingredients
- 1 cup bulgur wheat - Coarse or fine, rinsed and soaked or cooked according to package instructions.
- 2 cups fresh parsley - Finely chopped, packed.
- ½ cup fresh mint leaves - Finely chopped.
- 2 medium tomatoes - Diced.
- 1 medium cucumber - Peeled, seeded, and diced.
- 3 tablespoons fresh lemon juice - About one large lemon.
- ¼ cup extra-virgin olive oil - For dressing.
- ½ teaspoon salt - Or to taste.
- ¼ teaspoon black pepper - Freshly ground.
Instructions
- Prepare the bulgur wheat by soaking it in hot water or cooking it briefly until tender. Drain any excess water and let cool.
- In a large bowl, combine the chopped parsley, mint, tomatoes, and cucumber. Mix well to distribute the ingredients evenly.
- Add the cooled bulgur to the vegetable and herb mixture. Toss gently to combine all components.
- In a small bowl, whisk together the lemon juice, olive oil, salt, and pepper. Pour this dressing over the salad and toss thoroughly to coat everything evenly.
- Let the tabbouleh rest for at least 15 minutes before serving to allow the flavors to meld. Adjust seasoning if needed and serve chilled or at room temperature.
18. Chickpea Salad with Olives & Sun-Dried Tomatoes
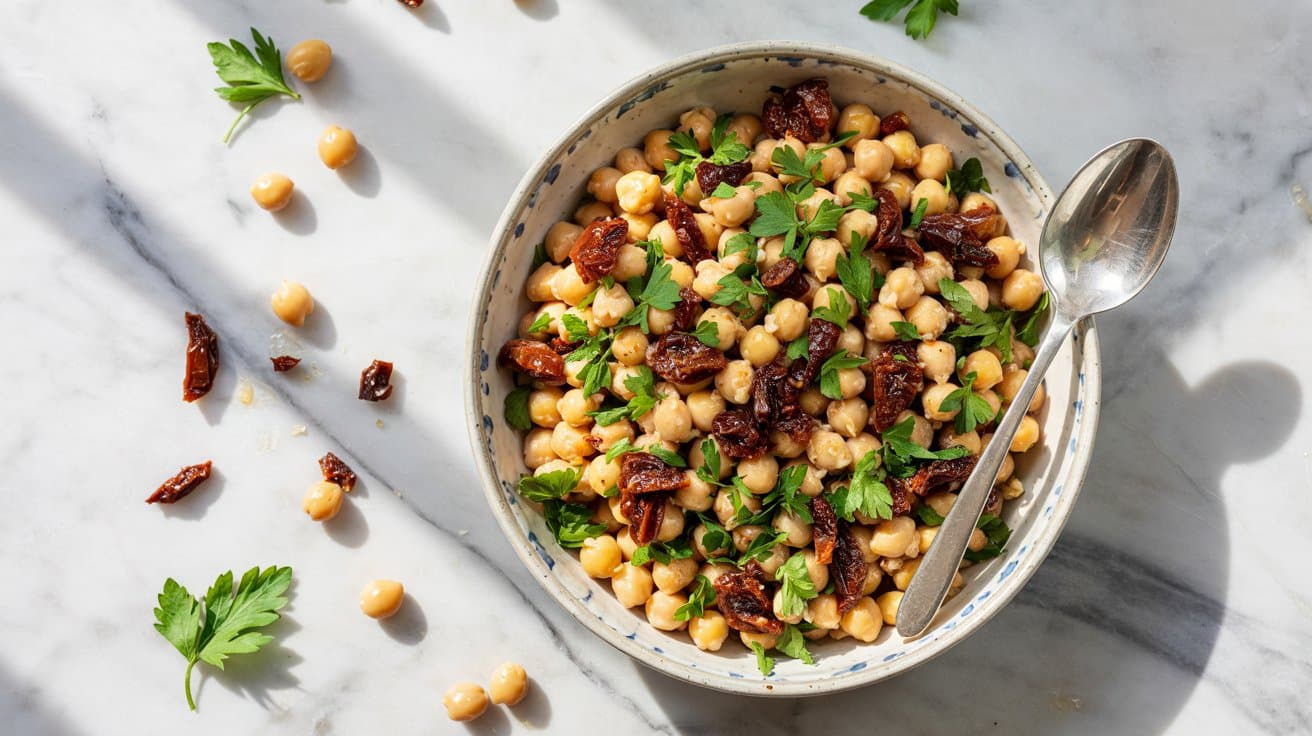
This salad is built almost entirely from pantry staples. Canned chickpeas, pitted Kalamata olives, and oil-packed sun-dried tomatoes combine with fresh flat-leaf parsley, red onion, and a sharp red wine vinegar dressing.
The sun-dried tomatoes bring a concentrated, jammy sweetness that balances the brininess of the olives.
Drain and rinse the chickpeas thoroughly, then pat them dry - this prevents the dressing from being watered down. A generous amount of chopped parsley keeps the salad tasting fresh despite using mostly preserved and canned ingredients.
It holds well refrigerated for up to four days.
Why This Recipe Works
Chickpea salad is one of the most reliable no-cook sides in Mediterranean cooking. It requires no timing coordination with a main dish, travels well, and delivers protein and fiber in every serving.
The balance of tangy, salty, and fresh elements is already built into the ingredient list - there is not much that can go wrong.
- Convenience: No cooking required - open cans, chop, and dress.
- Flavor balance: Tangy vinegar, briny olives, and sweet sun-dried tomatoes layer naturally.
- Texture: Creamy chickpeas with chewy sun-dried tomatoes and firm olive halves.
- Appeal: A filling, nutritious side that works as a light main with added greens.
- Versatile: Add feta, cucumbers, or roasted peppers to expand the salad easily.
Ingredient Swap Ideas
Swapping certain ingredients can accommodate dietary needs or bring new flavors without changing the essence of this salad.
- Bulgur replacement - Use quinoa for a gluten-free alternative with similar texture.
- Herbs variation - Swap mint for cilantro or basil for a different herbal note.
- Vegetables - Add finely diced bell peppers or radishes for extra crunch.
- Acid choice - Substitute lemon juice with apple cider vinegar for a milder tang.
Ingredients
- 1 cup bulgur wheat - Coarse or fine, rinsed and soaked or cooked according to package instructions.
- 2 cups fresh parsley - Finely chopped, packed.
- ½ cup fresh mint leaves - Finely chopped.
- 2 medium tomatoes - Diced.
- 1 medium cucumber - Peeled, seeded, and diced.
- 3 tablespoons fresh lemon juice - About one large lemon.
- ¼ cup extra-virgin olive oil - For dressing.
- ½ teaspoon salt - Or to taste.
- ¼ teaspoon black pepper - Freshly ground.
Instructions
- Prepare the bulgur wheat by soaking it in hot water or cooking it briefly until tender. Drain any excess water and let cool.
- In a large bowl, combine the chopped parsley, mint, tomatoes, and cucumber. Mix well to distribute the ingredients evenly.
- Add the cooled bulgur to the vegetable and herb mixture. Toss gently to combine all components.
- In a small bowl, whisk together the lemon juice, olive oil, salt, and pepper. Pour this dressing over the salad and toss thoroughly to coat everything evenly.
- Let the tabbouleh rest for at least 15 minutes before serving to allow the flavors to meld. Adjust seasoning if needed and serve chilled or at room temperature.
19. Za'atar Roasted Cauliflower Wedges
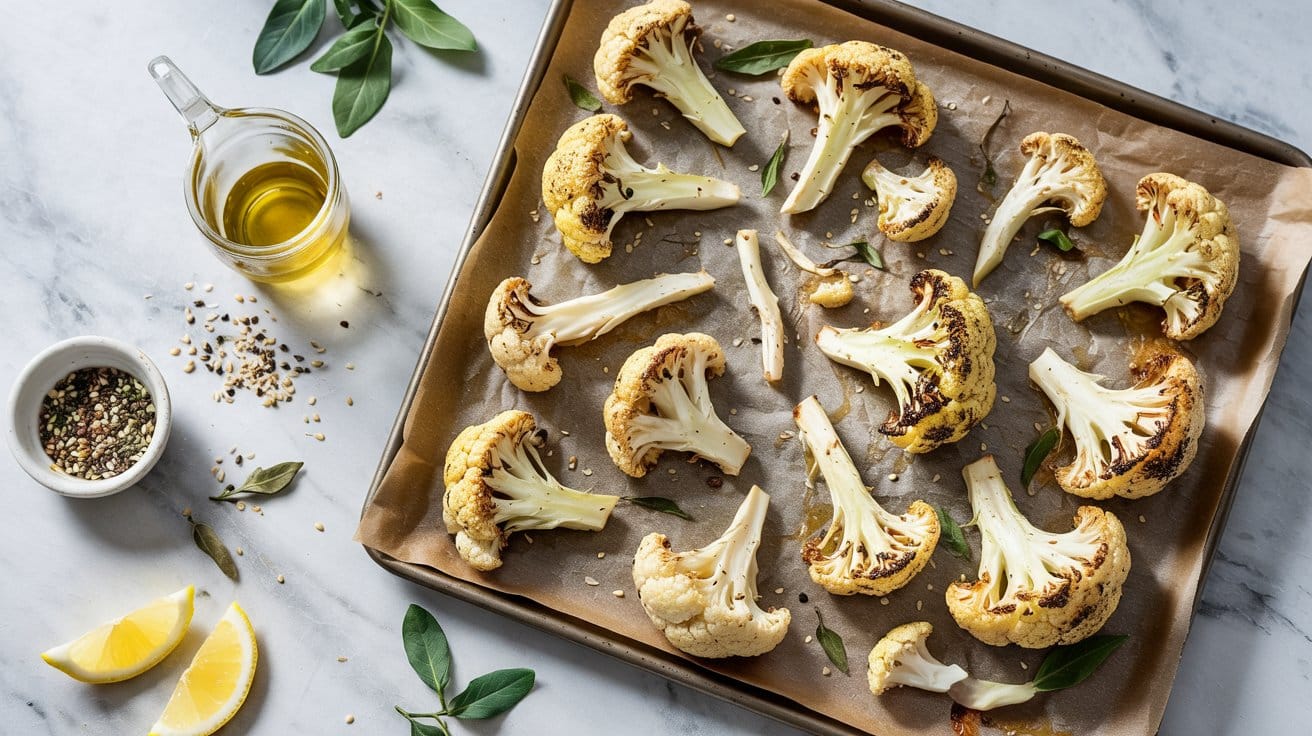
Cutting cauliflower into wedges rather than florets gives you more flat surface area against the hot pan, which translates directly into more caramelized, golden crust.
Coat each wedge generously with olive oil and za'atar - the spice blend of dried thyme, oregano, sesame, and sumac - then roast at 425°F for 25 to 30 minutes without flipping too early.
The edges turn crisp and deeply golden while the interior stays tender. A squeeze of lemon right before serving lifts the earthy za'atar and reinforces the natural nuttiness of the roasted cauliflower.
Serve with a spoonful of tahini or tzatziki alongside.
Why This Recipe Works
Za'atar roasted cauliflower is one of the most flavorful ways to prepare a mild vegetable. The spice blend does significant work with almost no effort, and the high-heat roasting method brings out a sweetness from the cauliflower that plain steaming never achieves.
For more ideas on getting maximum flavor from vegetables in the oven, the Mediterranean veggie sides with garlic and herbs collection covers similar territory.
- Convenience: Prep in five minutes and roast hands-off for 25 to 30 minutes.
- Flavor balance: Tangy, herby za'atar perfectly complements the mild, sweet cauliflower.
- Texture: Crispy golden edges with a tender, almost creamy interior.
- Appeal: A visually striking side that suits casual dinners and entertaining.
- Kid-friendly: Mild spice level and familiar vegetable with a satisfying crunch.
Ingredient Swap Ideas
Swapping certain ingredients can accommodate dietary needs or bring new flavors without changing the essence of this salad.
- Bulgur replacement - Use quinoa for a gluten-free alternative with similar texture.
- Herbs variation - Swap mint for cilantro or basil for a different herbal note.
- Vegetables - Add finely diced bell peppers or radishes for extra crunch.
- Acid choice - Substitute lemon juice with apple cider vinegar for a milder tang.
Ingredients
- 1 cup bulgur wheat - Coarse or fine, rinsed and soaked or cooked according to package instructions.
- 2 cups fresh parsley - Finely chopped, packed.
- ½ cup fresh mint leaves - Finely chopped.
- 2 medium tomatoes - Diced.
- 1 medium cucumber - Peeled, seeded, and diced.
- 3 tablespoons fresh lemon juice - About one large lemon.
- ¼ cup extra-virgin olive oil - For dressing.
- ½ teaspoon salt - Or to taste.
- ¼ teaspoon black pepper - Freshly ground.
Instructions
- Prepare the bulgur wheat by soaking it in hot water or cooking it briefly until tender. Drain any excess water and let cool.
- In a large bowl, combine the chopped parsley, mint, tomatoes, and cucumber. Mix well to distribute the ingredients evenly.
- Add the cooled bulgur to the vegetable and herb mixture. Toss gently to combine all components.
- In a small bowl, whisk together the lemon juice, olive oil, salt, and pepper. Pour this dressing over the salad and toss thoroughly to coat everything evenly.
- Let the tabbouleh rest for at least 15 minutes before serving to allow the flavors to meld. Adjust seasoning if needed and serve chilled or at room temperature.
20. Artichoke & White Bean Salad
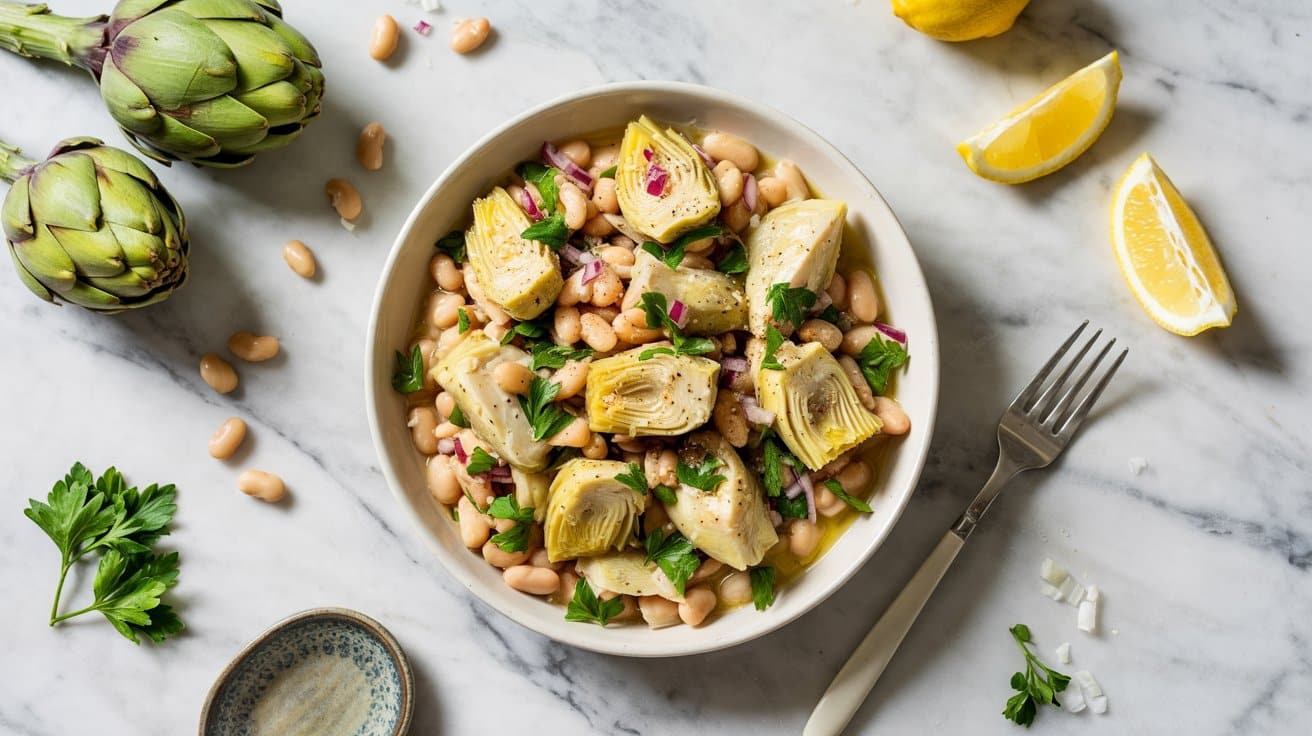
This salad uses marinated artichoke hearts from a jar - the oil they are packed in doubles as part of the dressing, so do not discard it. Drain the artichokes and combine with rinsed cannellini beans, thinly sliced red onion, lemon juice, dried oregano, and garlic.
Toss with the reserved artichoke oil and a little extra-virgin olive oil.
The texture contrast is the highlight here - creamy white beans against the firmer, slightly acidic artichoke pieces. A handful of chopped flat-leaf parsley adds color and freshness.
This salad needs no cooking and keeps refrigerated for three days.
Why This Recipe Works
Artichoke and white bean salad is the kind of recipe that looks and tastes more considered than the effort required. It is ready in about 10 minutes and needs no heat source at all.
For anyone building a no-cook Mediterranean spread, this pairs naturally with the marinated olives and hummus from earlier in this collection.
- Convenience: No cooking required - uses canned beans and jarred artichokes throughout.
- Flavor balance: Bright lemon, herbaceous oregano, and mild garlic bring creamy beans to life.
- Texture: Soft cannellini beans contrast with firmer artichoke pieces in every bite.
- Appeal: Works as a quick weekday side or a shareable dish at gatherings.
- Quick assembly: Assembled in under 10 minutes with zero active cooking.
Ingredient Swap Ideas
Adjusting this recipe to fit what you have on hand or your preferences is easy and keeps the core taste intact.
- Feta cheese - Substitute with grilled halloumi or fresh mozzarella for a different texture and milder flavor.
- Kalamata olives - Use green olives or Castelvetrano olives if you prefer a less briny option.
- Peppers - Swap sweet bell peppers for mild banana peppers or omit if not available.
- Herb seasoning - Instead of dried oregano, use fresh oregano or a sprinkle of dried thyme for a slightly different herbal note.
Ingredients
- 4 ripe tomatoes - Chunky cut into wedges.
- 1 large cucumber - Peeled and sliced into thick rounds or half-moons.
- 1 green bell pepper - Sliced into thin rings or strips.
- 1 small red onion - Thinly sliced for a sharp contrast.
- ½ cup Kalamata olives - Pitted and whole.
- 1 thick slab of feta cheese - About 4 ounces, not crumbled.
- ¼ cup extra-virgin olive oil - For drizzling generously.
- 1 teaspoon dried oregano - Sprinkled over the top.
- Salt and freshly ground black pepper - To taste.
Instructions
- Prepare all vegetables by washing and chopping the tomatoes, cucumber, green pepper, and red onion into their respective sizes. Arrange them loosely on a large serving plate or salad bowl.
- Scatter Kalamata olives evenly over the vegetables, ensuring every serving can enjoy some olives.
- Place the thick slab of feta on top of the salad without crumbling it, preserving its presentation and creaminess.
- Drizzle the extra-virgin olive oil generously over the entire salad, then sprinkle dried oregano evenly across the feta and vegetables.
- Season with salt and a few grinds of black pepper according to taste. Serve the salad immediately, inviting everyone to break the feta into pieces as they eat.
Frequently Asked Questions
What to serve with tabbouleh?
Tabbouleh pairs well with grilled lamb, chicken kebabs, falafel, and warm pita. It also works alongside hummus and baba ganoush as part of a mezze spread.
What are quick Mediterranean side dishes?
Hummus, tzatziki, Horiatiki salad, Caprese skewers, and marinated olives all come together in under 15 minutes using mostly pantry and fridge staples.
How long do Mediterranean sides last in the fridge?
Most Mediterranean dips and salads keep for 3 to 5 days refrigerated. Marinated olives last up to two weeks, while fattoush is best eaten the day it is made.
What main goes with roasted vegetables?
Ratatouille and za'atar cauliflower pair well with grilled chicken, roasted lamb, and baked fish. They also work alongside a grain like couscous or orzo for a vegetarian meal.
How can I make Mediterranean sides vegan-friendly?
Most Mediterranean sides are already vegan. Swap feta for extra olives or sun-dried tomatoes, and use olive oil instead of butter in green beans almondine to keep everything plant-based.
Save This for Later
Pin this 20 essential mediterranean side dishes to brighten table guide so you always have it when you need it.

Carrie is a food writer and editor with more than 15 years of experience. She has worked for some of the biggest names in the food industry, including Bon Appétit, Food & Wine, and Martha Stewart Living.
As the Editor in Chief of EpicureDelight, Carrie oversees all of the content on the site. She also manages the team of contributing writers and editors, who help to create delicious recipes, helpful tips, and informative articles that you’ll find on the site.
A native of the Chicago area, Carrie is passionate about all things food. She loves trying new restaurants and experimenting with new recipes in her kitchen. She’s also a graduate of the Culinary Institute of America, so she knows a thing or two about food!