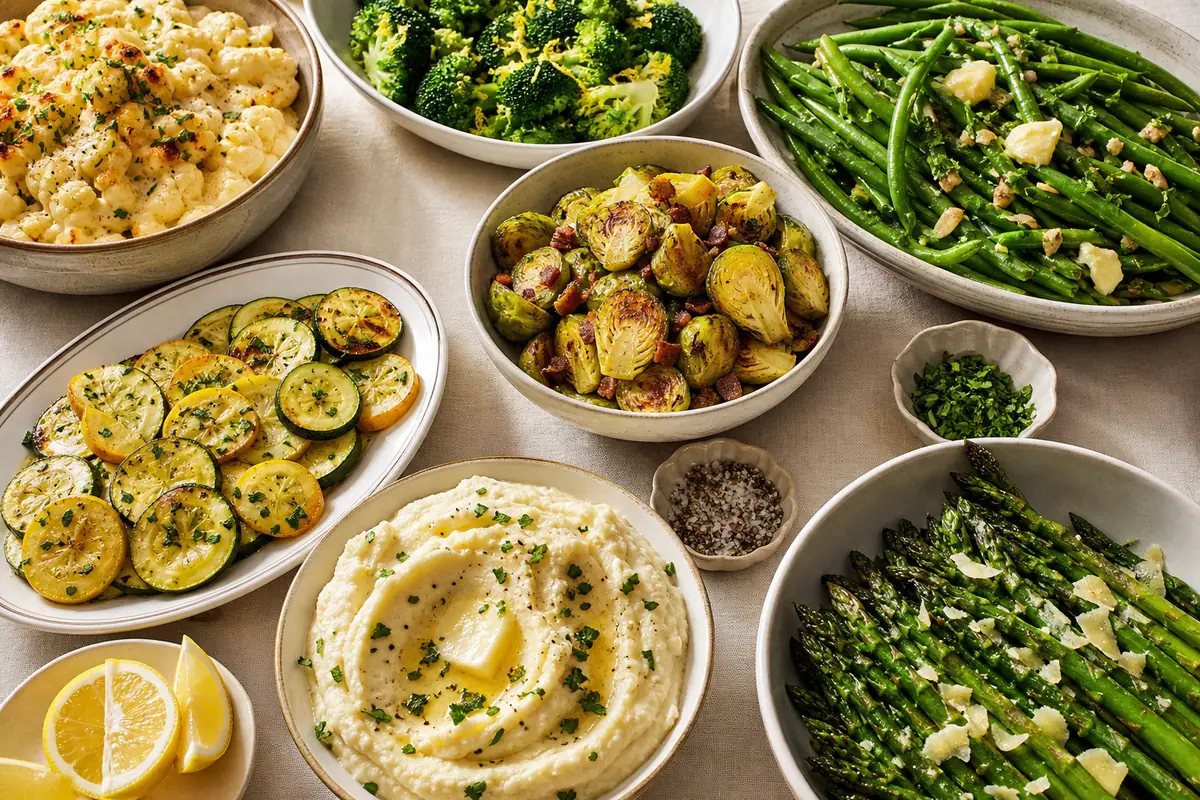
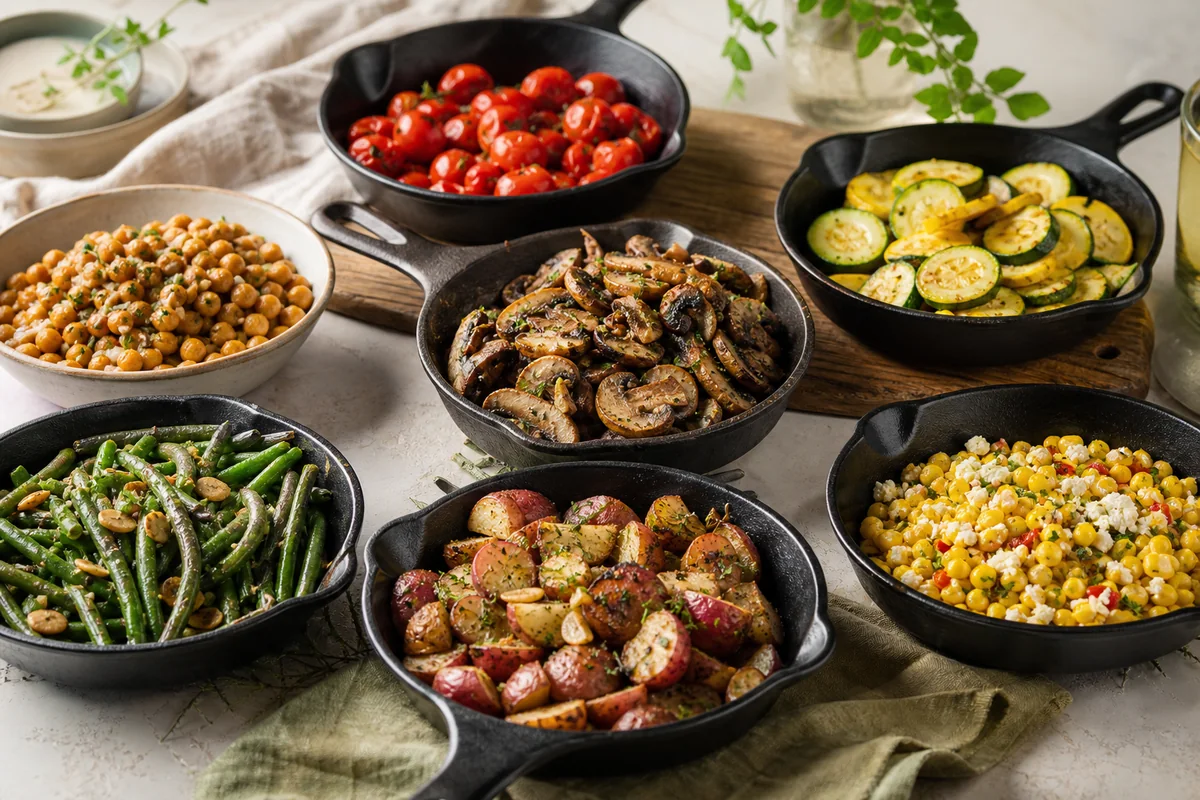
Busy weekdays go smoother when you have a fridge stocked with sides that actually taste good the second time around.
These 20 side dishes that reheat well were chosen specifically because they hold their texture, flavor, and appeal after a day or two in the fridge - no sad, soggy vegetables or dried-out grains.
The lineup covers a lot of ground: roasted vegetables, creamy gratins, whole grains, and hearty legume-based dishes.
Every recipe here pairs easily with proteins like roasted chicken, baked fish, or pan-seared tofu, and several work just as well as a light standalone meal.
If you need inspiration for cold side dishes for parties, many of these can pull double duty served at room temperature too.
The real advantage of this collection is one-time cooking with multiple days of payoff. Each dish reheats in either the microwave at medium power or in a 350°F oven, and most stay fresh for up to 4 days refrigerated.
These 20 reheatable side dishes cover roasted vegetables, creamy casseroles, whole grains, and legume-based options. Every recipe maintains texture and flavor after refrigeration and reheats well in the oven or microwave, making them reliable choices for weekly meal prep.
1. Garlic Parmesan Roasted Broccoli

Roasting broccoli at 425°F pulls out its natural sweetness and gives the florets those desirable charred edges that stay intact even after reheating.
Coating them in garlic-infused olive oil before they hit the oven means the savory flavor is baked in, not just sitting on top.
Parmesan goes on in the final few minutes, melting into a salty, nutty crust that clings to every floret. If you want more ways to use this vegetable throughout the week, try these broccoli side dishes for fresh inspiration.
Why This Recipe Works
This recipe is fast, bold, and reliable for meal prep - the florets reheat in a 375°F oven for 8 minutes without turning soft.
- Convenience: Minimal prep and a single sheet pan mean cleanup takes under 5 minutes.
- Flavor balance: Roasted garlic oil and salty Parmesan create a savory, slightly nutty coating without overwhelming the broccoli.
- Texture: Florets emerge tender at the stem and lightly crisp at the tips, with browned edges that add contrast.
- Reheat-friendly: Returns to near-fresh quality in the oven , skip the microwave to keep those edges from going limp.
Ingredient Swap Ideas
Adjusting ingredients can help tailor the dish to your preferences or dietary needs without losing its essence.
- Cheese alternative - Use Pecorino Romano or Asiago in place of Parmesan for a different flavor.
- Garlic substitute - Try garlic powder or roasted shallots if fresh garlic isn't on hand.
- Oil choice - Olive oil can be swapped with avocado oil or sunflower oil for a milder taste.
- Add crunch - Sprinkle toasted breadcrumbs or chopped nuts on top before serving for extra texture.
Ingredients
- 1 pound broccoli florets - Washed and cut into bite-sized pieces.
- 3 tablespoons olive oil - To coat the broccoli and infuse flavor.
- 3 cloves garlic - Minced finely to spread evenly over the broccoli.
- ⅓ cup grated Parmesan cheese - Freshly grated for best flavor.
- ½ teaspoon salt - To enhance overall taste.
- ¼ teaspoon freshly ground black pepper - For mild heat and depth.
Instructions
- Preheat your oven to 425°F (220°C). Line a baking sheet with parchment paper or foil for easy cleanup.
- In a large bowl, toss the broccoli florets with olive oil, minced garlic, salt, and black pepper until evenly coated.
- Spread the broccoli in a single layer on the prepared baking sheet, leaving space between pieces.
- Roast for 15 minutes, then remove from the oven and sprinkle Parmesan cheese evenly over the broccoli.
- Return to the oven and roast for an additional 5-7 minutes until the cheese has melted and the broccoli edges turn golden brown.
- Remove from oven and serve immediately, or let cool and store in the refrigerator for up to three days. Reheat gently to keep broccoli crisp.
2. Oven-Roasted Maple Glazed Carrots

Roasting concentrates the natural sugars already in carrots, and adding pure maple syrup deepens that sweetness into a proper glaze. Fresh thyme keeps the dish from tipping into dessert territory, adding an earthy, herbal note that balances every bite.
The glaze clings and firms up slightly as it cools, which means reheated carrots hold their shape rather than turning mushy.
This dish works equally well alongside weeknight protein or as part of a larger spread , it's one of those sides that fits nearly anywhere, including among holiday sides with fresh flavors.
Why This Recipe Works
One pan, minimal prep, and a glaze that actually improves after a night in the fridge , this is exactly what meal prep sides should look like.
- Convenience: Everything goes on one sheet pan with about 5 minutes of hands-on prep.
- Flavor balance: Maple syrup amplifies the carrots' sweetness while thyme adds savory depth to prevent cloyingness.
- Texture: Roasting at 400°F produces tender carrot sticks with lightly caramelized, crisp edges.
- Versatility: Pairs with chicken, pork, salmon, or a grain bowl without clashing with other flavors on the plate.
Ingredient Swap Ideas
Adjusting ingredients here can help suit dietary needs or simply change the flavor while keeping the dish just as enjoyable.
- Maple syrup - Substitute with honey or agave nectar for a different natural sweetness.
- Fresh thyme - Use rosemary or sage to add a varied herbal note.
- Carrots - Try parsnips or sweet potatoes for an alternate roasted side.
- Olive oil - Swap with avocado or coconut oil for a different fat source and flavor.
Ingredients
- 1 pound carrots - peeled and cut into sticks about 2-3 inches long.
- 2 tablespoons olive oil - to coat the carrots evenly.
- 2 tablespoons pure maple syrup - adds sweetness and glaze.
- 1 teaspoon fresh thyme leaves - freshly picked for best flavor.
- ½ teaspoon salt - enhances natural carrot sweetness.
- ¼ teaspoon black pepper - freshly ground for mild heat.
Instructions
- Preheat the oven to 400°F (200°C). Line a baking sheet with parchment paper or foil for easier cleanup.
- In a large bowl, toss the carrot sticks with olive oil, maple syrup, thyme leaves, salt, and black pepper until they are fully coated.
- Spread the carrots out in a single layer on the prepared baking sheet, making sure they aren't crowded.
- Roast the carrots in the oven for 25-30 minutes, flipping them halfway through to ensure even caramelization. They should be tender and lightly browned around the edges.
- Remove from the oven and serve warm. These maple glazed carrots pair well with roasted meats, grains, or as part of a veggie platter.
3. Balsamic-Glazed Brussels Sprouts

Brussels sprouts have a mild bitterness that responds well to high heat and acid. Roasting halved sprouts cut-side down at 400°F creates flat, caramelized surfaces, and a balsamic-honey glaze adds tangy sweetness that makes this vegetable genuinely craveable.
These come together in about 25 minutes and reheat without turning soggy, which puts them firmly in the meal prep column. They're sturdy enough to go into a container straight from the oven and still taste great two days later.
Why This Recipe Works
The cut-side-down roasting technique is the key here , it maximizes browning and locks in moisture at the center of each sprout.
- Convenience: Single pan, minimal chopping, and the oven does the heavy lifting.
- Flavor balance: Sharp balsamic vinegar and sweet honey work against the sprouts' natural bitterness for a well-rounded result.
- Texture: Crisp, golden edges on the outside with a tender, almost creamy center.
- Versatility: Reheats in the oven or a dry skillet without getting soggy , solid for leftovers and meal prep alike.
Ingredient Swap Ideas
Swapping ingredients here can help accommodate preferences or dietary needs without sacrificing the core flavor.
- Sweetener - Replace honey with maple syrup for a vegan-friendly option.
- Vinegar - Use apple cider vinegar if balsamic vinegar is unavailable; it offers a lighter acidity.
- Oil - Substitute olive oil with avocado oil for a milder taste and higher smoke point.
- Add-ins - Toss in chopped nuts like walnuts or almonds for extra crunch and nutrition.
Ingredients
- 1 pound Brussels sprouts - halved and trimmed.
- 2 tablespoons balsamic vinegar - to give a sweet and tangy glaze.
- 1 tablespoon honey - for natural sweetness and caramelization.
- 2 tablespoons olive oil - to help roast the sprouts evenly.
- ½ teaspoon salt - to improve the flavors.
- ¼ teaspoon black pepper - freshly ground for a gentle kick.
Instructions
- Preheat the oven to 400°F (200°C). Line a baking sheet with parchment paper or lightly grease it.
- In a large bowl, whisk together balsamic vinegar, honey, olive oil, salt, and black pepper until well combined.
- Add the halved Brussels sprouts to the bowl and toss them thoroughly in the glaze until each piece is coated.
- Spread the sprouts in a single layer on the prepared baking sheet, cut side down, for maximum crispiness.
- Roast in the oven for 20 to 25 minutes, turning once halfway through, until the sprouts are caramelized at the edges and tender inside.
- Remove from the oven and serve warm as a flavorful side dish that pairs well with a variety of mains.
4. Classic Cheesy Scalloped Potatoes

Thinly sliced potatoes layered in a sharp cheddar béchamel and baked until golden and bubbling , this is the kind of dish people ask about before the meal is even finished.
The cheese sauce soaks into every layer as it bakes, creating slices that are silky and fully flavored all the way through.
Leftovers reheat exceptionally well at 350°F covered with foil for 15 minutes, which makes this a top choice for weekend batch cooking. Slice into portions, refrigerate, and you have a hearty side ready for up to 4 days.
Why This Recipe Works
Even slicing is the secret to consistent results , use a mandoline set to ⅛-inch for uniform layers that cook at the same rate.
- Convenience: Uniform thin slices cook evenly, cutting bake time and making reheating straightforward.
- Flavor balance: A blend of sharp and mild cheeses builds a sauce that is rich without being one-dimensional.
- Texture: Tender potato layers contrast with a bubbly, golden top crust that holds after reheating.
- Family-friendly appeal: Pairs with virtually any main course and satisfies a wide range of palates.
Ingredient Swap Ideas
Swapping ingredients can adapt this recipe to various dietary preferences or ingredient availability, without sacrificing the core flavor and texture.
- Cheese options - Use Gruyère, mozzarella, or a blend of cheeses if you want a milder or more distinct flavor.
- Milk alternatives - Swap whole milk for half-and-half or a plant-based milk like oat milk for a different richness or to make it lactose-free.
- Potato types - Yukon Gold or red potatoes work well if you want a slightly waxier texture compared to russets.
- Add-ins - Incorporate sautéed onions or garlic for extra depth, or sprinkle herbs like thyme for subtle freshness.
Ingredients
- 4 large russet potatoes - peeled and thinly sliced about ⅛ inch thick.
- 3 tablespoons unsalted butter - softened, for richness in the sauce.
- 3 tablespoons all-purpose flour - to thicken the cheese sauce.
- 2 cups whole milk - warmed, for a smooth, creamy base.
- 1 ½ cups shredded sharp cheddar cheese - provides sharp and savory flavor.
- ½ cup shredded Parmesan cheese - adds a nutty depth and helps with browning.
- 1 teaspoon salt - enhances overall seasoning.
- ½ teaspoon black pepper - for subtle heat.
- ¼ teaspoon ground nutmeg - optional, for a warm, subtle spice.
- Non-stick cooking spray - for greasing the baking dish.
Instructions
- Preheat your oven to 350°F (175°C) and lightly grease a 9x13-inch baking dish with non-stick spray or butter.
- In a medium saucepan, melt the butter over medium heat. Whisk in the flour and cook for about 1-2 minutes until it becomes bubbly but not browned.
- Gradually pour in the warmed milk while whisking constantly to avoid lumps. Cook the mixture, stirring often, until it thickens and coats the back of a spoon-about 5-7 minutes. Remove from heat and stir in 1 cup of cheddar cheese, the Parmesan, salt, pepper, and nutmeg until the cheeses melt smoothly into the sauce.
- Arrange a layer of potato slices evenly on the bottom of the prepared baking dish. Pour about one-third of the cheese sauce over the potatoes, spreading it gently with a spatula. Repeat layering potatoes and sauce two more times, finishing with sauce on top. Sprinkle the remaining ½ cup cheddar cheese evenly over the top layer.
- Cover the dish tightly with foil and bake for 45 minutes. Remove the foil and bake for an additional 20-30 minutes until the potatoes are tender and the top is golden and bubbly. Let it rest for about 10 minutes before serving.
This recipe warms up nicely, whether reheated in the oven or microwave, making it a practical side dish to prepare in advance.
5. Creamy Mashed Cauliflower with Chives

Mashed cauliflower gets its velvety texture from cream cheese blended in while the cauliflower is still hot , a step that also prevents the watery result you get when cauliflower is simply pureed alone.
One medium head of cauliflower yields about four generous servings at roughly a third of the carbs in traditional mashed potatoes.
Fresh chives folded in at the end add a mild onion bite and keep the dish looking vibrant in the fridge. Reheat in the microwave at 70% power with a tablespoon of milk stirred in to restore the creamy consistency.
Why This Recipe Works
Cream cheese is the ingredient that separates a great mashed cauliflower from a thin, watery one , it adds body and richness without adding bulk.
- Convenience: Ready in under 20 minutes with a food processor or immersion blender.
- Flavor balance: Cream cheese adds richness while chives cut through with a fresh, sharp note.
- Texture: Smooth and thick with just enough body from the cauliflower to feel substantial.
- Appeal: Works alongside roasted chicken, grilled fish, or beef and suits low-carb eating plans.
Ingredient Swap Ideas
Swapping ingredients can help adjust the recipe to suit dietary needs or introduce new flavors without losing its creamy appeal. These options keep the dish simple but fresh.
- Cream cheese - Substitute with Greek yogurt for a tangier, lighter finish.
- Chives - Use scallions or finely minced shallots if chives aren't available.
- Cauliflower - Try a mix of cauliflower and parsnips for a slightly sweeter flavor.
- Butter or cream - Replace with olive oil or a dairy-free alternative for a vegan version.
Ingredients
- 1 large head cauliflower - broken into florets.
- 2 ounces cream cheese - softened to room temperature.
- 2 tablespoons unsalted butter - for added richness.
- ¼ cup whole milk or cream - warmed slightly.
- 2 tablespoons fresh chives - finely chopped.
- ½ teaspoon salt - adjust to taste.
- ¼ teaspoon black pepper - freshly ground for seasoning.
Instructions
- Bring a large pot of salted water to a boil and add the cauliflower florets. Cook until very tender, about 10 to 12 minutes. Drain well and let steam dry for a minute or two.
- Transfer the cooked cauliflower to a food processor or large mixing bowl if using a hand masher. Add the cream cheese, butter, and warmed milk or cream. Blend or mash until smooth and creamy but still slightly textured.
- Stir in the chopped chives, salt, and pepper. Taste and adjust the seasoning if needed.
- Serve immediately for best texture, or cover and refrigerate. When reheating, stir gently to refresh the flavors and texture.
This creamy mashed cauliflower is a delicious alternative side that's both comforting and lighter on the plate.
6. Buttery Garlic Green Beans Almondine

Green beans almondine is a French bistro classic that takes under 15 minutes from start to finish. Blanching the beans first in salted boiling water for 3 minutes sets their bright green color and snappy texture before they go into the butter and garlic.
Toasted slivered almonds go in right at the end so they stay crunchy rather than absorbing butter and softening. If you need a fast weeknight option, check out these quick microwave sides for last-minute meals to round out your rotation.
Why This Recipe Works
The blanch-then-sauté method gives you control over texture , you can stop the beans exactly where you want them before the butter goes in.
- Convenience: Ready in about 15 minutes with a handful of ingredients and one pot plus one pan.
- Flavor balance: Nutty browned butter, pungent garlic, and toasted almonds layer on top of the fresh green bean flavor without masking it.
- Texture: Crisp-tender beans with a satisfying crunch from the almonds make every bite interesting.
- Appeal: Elegant enough for a dinner party, simple enough for a Tuesday night.
Ingredient Swap Ideas
Swapping ingredients can help adjust this recipe to different dietary needs or personal tastes while preserving its intent. Here are a few practical substitutions:
- Butter - Use olive oil or avocado oil for a dairy-free version with a lighter taste.
- Green Beans - Substitute with asparagus or snap peas to vary the vegetable base.
- Almonds - Use chopped pecans or walnuts if preferred or for a different nutty flavor.
- Garlic - Replace with shallots or green onions if you want a milder aromatic note.
Ingredients
- 1 pound fresh green beans trimmed and washed.
- 3 tablespoons unsalted butter for a rich, creamy base.
- 3 cloves garlic minced to add fragrant flavor.
- ⅓ cup sliced almonds toasted for crunch and nuttiness.
- ½ teaspoon salt to season the beans.
- ¼ teaspoon black pepper freshly ground for subtle heat.
- 1 tablespoon fresh lemon juice (optional) for a bright finish.
Instructions
- Bring a large pot of salted water to a boil. Add the green beans and blanch for 2 to 3 minutes until bright green and crisp-tender. Drain and immediately plunge into ice water to stop cooking. Drain again and set aside.
- In a large skillet, melt the butter over medium heat. Stir in the minced garlic and cook until fragrant, about 1 minute, making sure not to brown the garlic.
- Add the drained green beans to the skillet and toss gently to coat in the garlic butter. Cook for 2 to 3 minutes, warming the beans and allowing them to absorb the flavor.
- Stir in the toasted almonds, salt, and pepper. Toss everything together carefully and cook for another minute just to combine the flavors.
- Remove from heat and, if desired, drizzle with fresh lemon juice to brighten the dish. Serve immediately as a flavorful side.
This simple yet elegant green bean recipe brightens your plate with a buttery sauce and crunchy nuts, making it a versatile side for many meals.
7. Wild Rice & Mushroom Pilaf
Wild rice takes longer to cook than white rice , typically 45 to 50 minutes , which makes it a natural candidate for batch cooking. Its chewy texture holds up well after refrigeration and reheating, unlike softer grains that turn mushy after a day.
Sautéed mushrooms and shallots add earthy depth to the pilaf, while a handful of fresh parsley stirred in just before serving keeps the flavor bright.
This dish works beautifully as a make-ahead base and is worth pairing alongside ideas from Mediterranean-style vegetable sides for a balanced spread.
Why This Recipe Works
Wild rice is one of the few grains that actually improves after sitting in the fridge overnight , the flavors meld and the texture firms up perfectly for reheating.
- Convenience: Cooks in one pot with pantry staples, and the rice can be made days ahead and stored without quality loss.
- Flavor balance: Earthy mushrooms and wild rice get brightness from shallots and fresh herbs, creating real depth.
- Texture: The chewy wild rice contrasts with tender mushrooms for an engaging, satisfying bite.
- Appeal: Naturally vegetarian and pairs with roasted chicken, lamb, or served as a main with a fried egg on top.
Ingredient Swap Ideas
Swapping ingredients can help tailor this pilaf to fit dietary preferences and the ingredients you have on hand without losing its core character.
- Wild rice - Substitute with a mix of brown rice and quinoa for a similar texture.
- Mushrooms - Use cremini, button mushrooms, or a wild mushroom blend depending on availability.
- Fresh parsley - Swap with fresh thyme or chopped green onions for a different bright finish.
- Shallots - Replace with finely chopped yellow onion or leeks for a milder onion flavor.
Ingredients
- 1 cup wild rice blend, rinsed
- 2 ½ cups vegetable broth or chicken broth
- 2 tablespoons olive oil
- 1 pound mushrooms, sliced (such as cremini or button)
- 2 shallots, finely chopped
- 2 cloves garlic, minced
- ¼ teaspoon salt, plus more to taste
- ¼ teaspoon black pepper, plus more to taste
- 2 tablespoons fresh parsley, chopped
Instructions
- In a medium saucepan, bring the broth to a boil. Add the wild rice, reduce heat to low, cover, and simmer for about 45 minutes or until the rice is tender and liquid is absorbed. Remove from heat and let it sit covered.
- While the rice cooks, heat olive oil in a large skillet over medium heat. Add the sliced mushrooms and cook, stirring occasionally, until they release their moisture and become golden brown, about 8 to 10 minutes.
- Add the chopped shallots and minced garlic to the mushrooms. Cook for another 2 to 3 minutes until the shallots soften and the garlic is fragrant, stirring frequently to avoid burning.
- Fluff the cooked rice with a fork and add it to the skillet with the mushroom mixture. Season with salt and pepper, then stir well to combine all ingredients evenly.
- Remove from heat, stir in chopped parsley, and adjust seasoning if needed. Serve warm as a side dish or a light meal.
8. Quinoa Salad with Chickpeas & Bell Peppers

Quinoa is a complete protein, containing all nine essential amino acids, which makes this salad a genuinely filling option whether served warm or at room temperature.
Paired with canned chickpeas (drained and rinsed), the protein content per serving climbs high enough to anchor a light meal on its own.
The lemon-garlic vinaigrette is the element that keeps this dish from feeling heavy , its acidity lifts the earthy quinoa and chickpeas and keeps bell peppers tasting fresh even after two days in the fridge.
For more plant-based sides in this vein, see delicious lentil side dishes that reheat just as well.
Why This Recipe Works
Quinoa cooks in 15 minutes and doubles in volume, so a single cup of dry quinoa produces enough salad for four to five servings.
- Convenience: Quinoa cooks fast and holds well refrigerated for up to 5 days without going soggy.
- Flavor balance: Lemon-garlic dressing adds acidity that brightens the earthy quinoa and creamy chickpeas.
- Texture: Fluffy quinoa and soft chickpeas contrast with crisp, juicy bell peppers for a layered bite.
- Appeal: Naturally gluten-free and vegetarian, works as a side or a packed lunch on its own.
Ingredient Swap Ideas
Swapping ingredients here can help tailor the salad for different textures or dietary needs without losing its essence.
- Chickpeas - Substitute with black beans or white beans for a different flavor.
- Bell peppers - Use chopped cucumber or cherry tomatoes if you prefer milder, juicier vegetables.
- Quinoa - Try couscous or bulgur wheat as alternatives for a similar grain base.
- Lemon juice - Replace with lime juice or apple cider vinegar for a different acidic note.
Ingredients
- 1 cup quinoa - rinsed well under cold water to remove bitterness.
- 1 ½ cups water - for cooking the quinoa.
- 1 can (15 ounces) chickpeas - drained and rinsed thoroughly.
- 1 large red bell pepper - diced into bite-sized pieces.
- 1 large yellow bell pepper - diced into bite-sized pieces.
- 2 tablespoons olive oil - extra-virgin for best flavor.
- Juice of 1 lemon - about 2 tablespoons fresh lemon juice.
- 2 cloves garlic - finely minced for the dressing.
- Salt - to taste, approximately ½ teaspoon.
- Freshly ground black pepper - about ¼ teaspoon.
- 2 tablespoons fresh parsley - chopped, optional for garnish.
Instructions
- In a medium saucepan, combine the rinsed quinoa and water. Bring to a boil, then reduce heat to low, cover, and simmer for 15 minutes or until the water is absorbed and quinoa is tender. Remove from heat and fluff with a fork. Let it cool slightly.
- In a large bowl, mix the cooked quinoa with drained chickpeas, diced red and yellow bell peppers. Stir gently to combine.
- In a small bowl, whisk together olive oil, fresh lemon juice, minced garlic, salt, and pepper until well blended.
- Pour the dressing over the quinoa mixture and toss to evenly coat all ingredients. Adjust seasoning with additional salt or lemon juice if needed.
- Garnish with chopped parsley before serving. This salad can be served warm or at room temperature, making it a versatile option for any meal.
9. Brown Rice Pilaf with Herbs & Pine Nuts

Brown rice has a nutty, slightly chewy character that white rice simply cannot match, and it holds its structure beautifully when reheated with a splash of water or broth.
Toasting the rice in a dry pan for 2 to 3 minutes before adding liquid deepens that nuttiness significantly.
Pine nuts go into a dry skillet until golden, which takes about 3 minutes and transforms them from mild to rich and toasty. Fresh parsley and lemon zest stirred through at the end make this pilaf taste considerably brighter than its humble ingredients suggest.
Why This Recipe Works
The dry-toasting step at the start is what separates this pilaf from plain brown rice , it adds a roasted depth that carries through reheating.
- Convenience: Brown rice can be cooked in a large batch and refrigerated for up to 5 days, making this pilaf ready in minutes.
- Flavor balance: Earthy rice, fresh herbs, and toasty pine nuts create three distinct flavor layers that work together cleanly.
- Texture: Slightly chewy rice against crunchy pine nuts gives every spoonful a satisfying contrast.
- Appeal: Versatile enough to sit beside fish, chicken, roasted lamb, or a simple green salad.
Ingredient Swap Ideas
Adjusting ingredients can tailor this pilaf to different dietary preferences or ingredient availability without losing its core flavor.
- Brown rice can be substituted with quinoa or farro for a different but equally hearty grain option.
- Pine nuts can be swapped with toasted almonds or walnuts for a more affordable or allergy-friendly nut choice.
- Fresh herbs like parsley or cilantro work well if you want to try new flavors.
- Vegetable broth can replace chicken broth to make the dish vegetarian or vegan.
Ingredients
- 1 cup brown rice - rinsed and drained.
- 2 tablespoons olive oil - for toasting and sautéing.
- 1 small onion - finely chopped.
- 2 garlic cloves - minced.
- 2 ½ cups chicken or vegetable broth - for cooking the rice.
- ¼ cup pine nuts - toasted lightly for crunch.
- 2 tablespoons fresh parsley - chopped.
- 1 tablespoon fresh thyme leaves - chopped.
- Salt - to taste.
- Black pepper - freshly ground, to taste.
Instructions
- Heat olive oil in a medium saucepan over medium heat. Add the chopped onion and cook for about 5 minutes until softened but not browned.
- Stir in the minced garlic and cook for 1 more minute until fragrant.
- Add the rinsed brown rice to the pan, stirring well to coat the grains with the oil and onion mixture. Toast the rice for 2 to 3 minutes, stirring frequently.
- Pour in the broth, increase heat to bring to a boil, then reduce to a simmer. Cover and cook for 40 to 45 minutes, or until rice is tender and liquid is absorbed.
- Meanwhile, toast the pine nuts in a dry skillet over medium heat for 3 to 5 minutes until golden, stirring often to prevent burning.
- Once the rice is cooked, fluff it with a fork and stir in the toasted pine nuts, fresh parsley, thyme, salt, and pepper. Adjust seasoning to your preference.
- Serve warm as a side dish to complement your main course.
10. Mediterranean Couscous with Feta & Olives

Couscous is technically pasta, and it "cooks" by simply absorbing boiling water or broth , 10 minutes covered off the heat is all it needs. That speed makes it one of the fastest grain-based sides in any meal prep rotation.
Salty feta, briny olives, and lemon zest go in after the couscous has cooled slightly, which keeps the cheese from melting into the grains and losing its texture.
For even more ideas in this flavor profile, see what vibrant Mediterranean sides can add to your weekly menu.
Use hot chicken or vegetable broth instead of water to cook the couscous. It absorbs directly into the grain and adds flavor without any extra seasoning steps.
Why This Recipe Works
Couscous absorbs dressing and seasoning over time, so this dish genuinely tastes better on day two than it does freshly made.
- Convenience: Ready in under 15 minutes with zero active cooking , just boiling liquid and a covered bowl.
- Flavor balance: Tangy lemon zest, creamy feta, and salty olives hit three different flavor notes in every bite.
- Texture: Fluffy couscous with crumbled cheese and plump olives creates a pleasant, varied texture throughout.
- Versatility: Works as a base for grilled chicken or shrimp, or stands alone as a quick lunch straight from the fridge.
Ingredient Swap Ideas
Adjusting ingredients can help tailor the dish to your preferences or dietary needs without losing its essence.
- Cheese alternative - Use Pecorino Romano or Asiago in place of Parmesan for a different flavor.
- Garlic substitute - Try garlic powder or roasted shallots if fresh garlic isn't on hand.
- Oil choice - Olive oil can be swapped with avocado oil or sunflower oil for a milder taste.
- Add crunch - Sprinkle toasted breadcrumbs or chopped nuts on top before serving for extra texture.
Ingredients
- 1 pound broccoli florets - Washed and cut into bite-sized pieces.
- 3 tablespoons olive oil - To coat the broccoli and infuse flavor.
- 3 cloves garlic - Minced finely to spread evenly over the broccoli.
- ⅓ cup grated Parmesan cheese - Freshly grated for best flavor.
- ½ teaspoon salt - To enhance overall taste.
- ¼ teaspoon freshly ground black pepper - For mild heat and depth.
Instructions
- Preheat your oven to 425°F (220°C). Line a baking sheet with parchment paper or foil for easy cleanup.
- In a large bowl, toss the broccoli florets with olive oil, minced garlic, salt, and black pepper until evenly coated.
- Spread the broccoli in a single layer on the prepared baking sheet, leaving space between pieces.
- Roast for 15 minutes, then remove from the oven and sprinkle Parmesan cheese evenly over the broccoli.
- Return to the oven and roast for an additional 5-7 minutes until the cheese has melted and the broccoli edges turn golden brown.
- Remove from oven and serve immediately, or let cool and store in the refrigerator for up to three days. Reheat gently to keep broccoli crisp.
11. Baked Macaroni & Cheese

The difference between a baked mac and cheese that reheats well and one that dries out comes down to the sauce ratio.
This version uses a slightly looser béchamel than you might expect, because the pasta continues absorbing sauce in the fridge , by day two, the consistency is exactly right.
Sharp cheddar is the primary cheese here, grated fresh rather than pre-shredded, since bagged shredded cheese contains anti-caking agents that prevent smooth melting.
Panko breadcrumbs on top toast to a golden crunch in the oven and stay reasonably crisp even after reheating at 350°F covered for 10 minutes, then uncovered for 5.
Why This Recipe Works
Grating the cheese yourself takes two extra minutes but produces a significantly smoother, silkier sauce , no grainy texture, no separation.
- Convenience: Pantry staples, one pot for the sauce, one baking dish , and it reheats reliably all week.
- Flavor balance: Sharp cheddar delivers real cheesy depth, balanced by a buttery panko crust that adds richness and crunch.
- Texture: Creamy pasta beneath a golden, crisp breadcrumb topping , the contrast is what makes this dish work.
- Appeal: Universally loved, feeds a crowd, and works as a main or a hearty side depending on portion size.
Ingredient Swap Ideas
Adjusting ingredients can help tailor the dish to your preferences or dietary needs without losing its essence.
- Cheese alternative - Use Pecorino Romano or Asiago in place of Parmesan for a different flavor.
- Garlic substitute - Try garlic powder or roasted shallots if fresh garlic isn't on hand.
- Oil choice - Olive oil can be swapped with avocado oil or sunflower oil for a milder taste.
- Add crunch - Sprinkle toasted breadcrumbs or chopped nuts on top before serving for extra texture.
Ingredients
- 1 pound broccoli florets - Washed and cut into bite-sized pieces.
- 3 tablespoons olive oil - To coat the broccoli and infuse flavor.
- 3 cloves garlic - Minced finely to spread evenly over the broccoli.
- ⅓ cup grated Parmesan cheese - Freshly grated for best flavor.
- ½ teaspoon salt - To enhance overall taste.
- ¼ teaspoon freshly ground black pepper - For mild heat and depth.
Instructions
- Preheat your oven to 425°F (220°C). Line a baking sheet with parchment paper or foil for easy cleanup.
- In a large bowl, toss the broccoli florets with olive oil, minced garlic, salt, and black pepper until evenly coated.
- Spread the broccoli in a single layer on the prepared baking sheet, leaving space between pieces.
- Roast for 15 minutes, then remove from the oven and sprinkle Parmesan cheese evenly over the broccoli.
- Return to the oven and roast for an additional 5-7 minutes until the cheese has melted and the broccoli edges turn golden brown.
- Remove from oven and serve immediately, or let cool and store in the refrigerator for up to three days. Reheat gently to keep broccoli crisp.
12. Cheddar Cauliflower Gratin

A gratin works here because cauliflower has enough water content to steam gently inside the sauce as it bakes, becoming completely tender without pre-cooking.
The cheddar béchamel , made with a standard butter-flour-milk base , clings to every floret and sets into a creamy, cohesive layer.
The top browns to a golden crust at 375°F, which holds up well when reheated covered with foil at the same temperature for about 12 minutes.
This is a dish that actually improves after a night in the fridge as the sauce thickens and the flavors settle.
Reheat gratins covered with foil to trap steam and prevent the sauce from drying out. Remove the foil for the last 3 minutes to re-crisp the top.
Why This Recipe Works
The béchamel base is the structural element that keeps this gratin moist through refrigeration and reheating , do not skip it for a shortcut sauce.
- Convenience: Assemble ahead and refrigerate unbaked, then pop it in the oven when needed , no extra prep on serving day.
- Flavor balance: Sharp cheddar brings tang, the béchamel adds creaminess, and the cauliflower contributes mild sweetness underneath.
- Texture: Silky, creamy interior contrasts with a lightly browned, slightly crunchy top layer.
- Make-ahead friendly: Holds moisture exceptionally well through storage , it does not dry out the way lighter casseroles can.
Ingredient Swap Ideas
Adjusting ingredients can help tailor the dish to your preferences or dietary needs without losing its essence.
- Cheese alternative - Use Pecorino Romano or Asiago in place of Parmesan for a different flavor.
- Garlic substitute - Try garlic powder or roasted shallots if fresh garlic isn't on hand.
- Oil choice - Olive oil can be swapped with avocado oil or sunflower oil for a milder taste.
- Add crunch - Sprinkle toasted breadcrumbs or chopped nuts on top before serving for extra texture.
Ingredients
- 1 pound broccoli florets - Washed and cut into bite-sized pieces.
- 3 tablespoons olive oil - To coat the broccoli and infuse flavor.
- 3 cloves garlic - Minced finely to spread evenly over the broccoli.
- ⅓ cup grated Parmesan cheese - Freshly grated for best flavor.
- ½ teaspoon salt - To enhance overall taste.
- ¼ teaspoon freshly ground black pepper - For mild heat and depth.
Instructions
- Preheat your oven to 425°F (220°C). Line a baking sheet with parchment paper or foil for easy cleanup.
- In a large bowl, toss the broccoli florets with olive oil, minced garlic, salt, and black pepper until evenly coated.
- Spread the broccoli in a single layer on the prepared baking sheet, leaving space between pieces.
- Roast for 15 minutes, then remove from the oven and sprinkle Parmesan cheese evenly over the broccoli.
- Return to the oven and roast for an additional 5-7 minutes until the cheese has melted and the broccoli edges turn golden brown.
- Remove from oven and serve immediately, or let cool and store in the refrigerator for up to three days. Reheat gently to keep broccoli crisp.
13. Spinach & Artichoke Casserole

This casserole takes the creamy, tangy profile of spinach-artichoke dip and bakes it into a proper side dish that serves eight people from a single 9x13-inch pan.
Frozen spinach works better than fresh here , squeeze it completely dry before mixing, or the excess water will thin the sauce and prevent proper setting.
Canned artichoke hearts, roughly chopped, and a blend of cream cheese, sour cream, and mozzarella create a filling that stays moist and cohesive after reheating. Reheat covered at 350°F for 15 minutes to keep the interior creamy without drying out the edges.
Why This Recipe Works
Squeezing the spinach dry is the single most important step , even a little extra moisture will make the casserole watery instead of rich and creamy.
- Convenience: Prep the entire casserole the day before and refrigerate unbaked , it goes straight into the oven from cold.
- Flavor balance: Tangy artichoke hearts cut through the richness of the cheese mixture, keeping each bite balanced.
- Texture: Smooth and creamy throughout with a lightly golden top that sets during baking.
- Appeal: Works as a vegetarian main, a party side, or a weeknight dinner with crusty bread alongside.
Ingredient Swap Ideas
Adjusting ingredients can help tailor the dish to your preferences or dietary needs without losing its essence.
- Cheese alternative - Use Pecorino Romano or Asiago in place of Parmesan for a different flavor.
- Garlic substitute - Try garlic powder or roasted shallots if fresh garlic isn't on hand.
- Oil choice - Olive oil can be swapped with avocado oil or sunflower oil for a milder taste.
- Add crunch - Sprinkle toasted breadcrumbs or chopped nuts on top before serving for extra texture.
Ingredients
- 1 pound broccoli florets - Washed and cut into bite-sized pieces.
- 3 tablespoons olive oil - To coat the broccoli and infuse flavor.
- 3 cloves garlic - Minced finely to spread evenly over the broccoli.
- ⅓ cup grated Parmesan cheese - Freshly grated for best flavor.
- ½ teaspoon salt - To enhance overall taste.
- ¼ teaspoon freshly ground black pepper - For mild heat and depth.
Instructions
- Preheat your oven to 425°F (220°C). Line a baking sheet with parchment paper or foil for easy cleanup.
- In a large bowl, toss the broccoli florets with olive oil, minced garlic, salt, and black pepper until evenly coated.
- Spread the broccoli in a single layer on the prepared baking sheet, leaving space between pieces.
- Roast for 15 minutes, then remove from the oven and sprinkle Parmesan cheese evenly over the broccoli.
- Return to the oven and roast for an additional 5-7 minutes until the cheese has melted and the broccoli edges turn golden brown.
- Remove from oven and serve immediately, or let cool and store in the refrigerator for up to three days. Reheat gently to keep broccoli crisp.
14. Sweet Potato Casserole with Pecans

Sweet potatoes get mashed with butter, a touch of cinnamon, and just enough brown sugar to amplify their natural sweetness without turning this into a dessert. The filling is smooth and velvety, which makes the crunchy pecan topping the textural centerpiece of the dish.
Toast the pecans for 5 minutes before adding them to the topping mixture , raw pecans go in soft and come out soft, while toasted ones stay snappy even after baking.
This casserole reheats at 325°F covered for 20 minutes and tastes nearly identical to day one.
Why This Recipe Works
Toasting the pecans before they go on top is a small step that makes a real difference in final texture , do not skip it.
- Convenience: Mash and assemble a day ahead, refrigerate, and bake when needed without any extra prep.
- Flavor balance: Cinnamon-spiced sweet potato filling and buttery, crunchy pecans hit warm and rich notes in every bite.
- Texture: Silky mashed base topped with crisp, toasty nuts , the contrast is what makes people go back for seconds.
- Appeal: A crowd-pleaser for family dinners and holiday meals alike, with no complicated techniques required.
Ingredient Swap Ideas
Adjusting ingredients can help tailor the dish to your preferences or dietary needs without losing its essence.
- Cheese alternative - Use Pecorino Romano or Asiago in place of Parmesan for a different flavor.
- Garlic substitute - Try garlic powder or roasted shallots if fresh garlic isn't on hand.
- Oil choice - Olive oil can be swapped with avocado oil or sunflower oil for a milder taste.
- Add crunch - Sprinkle toasted breadcrumbs or chopped nuts on top before serving for extra texture.
Ingredients
- 1 pound broccoli florets - Washed and cut into bite-sized pieces.
- 3 tablespoons olive oil - To coat the broccoli and infuse flavor.
- 3 cloves garlic - Minced finely to spread evenly over the broccoli.
- ⅓ cup grated Parmesan cheese - Freshly grated for best flavor.
- ½ teaspoon salt - To enhance overall taste.
- ¼ teaspoon freshly ground black pepper - For mild heat and depth.
Instructions
- Preheat your oven to 425°F (220°C). Line a baking sheet with parchment paper or foil for easy cleanup.
- In a large bowl, toss the broccoli florets with olive oil, minced garlic, salt, and black pepper until evenly coated.
- Spread the broccoli in a single layer on the prepared baking sheet, leaving space between pieces.
- Roast for 15 minutes, then remove from the oven and sprinkle Parmesan cheese evenly over the broccoli.
- Return to the oven and roast for an additional 5-7 minutes until the cheese has melted and the broccoli edges turn golden brown.
- Remove from oven and serve immediately, or let cool and store in the refrigerator for up to three days. Reheat gently to keep broccoli crisp.
15. Herb-Stuffing Bake

Day-old bread is non-negotiable for a good stuffing bake , fresh bread holds too much moisture and turns the interior gummy rather than fluffy.
Cube the bread and let it sit uncovered overnight, or dry it in a 300°F oven for 20 minutes if you need to speed up the process.
Chicken or vegetable broth goes in gradually until the bread is moist but not saturated, and fresh sage, thyme, and rosemary create the classic stuffing aroma. This dish reheats beautifully covered with foil at 350°F for 15 minutes, then uncovered for 5 more to re-crisp the top.
For make-ahead strategies beyond this recipe, browse make-ahead sides that are just as reliable.
Why This Recipe Works
Dried bread is the foundation , it absorbs the broth without falling apart, giving you a moist interior and a crisp top after baking.
- Convenience: Assemble the entire dish a day ahead and refrigerate , reheat on serving day with zero extra work.
- Flavor balance: Fresh sage, thyme, and rosemary add herbal brightness that balances the richness of butter-soaked bread.
- Texture: Moist, tender interior with a properly crisped top layer that holds after reheating.
- Appeal: Familiar and comforting, it pairs with roasted chicken, turkey, or pork without competing for attention.
Ingredient Swap Ideas
Adjusting ingredients can help tailor the dish to your preferences or dietary needs without losing its essence.
- Cheese alternative - Use Pecorino Romano or Asiago in place of Parmesan for a different flavor.
- Garlic substitute - Try garlic powder or roasted shallots if fresh garlic isn't on hand.
- Oil choice - Olive oil can be swapped with avocado oil or sunflower oil for a milder taste.
- Add crunch - Sprinkle toasted breadcrumbs or chopped nuts on top before serving for extra texture.
Ingredients
- 1 pound broccoli florets - Washed and cut into bite-sized pieces.
- 3 tablespoons olive oil - To coat the broccoli and infuse flavor.
- 3 cloves garlic - Minced finely to spread evenly over the broccoli.
- ⅓ cup grated Parmesan cheese - Freshly grated for best flavor.
- ½ teaspoon salt - To enhance overall taste.
- ¼ teaspoon freshly ground black pepper - For mild heat and depth.
Instructions
- Preheat your oven to 425°F (220°C). Line a baking sheet with parchment paper or foil for easy cleanup.
- In a large bowl, toss the broccoli florets with olive oil, minced garlic, salt, and black pepper until evenly coated.
- Spread the broccoli in a single layer on the prepared baking sheet, leaving space between pieces.
- Roast for 15 minutes, then remove from the oven and sprinkle Parmesan cheese evenly over the broccoli.
- Return to the oven and roast for an additional 5-7 minutes until the cheese has melted and the broccoli edges turn golden brown.
- Remove from oven and serve immediately, or let cool and store in the refrigerator for up to three days. Reheat gently to keep broccoli crisp.
16. Cheesy Polenta Squares

Polenta sets firmly when poured into a pan and refrigerated, which means you can make it two days ahead, slice it into squares, and pan-sear or bake it when ready to serve.
Pressing the squares into a hot skillet with a little olive oil gives them a golden, lightly crisp exterior that contrasts with the creamy, cheesy interior.
Parmesan and sharp cheddar stirred in while the polenta is still hot melt completely into the mixture, so every square has cheese flavor throughout , not just on top.
These reheat in a 375°F oven for 10 minutes and come out nearly as good as freshly seared.
Why This Recipe Works
Refrigerating the polenta overnight makes slicing clean and easy , trying to cut warm polenta results in uneven, soft squares that fall apart in the pan.
- Convenience: Make the polenta up to 2 days ahead, then slice and sear portions as needed throughout the week.
- Flavor balance: Parmesan and cheddar together create a sharp, savory richness that makes the polenta taste complete on its own.
- Texture: Golden, slightly crisp exterior with a soft, velvety interior , the contrast is the whole point of this dish.
- Appeal: Works as a snack, a side for braised meats, or a base for roasted vegetables and a drizzle of marinara.
Ingredient Swap Ideas
Adjusting ingredients can help tailor the dish to your preferences or dietary needs without losing its essence.
- Cheese alternative - Use Pecorino Romano or Asiago in place of Parmesan for a different flavor.
- Garlic substitute - Try garlic powder or roasted shallots if fresh garlic isn't on hand.
- Oil choice - Olive oil can be swapped with avocado oil or sunflower oil for a milder taste.
- Add crunch - Sprinkle toasted breadcrumbs or chopped nuts on top before serving for extra texture.
Ingredients
- 1 pound broccoli florets - Washed and cut into bite-sized pieces.
- 3 tablespoons olive oil - To coat the broccoli and infuse flavor.
- 3 cloves garlic - Minced finely to spread evenly over the broccoli.
- ⅓ cup grated Parmesan cheese - Freshly grated for best flavor.
- ½ teaspoon salt - To enhance overall taste.
- ¼ teaspoon freshly ground black pepper - For mild heat and depth.
Instructions
- Preheat your oven to 425°F (220°C). Line a baking sheet with parchment paper or foil for easy cleanup.
- In a large bowl, toss the broccoli florets with olive oil, minced garlic, salt, and black pepper until evenly coated.
- Spread the broccoli in a single layer on the prepared baking sheet, leaving space between pieces.
- Roast for 15 minutes, then remove from the oven and sprinkle Parmesan cheese evenly over the broccoli.
- Return to the oven and roast for an additional 5-7 minutes until the cheese has melted and the broccoli edges turn golden brown.
- Remove from oven and serve immediately, or let cool and store in the refrigerator for up to three days. Reheat gently to keep broccoli crisp.
17. Roasted Sweet Potato Wedges

Sweet potato wedges roasted at 425°F develop a caramelized exterior while staying tender all the way through.
Smoked paprika adds a warm, slightly smoky depth that plays against the potato's sweetness, and dried rosemary contributes an herbal note that keeps the flavor profile from being one-dimensional.
Cut the wedges to a consistent thickness , about 1 inch at the widest point , so they cook evenly without some burning while others remain underdone. These reheat in a 400°F oven for 8 minutes, coming out crisp on the edges again rather than soft and steamed like microwave-reheated potatoes tend to be.
For more meal prep inspiration, see these meal prep rice bowl recipes that pair well with these wedges.
Why This Recipe Works
The oven reheat method is critical for wedges , it restores the crisp edges that make this dish worth eating again the next day.
- Convenience: Simple prep with two spices and one pan , the oven handles everything after the first 5 minutes.
- Flavor balance: Smoked paprika brings warmth, rosemary adds earthiness, and both let the natural sweetness come through.
- Texture: Crispy, caramelized edges with a soft, tender interior that holds its shape after reheating.
- Appeal: Works with grilled chicken, burgers, or alongside a grain bowl for a complete meal.
Ingredient Swap Ideas
Adjusting ingredients can help tailor the dish to your preferences or dietary needs without losing its essence.
- Cheese alternative - Use Pecorino Romano or Asiago in place of Parmesan for a different flavor.
- Garlic substitute - Try garlic powder or roasted shallots if fresh garlic isn't on hand.
- Oil choice - Olive oil can be swapped with avocado oil or sunflower oil for a milder taste.
- Add crunch - Sprinkle toasted breadcrumbs or chopped nuts on top before serving for extra texture.
Ingredients
- 1 pound broccoli florets - Washed and cut into bite-sized pieces.
- 3 tablespoons olive oil - To coat the broccoli and infuse flavor.
- 3 cloves garlic - Minced finely to spread evenly over the broccoli.
- ⅓ cup grated Parmesan cheese - Freshly grated for best flavor.
- ½ teaspoon salt - To enhance overall taste.
- ¼ teaspoon freshly ground black pepper - For mild heat and depth.
Instructions
- Preheat your oven to 425°F (220°C). Line a baking sheet with parchment paper or foil for easy cleanup.
- In a large bowl, toss the broccoli florets with olive oil, minced garlic, salt, and black pepper until evenly coated.
- Spread the broccoli in a single layer on the prepared baking sheet, leaving space between pieces.
- Roast for 15 minutes, then remove from the oven and sprinkle Parmesan cheese evenly over the broccoli.
- Return to the oven and roast for an additional 5-7 minutes until the cheese has melted and the broccoli edges turn golden brown.
- Remove from oven and serve immediately, or let cool and store in the refrigerator for up to three days. Reheat gently to keep broccoli crisp.
18. Moroccan-Spiced Carrot & Cauliflower Bake

Cumin, coriander, and harissa paste coat the vegetables before roasting, building a spiced crust that concentrates as the moisture evaporates in the oven.
Harissa , a North African chili paste , adds smokiness and heat that straight spice powders cannot replicate, so it's worth keeping a jar on hand.
Roast at 400°F for 30 to 35 minutes until the edges are slightly charred and the carrots are fully tender.
This dish is one of those rare sides that tastes noticeably better the day after cooking, once the spices have had time to settle into the vegetables.
Why This Recipe Works
Harissa paste is the defining ingredient , it provides heat, smoke, and acidity in one spoonful and elevates this from a simple roasted vegetable dish to something with real personality.
- Convenience: Toss everything together in one bowl, spread on a sheet pan, and roast , hands-on time is under 10 minutes.
- Flavor balance: Warm cumin and smoky harissa work against the natural sweetness of carrots and the mild earthiness of cauliflower.
- Texture: Slightly charred, crisp edges with tender, yielding interiors , roasting at high heat handles both simultaneously.
- Rest and reheat friendly: Spice flavor deepens after resting, making next-day leftovers better than the freshly roasted batch.
Ingredient Swap Ideas
Adjusting ingredients can help tailor the dish to your preferences or dietary needs without losing its essence.
- Cheese alternative - Use Pecorino Romano or Asiago in place of Parmesan for a different flavor.
- Garlic substitute - Try garlic powder or roasted shallots if fresh garlic isn't on hand.
- Oil choice - Olive oil can be swapped with avocado oil or sunflower oil for a milder taste.
- Add crunch - Sprinkle toasted breadcrumbs or chopped nuts on top before serving for extra texture.
Ingredients
- 1 pound broccoli florets - Washed and cut into bite-sized pieces.
- 3 tablespoons olive oil - To coat the broccoli and infuse flavor.
- 3 cloves garlic - Minced finely to spread evenly over the broccoli.
- ⅓ cup grated Parmesan cheese - Freshly grated for best flavor.
- ½ teaspoon salt - To enhance overall taste.
- ¼ teaspoon freshly ground black pepper - For mild heat and depth.
Instructions
- Preheat your oven to 425°F (220°C). Line a baking sheet with parchment paper or foil for easy cleanup.
- In a large bowl, toss the broccoli florets with olive oil, minced garlic, salt, and black pepper until evenly coated.
- Spread the broccoli in a single layer on the prepared baking sheet, leaving space between pieces.
- Roast for 15 minutes, then remove from the oven and sprinkle Parmesan cheese evenly over the broccoli.
- Return to the oven and roast for an additional 5-7 minutes until the cheese has melted and the broccoli edges turn golden brown.
- Remove from oven and serve immediately, or let cool and store in the refrigerator for up to three days. Reheat gently to keep broccoli crisp.
19. Lentil Shepherd's Pie

Green or brown lentils work best here because they hold their shape after simmering, giving the filling a stew-like texture rather than a paste.
The lentil base , cooked with carrots, celery, onion, and a splash of vegetable broth , needs about 25 minutes on medium heat to develop enough depth before going into the baking dish.
Mashed sweet potatoes replace the traditional white potato topping, adding natural sweetness that balances the savory lentil filling underneath. Bake from chilled at 375°F for 25 minutes and the filling reheats evenly without drying out.
For more ideas in this category, see lentil side dishes that bring the same hearty satisfaction.
Why This Recipe Works
Green or brown lentils are the right choice here , red lentils break down completely into a puree and will not give the filling the texture it needs.
- Convenience: Prepare the filling and sweet potato mash separately, assemble, refrigerate, and bake when needed.
- Flavor balance: Savory, herby lentil filling contrasts with the gentle sweetness of the sweet potato mash on top.
- Texture: Stew-like lentil base topped with smooth, creamy mash , two distinct layers that hold well through reheating.
- Appeal: Naturally vegan, high in plant protein, and satisfying enough to work as a complete dinner.
Ingredient Swap Ideas
Adjusting ingredients can help tailor the dish to your preferences or dietary needs without losing its essence.
- Cheese alternative - Use Pecorino Romano or Asiago in place of Parmesan for a different flavor.
- Garlic substitute - Try garlic powder or roasted shallots if fresh garlic isn't on hand.
- Oil choice - Olive oil can be swapped with avocado oil or sunflower oil for a milder taste.
- Add crunch - Sprinkle toasted breadcrumbs or chopped nuts on top before serving for extra texture.
Ingredients
- 1 pound broccoli florets - Washed and cut into bite-sized pieces.
- 3 tablespoons olive oil - To coat the broccoli and infuse flavor.
- 3 cloves garlic - Minced finely to spread evenly over the broccoli.
- ⅓ cup grated Parmesan cheese - Freshly grated for best flavor.
- ½ teaspoon salt - To enhance overall taste.
- ¼ teaspoon freshly ground black pepper - For mild heat and depth.
Instructions
- Preheat your oven to 425°F (220°C). Line a baking sheet with parchment paper or foil for easy cleanup.
- In a large bowl, toss the broccoli florets with olive oil, minced garlic, salt, and black pepper until evenly coated.
- Spread the broccoli in a single layer on the prepared baking sheet, leaving space between pieces.
- Roast for 15 minutes, then remove from the oven and sprinkle Parmesan cheese evenly over the broccoli.
- Return to the oven and roast for an additional 5-7 minutes until the cheese has melted and the broccoli edges turn golden brown.
- Remove from oven and serve immediately, or let cool and store in the refrigerator for up to three days. Reheat gently to keep broccoli crisp.
20. Green Bean Casserole with Crispy Onions

This version replaces canned cream of mushroom soup with a homemade mushroom sauce built from sautéed cremini mushrooms, shallots, a roux, and whole milk , the result is noticeably richer and less salty than the canned version.
Fresh or blanched green beans go in instead of canned, which means they hold their snappy texture after baking rather than going completely soft.
Panko-fried onions, made by tossing sliced onions in seasoned flour and frying in a shallow pan, stay crispy even after the casserole bakes and reheats. Store the onions separately and add them on top when reheating to keep the crunch.
You can find more no-fuss baked sides in our guide to easy bread sides and also browse make-ahead reheatable breakfasts for a full week of batch cooking beyond dinner.
Do not add the crispy onion topping before refrigerating. Store them in a separate container and scatter them on top just before reheating , otherwise they absorb moisture overnight and turn soft.
Why This Recipe Works
Keeping the onion topping separate until reheating is the move that keeps this casserole from turning into a soggy disappointment on day two.
- Convenience: Make the mushroom sauce and fry the onions ahead separately , assemble and bake on serving day in under 40 minutes.
- Flavor balance: Savory, creamy homemade mushroom sauce pairs with the brightness of fresh green beans without overpowering either.
- Texture: Crunchy panko-fried onions on top of tender green beans in a velvety sauce , three textures in one dish.
- Appeal: A crowd-pleasing classic updated with better ingredients, suitable for weeknight dinners or holiday tables.
Ingredient Swap Ideas
Adjusting ingredients here can help suit dietary needs or simply change the flavor while keeping the dish just as enjoyable.
- Maple syrup - Substitute with honey or agave nectar for a different natural sweetness.
- Fresh thyme - Use rosemary or sage to add a varied herbal note.
- Carrots - Try parsnips or sweet potatoes for an alternate roasted side.
- Olive oil - Swap with avocado or coconut oil for a different fat source and flavor.
Ingredients
- 1 pound carrots - peeled and cut into sticks about 2-3 inches long.
- 2 tablespoons olive oil - to coat the carrots evenly.
- 2 tablespoons pure maple syrup - adds sweetness and glaze.
- 1 teaspoon fresh thyme leaves - freshly picked for best flavor.
- ½ teaspoon salt - enhances natural carrot sweetness.
- ¼ teaspoon black pepper - freshly ground for mild heat.
Instructions
- Preheat the oven to 400°F (200°C). Line a baking sheet with parchment paper or foil for easier cleanup.
- In a large bowl, toss the carrot sticks with olive oil, maple syrup, thyme leaves, salt, and black pepper until they are fully coated.
- Spread the carrots out in a single layer on the prepared baking sheet, making sure they aren't crowded.
- Roast the carrots in the oven for 25-30 minutes, flipping them halfway through to ensure even caramelization. They should be tender and lightly browned around the edges.
- Remove from the oven and serve warm. These maple glazed carrots pair well with roasted meats, grains, or as part of a veggie platter.
Frequently Asked Questions
What proteins pair well with reheated side dishes?
Roasted chicken, baked salmon, and pan-seared tofu all pair cleanly with the sides in this list , they reheat at the same 350°F temperature, so you can warm everything together in one oven.
What are the best reheatable side dishes for meal prep?
Grain-based sides like wild rice pilaf and brown rice pilaf hold up best over multiple days; casseroles like scalloped potatoes and cauliflower gratin also reheat reliably for up to 4 days refrigerated.
How long do reheated sides last in the fridge?
Most cooked side dishes stay safe and good-quality for 3 to 4 days refrigerated at or below 40°F, per USDA food safety guidelines , always use a food thermometer to confirm reheated food reaches 165°F.
Should I reheat side dishes in the microwave or oven?
Crispy or roasted sides (broccoli, sweet potato wedges, polenta squares) reheat best in a 375-400°F oven; creamy or grain-based sides reheat well in the microwave at 70% power with a splash of liquid added.
Can I freeze these side dishes for longer storage?
Casseroles like scalloped potatoes, mac and cheese, and lentil shepherd's pie freeze well for up to 3 months; roasted vegetables and grain pilafs lose texture when frozen and are best kept refrigerated only.
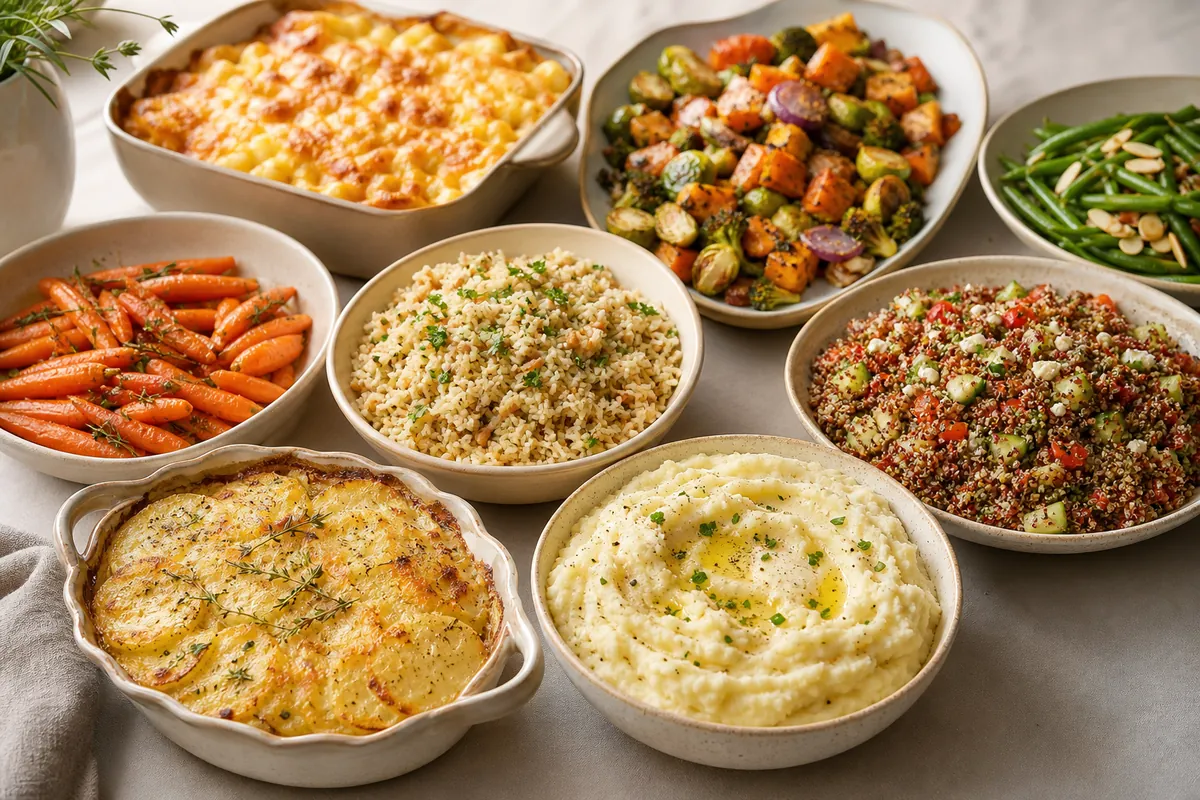
20 Side Dishes That Reheat Well for Easy Meal Prep
Ingredients
Equipment
Method
- Check what Side Dishes Reheat already brings to the plate — protein, starch, or richness — so you fill gaps instead of doubling up.
- Pick 2-3 sides from the list that cover different categories: one vegetable, one starch or bread, and one sauce or dip.
- Start the longest-cooking side first. Prep quick items like salads or slaws while the oven or stovetop works.
- Balance temperatures on the plate — pair a hot roasted vegetable with a cold slaw or chilled dip for contrast.
- Plate Side Dishes Reheat at the center with sides arranged around it. Add a drizzle of sauce or fresh herbs as a finishing touch.
Notes
Tried this recipe?
Let us know how it was!Save This for Later
Pin this 20 side dishes that reheat well for easy meal prep guide so you always have it when you need it.

Carrie is a food writer and editor with more than 15 years of experience. She has worked for some of the biggest names in the food industry, including Bon Appétit, Food & Wine, and Martha Stewart Living.
As the Editor in Chief of EpicureDelight, Carrie oversees all of the content on the site. She also manages the team of contributing writers and editors, who help to create delicious recipes, helpful tips, and informative articles that you’ll find on the site.
A native of the Chicago area, Carrie is passionate about all things food. She loves trying new restaurants and experimenting with new recipes in her kitchen. She’s also a graduate of the Culinary Institute of America, so she knows a thing or two about food!