These 20 pantry-only dinners are for nights when there is nothing in the fridge. They start from cans, dried pasta, rice, lentils and jars, with dried spices doing the seasoning.
Seventeen of them need nothing from the fridge. The other three are cacio e pepe (Pecorino Romano), hummus pasta (hummus) and miso soup (miso), and the table below marks them.
Onions and garlic count as pantry items here because USDA FoodKeeper gives each about 1 month at room temperature.
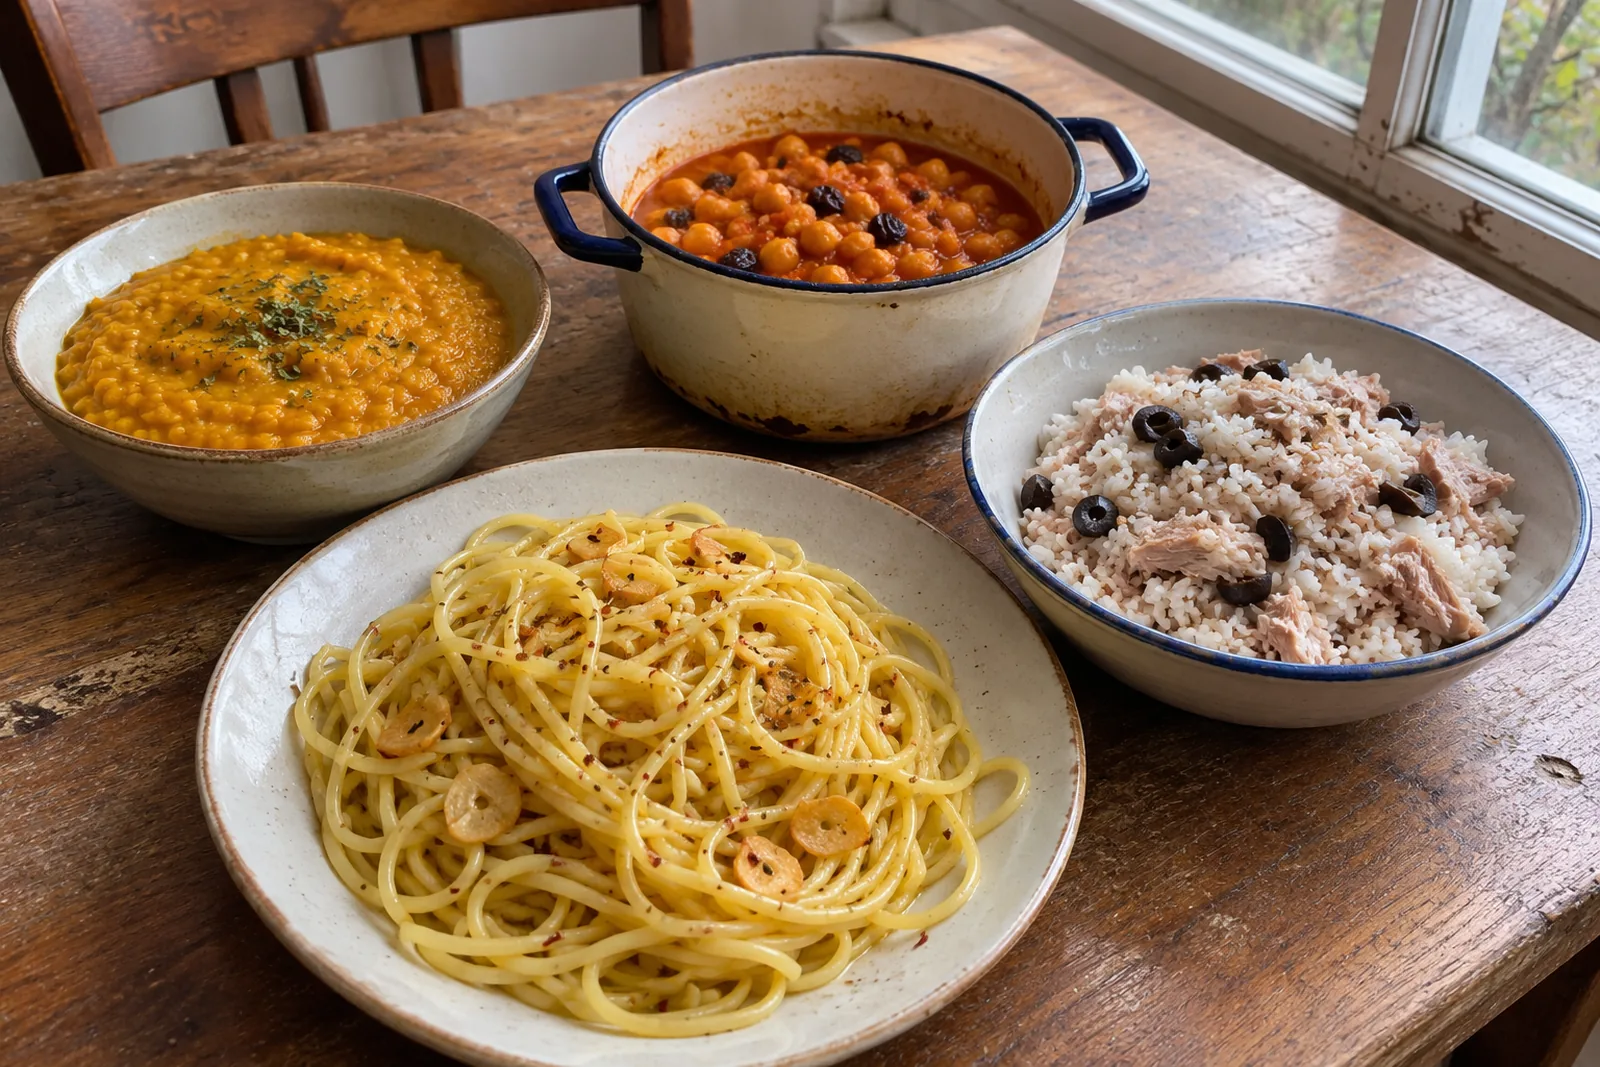
Start with One-Pot Pantry Tomato & Basil Pasta (#2) or Pasta Aglio e Olio (#1), and know that 17 of the 20 need nothing from the fridge.
Which Pantry Dinner Fits Tonight?
Each row gives the dinner's best use and whether it needs an ingredient from the fridge case. Choose by the third column when you want a certain kind of meal, and by the last one when the fridge really is empty, because 17 of the 20 rows say None.
Optional toppings such as Parmesan, sour cream or fresh herbs are not counted.
| No. | Dinner | Best for | Fridge item |
|---|---|---|---|
| 1 | Pasta Aglio e Olio | Fastest, sauce made while the pasta boils | None |
| 2 | One-Pot Pantry Tomato & Basil Pasta | One pot, nothing to drain | None |
| 3 | Cacio e Pepe | Four ingredients, creamy sauce with no cream | Pecorino Romano |
| 4 | Creamy Hummus Pasta | Creamy sauce in minutes | Hummus |
| 5 | Spicy Peanut Noodles | No-cook sauce, warm or chilled | None |
| 6 | Red Thai Curry with Canned Coconut Milk | Coconut-milk curry over rice | None |
| 7 | Three-Bean Chili | Most filling, feeds a crowd | None |
| 8 | Mexican Rice & Beans | One covered pan, rice and beans together | None |
| 9 | Spanish Migas | Using up stale bread | None |
| 10 | Pappa al Pomodoro | Stale bread and canned tomatoes | None |
| 11 | Tuscan White Bean Skillet | Five ingredients, one skillet | None |
| 12 | Red Lentil Dal | Thick dal in 20 to 25 minutes | None |
| 13 | Moroccan Chickpea Stew | Spiced stew over rice | None |
| 14 | Tuna-Stuffed Rice Bowls | Nothing cooked except the rice | None |
| 15 | Pantry Ramen Stir-Fry | Instant ramen turned into dinner | None |
| 16 | Gochujang Peanut Noodles | No-cook sauce with real heat | None |
| 17 | Coconut Chickpea Curry | Vegan curry over rice | None |
| 18 | Miso Soup with Soba Noodles | Light meal with soba and tofu | Miso paste |
| 19 | Tuna Pasta Salad with Olives | Cold dinner with no mayonnaise | None |
| 20 | Lentil & Vegetable Soup | Big pot, 35 to 40 minutes | None |
Rows 3, 4 and 18 are the only ones with a chilled ingredient, so cross those out first on a night with a truly empty fridge.
How Long Do the Pantry Staples Last?
USDA FoodKeeper lists unopened dried pasta at 2 years, canned tomatoes at 12 to 18 months, canned beans at 2 to 5 years and canned tuna at 3 years, so a cupboard stocked for these dinners holds for months.
Beyond those four, FoodKeeper gives white rice 2 years unopened, dried lentils 1 year, dried beans 1 to 2 years and olive oil 6 to 12 months unopened. Fresh ginger lasts only 2 to 5 days in the pantry, which is why the curries and noodles here use ground ginger.
An unopened jar of Thai red curry paste keeps 2 years, but once opened it needs the fridge and lasts 5 days.
Once a can is open, the leftovers go into a covered container in the fridge. FoodKeeper gives opened low-acid canned food such as beans 3 to 4 days, canned coconut milk 4 days, and opened high-acid canned food such as tomatoes 5 to 7 days.
Which Pantry Staples Cover the Most Dinners?
A small cupboard goes a long way here. The table counts how many of the 20 dinners use each staple, so you can stock the ones that do the most work first.
Olive oil is in 14 dinners and canned tomatoes in 8, which makes those two the best place to start.
| Staple | Dinners | Keeps |
|---|---|---|
| Olive oil | 14: 1-4, 7-11, 13, 14, 17, 19, 20 | 6 to 12 months unopened |
| Canned tomatoes | 8: 2, 7, 8, 10, 12, 13, 17, 20 | 12 to 18 months unopened |
| Pasta or noodles | 9: 1-5, 15, 16, 18, 19 | Dried pasta 2 years unopened |
| Onions | 7: 7, 8, 10, 12, 13, 17, 20 | About 1 month, room temperature |
| Canned beans or chickpeas | 6: 7-9, 11, 13, 17 | 2 to 5 years unopened |
| White rice | 5: 6, 8, 13, 14, 17 | 2 years unopened |
| Dried lentils | 2: 12, 20 | 1 year |
| Canned tuna | 2: 14, 19 | 3 years unopened |
| Canned coconut milk | 2: 6, 17 | Opened can: 4 days in the fridge |
On top of these staples, each dinner adds its own spices or one jar, such as red curry paste (6), gochujang (16) or instant miso (18), so check that one item before you commit to a recipe.
Peanut butter (5, 15 and 16) and soy sauce (5, 6, 15, 16 and 18) are the two jars that return most in the noodle and curry dinners, and the date on each label tells you how long yours keeps.
How Long Does Each Dinner Take at the Stove?
Dinner time depends on what the pot has to do after the prep. These are the pan and simmer times the recipes give, and four dinners need nothing more than boiling pasta, noodles or rice: 5, 14, 16 and 19.
Under 15 minutes of pan time: the Tuscan white bean skillet (11) warms its beans in 5 to 7 minutes, the ramen stir-fry (15) fries for 2 to 3 minutes after boiling, and the migas (9) take 5 to 7 minutes to crisp plus 3 to 4 for the beans.
The Thai curry (6) simmers 8 to 10 minutes, and the aglio e olio (1) is done in about 15.
15 to 25 minutes: the one-pot tomato pasta (2) cooks 12 to 15 minutes, the coconut chickpea curry (17) simmers 15 to 20, the red lentil dal (12) 20 to 25, and the Mexican rice (8) 18 to 20 plus a 5-minute rest.
The Moroccan stew (13) takes 10 minutes for the sauce and 10 more with the chickpeas.
Slow pots for a quiet evening: the three-bean chili (7) simmers 30 to 40 minutes, the lentil soup (20) 35 to 40, and the pappa al pomodoro (10) about 10 for the tomatoes and 15 to 20 with the bread. They need only an occasional stir.
With 15 minutes to spare, start with dinner 1, 11 or 15. With the whole evening, put the chili (7) or the lentil soup (20) on first and set the table while it cooks.
Simmering pots can be left alone between stirs, while the pasta dinners (1, 3 and 4) need you at the stove, because their sauce comes together in the last minute.
How Do You Keep Pantry Dinners From Tasting Flat?
Food from cans and jars can taste dull when it has only salt and canned flavor. Four habits from these recipes fix that, and each one takes a minute or less.
- Toast the spices in oil first. Ground spices such as chili powder, cumin and curry powder release more of their flavor in hot fat, which is why dinners 7, 12, 13 and 17 start with a minute in the pan.
- Add acid at the end. Vinegar, lemon powder, lemon juice and tomatoes sharpen heavy, starchy food, and dinners 5, 11, 12, 14, 16 and 19 all use one.
- Taste before you salt. Canned beans, olives, tuna, miso, soy sauce and broth already carry salt, and draining and rinsing canned beans washes some of it away.
- Finish with something crisp or fresh. Toasted sesame seeds (5 and 16), crushed peanuts (15), crisp bread crumbs (9) or a sprinkle of parsley give soft dishes a contrast.
None of these steps needs a fridge, only jars, bottles and a few minutes at the stove. Try them in order on the dinner you cook first, and you will taste which one the pot was missing.
1. Pasta Aglio e Olio

Spaghetti, garlic, olive oil and red pepper flakes are the whole sauce, so this is the dinner that asks the least of the cupboard. The garlic cooks in the oil for 2 to 3 minutes, and a half cup of starchy pasta water then turns that oil into a glossy coating.
Aglio e olio is a classic Italian cupboard dinner made of pasta, garlic, oil and chili. The sauce tastes of sweet, toasted garlic with a clean, peppery heat.
The oil should coat the noodles without pooling in the bowl, and that is the job of the pasta water.
Gluten-free spaghetti keeps it gluten-free, and a pinch of dried parsley or basil replaces the fresh parsley.
Slice the garlic thin and even so every piece cooks at the same speed. Keep the heat at medium, because garlic goes from golden to bitter in seconds, and lift the pan off the burner for a moment if it moves too fast.
Six cloves sounds like a lot, but gentle cooking makes them mellow and sweet.
Ingredients
- 12 ounces spaghetti
- ⅓ cup extra-virgin olive oil
- 6 garlic cloves, thinly sliced
- 1 teaspoon red pepper flakes
- Salt, for the pasta water and to taste
- Freshly ground black pepper, to taste (optional)
- ¼ cup fresh parsley, chopped (optional garnish)
- Grated Parmesan cheese (optional)
Instructions
- Boil the pasta. Bring a large pot of salted water to a boil, cook the spaghetti until al dente, reserve about 1 cup of the pasta water, then drain.
- Warm the garlic. While the pasta cooks, heat the olive oil in a large skillet over medium heat and cook the sliced garlic for 2 to 3 minutes, until fragrant and lightly golden.
- Add the pepper flakes. Stir in the red pepper flakes and cook for 30 seconds.
- Toss with pasta water. Add the drained pasta and about ½ cup of the reserved water, toss well, and add more water as needed until the sauce is smooth and silky.
- Season and serve. Add salt and black pepper to taste, take the pan off the heat, toss in the parsley, and serve right away with Parmesan if you like.
Leftover aglio e olio is good the next day, cold or reheated in a skillet with a splash of water, because the oil firms up in the fridge.
Cooked pasta keeps 3 to 5 days. Add a can of white beans or tuna to turn the pot into a bigger dinner without leaving the cupboard.
2. One-Pot Pantry Tomato & Basil Pasta
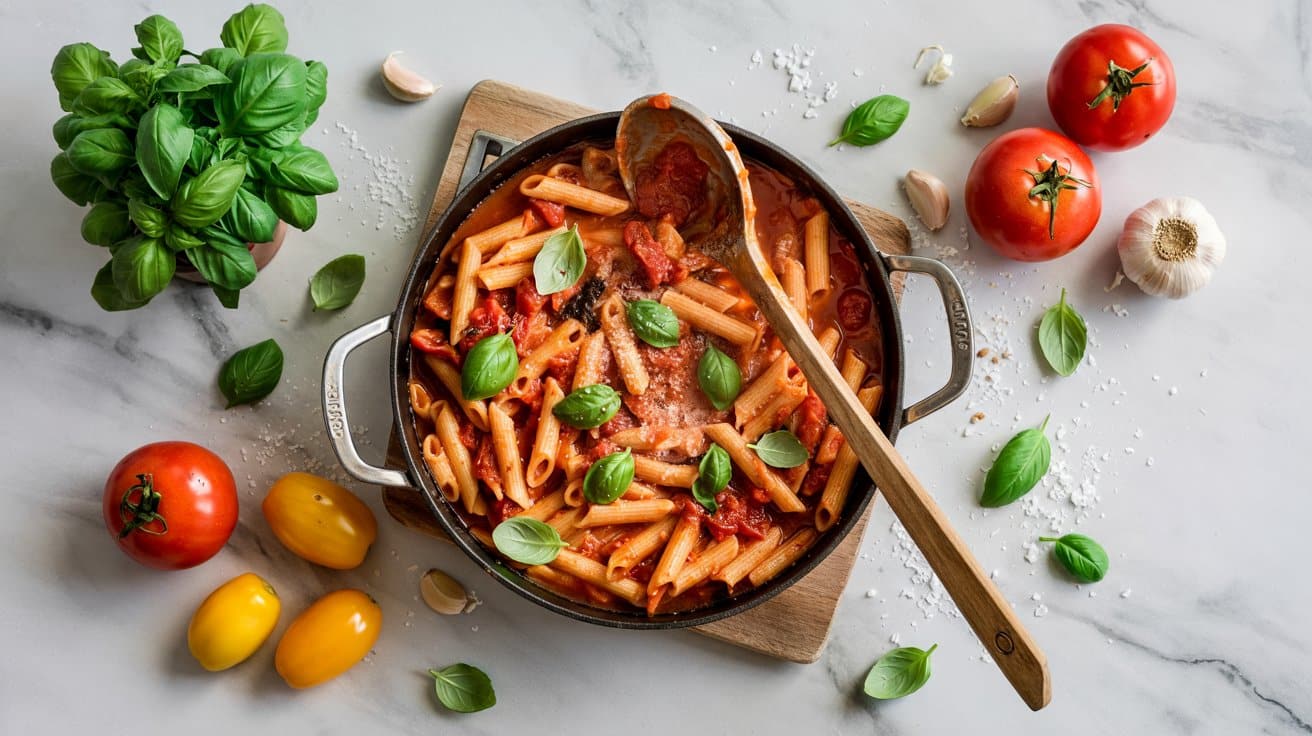
Dried pasta cooks straight in canned crushed tomatoes and water, so the cooking liquid becomes the sauce and nothing gets drained. Garlic powder and dried basil replace the fresh garlic and basil a tomato sauce usually calls for.
Stir often, because the starch settles and the pasta sticks to the bottom of the pot, and add a splash of water if it looks dry before the pasta is tender.
Because the pasta cooks in the tomatoes, the starch it releases thickens the sauce while the pasta takes up the tomato flavor as it softens. The result is a thick sauce that clings to every piece.
Dried basil and garlic powder give it the familiar red-sauce smell.
A drained can of beans adds protein, and nutritional yeast replaces the Parmesan for a dairy-free bowl.
Short, sturdy shapes such as penne, rotini and elbows work best, because they cook evenly in a small amount of liquid. Spaghetti is harder to stir in a crowded pot and tends to clump.
A wide, deep skillet gives the sauce room to reduce.
The one-pot pasta is mild, with no chili in the pot and only ¼ teaspoon of black pepper, so it suits a table with children.
Ingredients
- 8 ounces dried pasta, such as penne, rotini or elbow macaroni
- 1 (28-ounce) can crushed tomatoes
- 2 ½ cups water
- 1 teaspoon garlic powder
- 1 teaspoon dried basil
- ½ teaspoon salt
- ¼ teaspoon black pepper
- 2 tablespoons olive oil
- Grated Parmesan cheese, for serving (optional)
Instructions
- Combine everything. Put the crushed tomatoes, water, dried pasta, garlic powder, basil, salt, pepper and olive oil in a large pot or deep skillet and stir.
- Boil, then simmer. Bring the mixture to a boil over medium-high heat, then reduce to medium-low and simmer uncovered, stirring often.
- Cook until thick. Cook for 12 to 15 minutes, until the pasta is tender and the liquid has reduced to a thick sauce.
- Rest the pot. Take it off the heat and let it stand for a couple of minutes, then stir well.
- Serve hot. Top with grated Parmesan if you like.
Eight ounces of dried pasta makes about 4 servings at 2 ounces each. Leftovers thicken in the fridge, so loosen them with a splash of water when you reheat them.
FoodKeeper gives cooked pasta 3 to 5 days in the fridge.
3. Cacio e Pepe
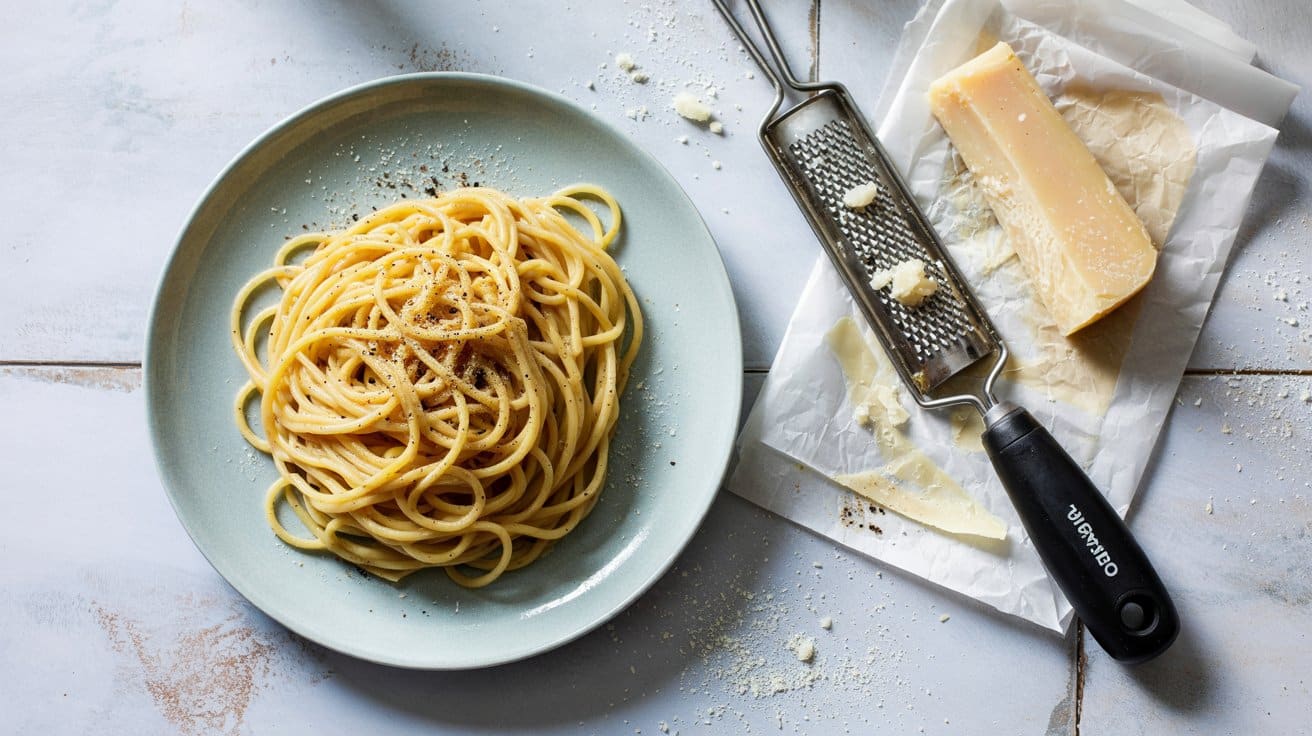
Pasta, Pecorino Romano, black pepper and olive oil make a creamy sauce with no cream, and the cheese goes in off the heat. The pepper toasts in the oil first, which gives the sauce its warmth, and the starchy pasta water melts the cheese into a coating.
Pecorino is a hard cheese sold chilled, so this is the first of three recipes here that need one fridge ingredient.
The sauce is made of three things besides the pasta: cheese, pepper and starchy water. Finely grated Pecorino melts smoothly, while coarse shreds clump, so use the small holes of a box grater.
Pecorino is also saltier than Parmesan, so the pan needs little added salt.
Parmesan gives a milder sauce than Pecorino, and gluten-free spaghetti keeps the dish gluten-free.
If the sauce turns grainy, the pan was too hot when the cheese went in. Take it off the heat and add a splash of pasta water, then toss hard until it smooths out.
The pasta finishes cooking in the sauce, so pull it from the pot while it is still slightly firm.
Ingredients
- 12 ounces spaghetti or tonnarelli pasta
- 1 cup finely grated Pecorino Romano cheese
- 2 teaspoons freshly cracked black pepper
- 2 tablespoons olive oil
- 1 teaspoon salt, for the pasta water
Instructions
- Boil the pasta. Cook it in a large pot of salted water until just shy of al dente, and reserve 1 cup of the cooking water before draining.
- Toast the pepper. Warm the olive oil in a large skillet over medium heat, add the cracked pepper, and toast it for about 1 minute until fragrant.
- Add pasta water. Pour in about ½ cup of the reserved water, bring it to a simmer, and toss in the drained pasta.
- Add the cheese off the heat. Take the pan off the burner, sprinkle in the Pecorino, and toss hard, adding more pasta water until the sauce is creamy and clings to the noodles.
- Serve at once. Pass extra Pecorino and black pepper at the table.
Serve it the moment it is done, because the sauce tightens as it cools. Warm the bowls if you can, and keep the extra pasta water nearby to loosen it.
This is the dinner to cook when the fridge holds one wedge of cheese and nothing else.
4. Creamy Hummus Pasta
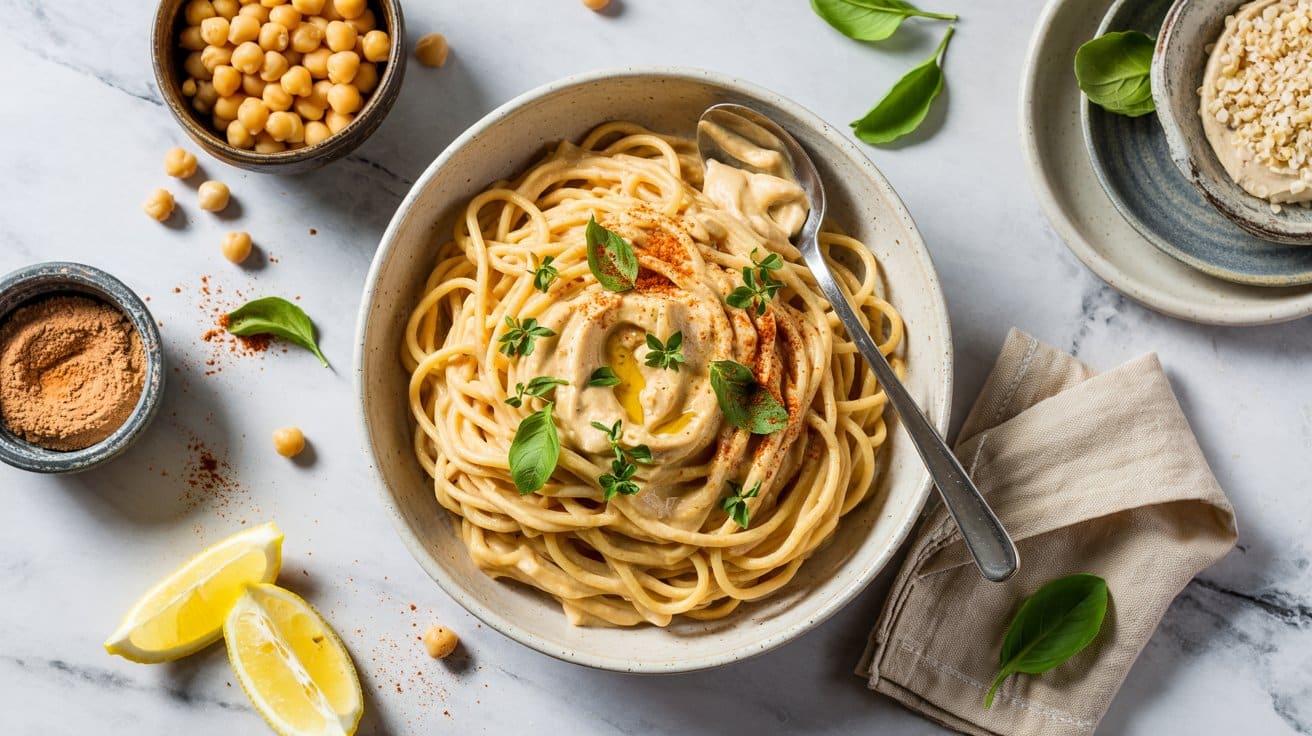
Hummus already holds chickpeas, oil and sesame, so whisked with hot pasta water it becomes a creamy sauce with no cream. Garlic, black pepper and a little lemon juice wake it up, and extra pasta water loosens it until it coats every piece.
Hummus brings chickpeas, tahini, lemon and garlic to the sauce, so the dish tastes nutty and a little tangy, with a smooth, creamy texture. The pasta water must be hot so it loosens the hummus into a sauce and leaves no clumps.
Plain hummus works best, because flavored kinds change the taste.
Hummus is sold in the refrigerated case, so this is the second recipe here that needs one chilled ingredient. With no hummus, mash a drained can of chickpeas with 1 tablespoon of tahini or peanut butter and 2 tablespoons of olive oil, then loosen it with pasta water until it coats the back of a spoon.
Chickpea pasta adds protein, and a spoonful of tahini deepens the nutty flavor if your hummus tastes mild.
Taste the hummus before you add salt, because brands differ widely in saltiness. Add pasta water a tablespoon at a time until the sauce coats the back of a spoon.
The lemon at the end brightens the heavy, nutty base.
Ingredients
- 8 ounces pasta of your choice (penne, fusilli or spaghetti)
- 1 cup hummus, smooth or creamy style
- ½ cup reserved pasta cooking water, hot
- 2 tablespoons extra-virgin olive oil
- 1 garlic clove, minced
- ¼ teaspoon salt, adjusted to the saltiness of the hummus
- Freshly ground black pepper, to taste
- 1 tablespoon lemon juice (optional)
- Chopped fresh parsley, for garnish (optional)
Instructions
- Cook the pasta. Boil it until al dente and reserve ½ cup of the cooking water before draining.
- Whisk the sauce. In a large bowl, whisk the hummus, hot pasta water, olive oil, garlic, salt and pepper until smooth.
- Toss. Add the drained pasta and toss until every piece is coated, thinning with a little more pasta water if the sauce is thick.
- Add the lemon. Stir in the lemon juice, if using, to cut the richness.
- Serve warm. Garnish with parsley if you have it.
Hummus is sold chilled, which makes it the rare fridge item in this list.
FoodKeeper gives a commercial tub 3 months unopened and 7 days once opened, so a tub bought for this dinner lasts. Hummus contains sesame, so check with guests who avoid it.
5. Spicy Peanut Noodles
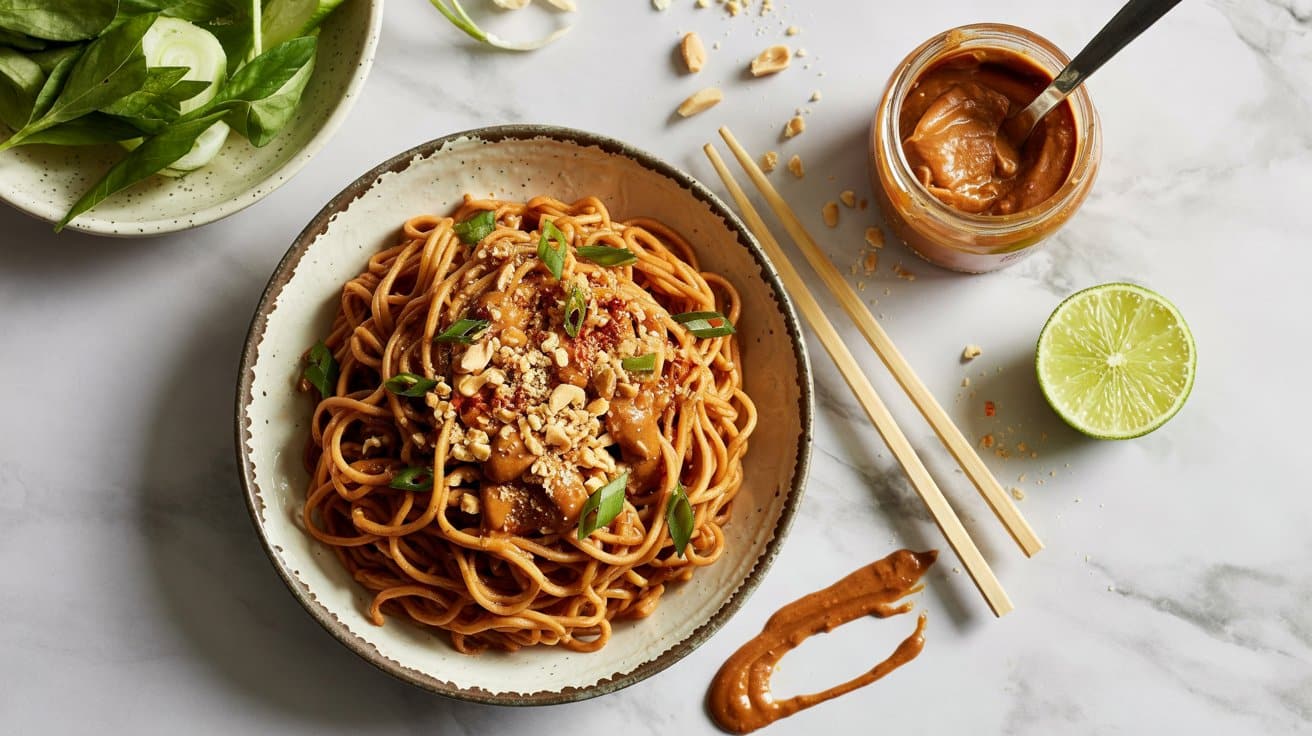
Peanut butter, soy sauce, rice vinegar, honey and chili flakes whisk into a sauce with no cooking, so the noodles are the only thing on the stove. Vinegar and honey keep the peanut butter from tasting flat, and warm water thins the sauce enough to coat spaghetti or rice noodles.
Serve it warm or chilled, and loosen it with a spoonful of warm water if it firms up.
The sauce is salty from soy sauce, sweet from honey, tangy from rice vinegar and warm from chili flakes, with peanut butter holding all of it together. Creamy peanut butter blends smoothest, and a natural one that has separated needs a good stir before measuring.
The sesame oil adds a toasted note.
Almond or cashew butter works as one of several peanut butter substitutes, and tamari with rice noodles makes the bowl gluten-free.
Rinse the cooked noodles under cold water if you plan to serve them chilled, which stops the cooking and keeps them from sticking. Warm water loosens the sauce faster than cold, so use it for the ¼ cup in the recipe.
Peanut sauce thickens as it sits, so keep a little water on hand.
Ingredients
- 8 ounces spaghetti or rice noodles
- ¼ cup creamy peanut butter
- 3 tablespoons soy sauce
- 1 tablespoon rice vinegar
- 1 tablespoon honey or maple syrup
- 1 teaspoon sesame oil
- ½ teaspoon red chili flakes, adjusted to taste
- 2 cloves garlic, minced
- ¼ cup warm water
- 2 green onions, sliced (optional)
- 1 tablespoon toasted sesame seeds (optional)
Instructions
- Cook the noodles. Boil them until al dente, drain, and put them in a large bowl.
- Whisk the sauce. In a small bowl, whisk the peanut butter, soy sauce, vinegar, honey, sesame oil, chili flakes, garlic and warm water until smooth.
- Coat the noodles. Pour the sauce over the noodles and toss, adding more water for a thinner sauce.
- Season. Stir in the green onions if using, then add soy sauce or chili flakes to taste.
- Serve. Eat warm or chilled, topped with toasted sesame seeds.
Peanuts are one of the nine major food allergens, and this dinner is built on peanut butter. Warn guests with a peanut allergy, and use sunflower seed butter if you need a nut-free bowl.
Warm or chilled, the noodles also pack well for lunch.
6. Red Thai Curry with Canned Coconut Milk
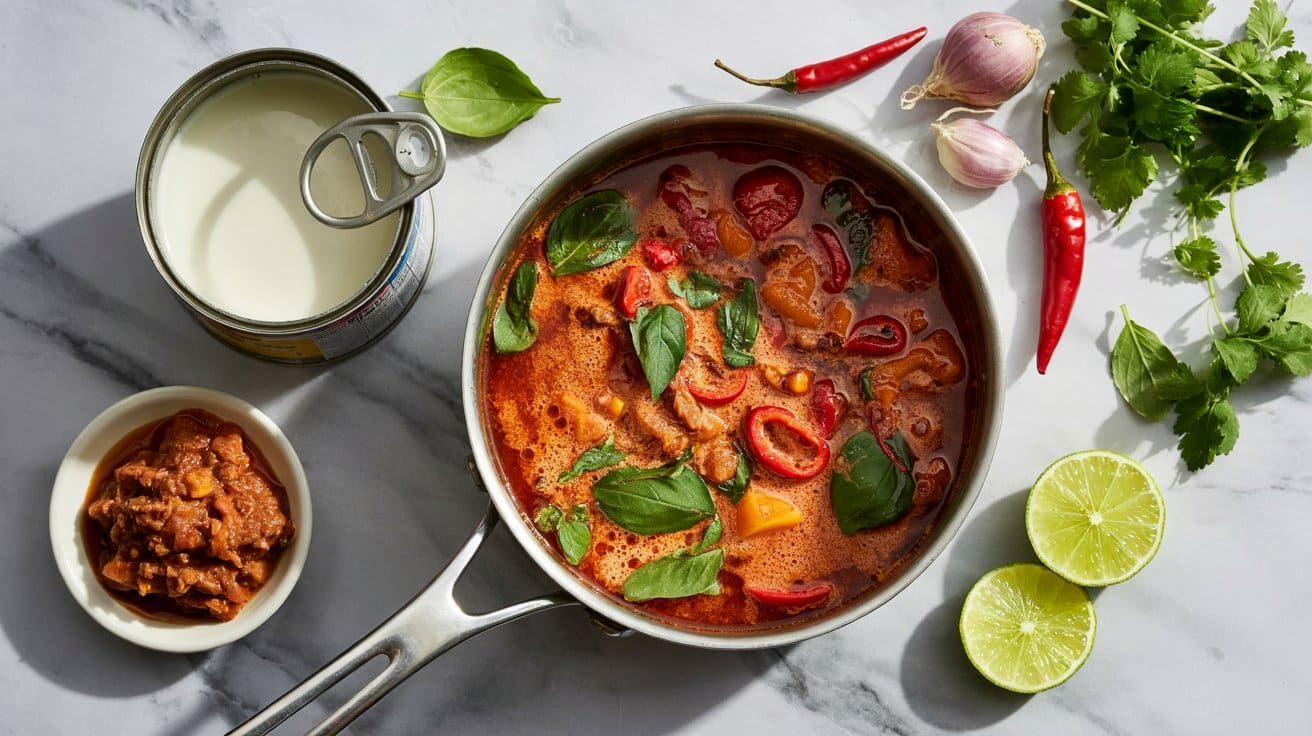
Red curry paste fried in oil for 1 to 2 minutes gives the canned coconut milk its heat and depth, and dried or frozen vegetables simmer in it until tender. Soy sauce adds salt, and brown sugar or maple syrup rounds off the spice.
Red curry paste is a blend of chilies, garlic, galangal and lemongrass, and frying it in oil first wakes up its flavor before the coconut milk goes in. The finished curry is creamy, mildly sweet and hot, with the soy sauce adding salt.
A drained can of chickpeas adds protein. Some red curry pastes contain shrimp paste, so read the label before serving this to vegetarians.
Dried mixed vegetables rehydrate in the sauce, so stir in about ½ cup of water with them and add a splash more whenever it looks dry. If you use frozen vegetables, skip the extra water, because they release their own as they thaw.
Either way, the curry should end as a pourable sauce that coats the rice.
Ingredients
- 1 tablespoon red Thai curry paste
- 1 can (13.5 ounces) coconut milk
- 1 cup dried mixed vegetables, or 2 cups frozen mixed vegetables
- 1 tablespoon vegetable oil
- 1 teaspoon soy sauce or tamari
- 1 teaspoon brown sugar or maple syrup
- 1 cup cooked jasmine rice, for serving
- Fresh cilantro or Thai basil, for garnish (optional)
Instructions
- Fry the paste. Heat the oil in a large skillet or saucepan over medium heat, add the curry paste, and cook for 1 to 2 minutes, stirring constantly, until fragrant.
- Add the coconut milk. Pour it in, stir it into the paste, and bring it to a gentle simmer.
- Simmer the vegetables. Add the dried vegetables with about ½ cup of water, or add frozen vegetables once the coconut milk is hot, and simmer for 8 to 10 minutes, until tender and the sauce thickens slightly.
- Balance the flavor. Stir in the soy sauce and sugar, then taste and adjust.
- Serve. Spoon the curry over cooked jasmine rice and add cilantro or Thai basil if you have it.
Jasmine rice is the usual partner. Stir the canned coconut milk well before opening, since the cream rises to the top of the can and the thin part settles below.
An opened can keeps 4 days in the fridge, according to FoodKeeper, and a jar of red curry paste is worth stocking.
7. Three-Bean Chili
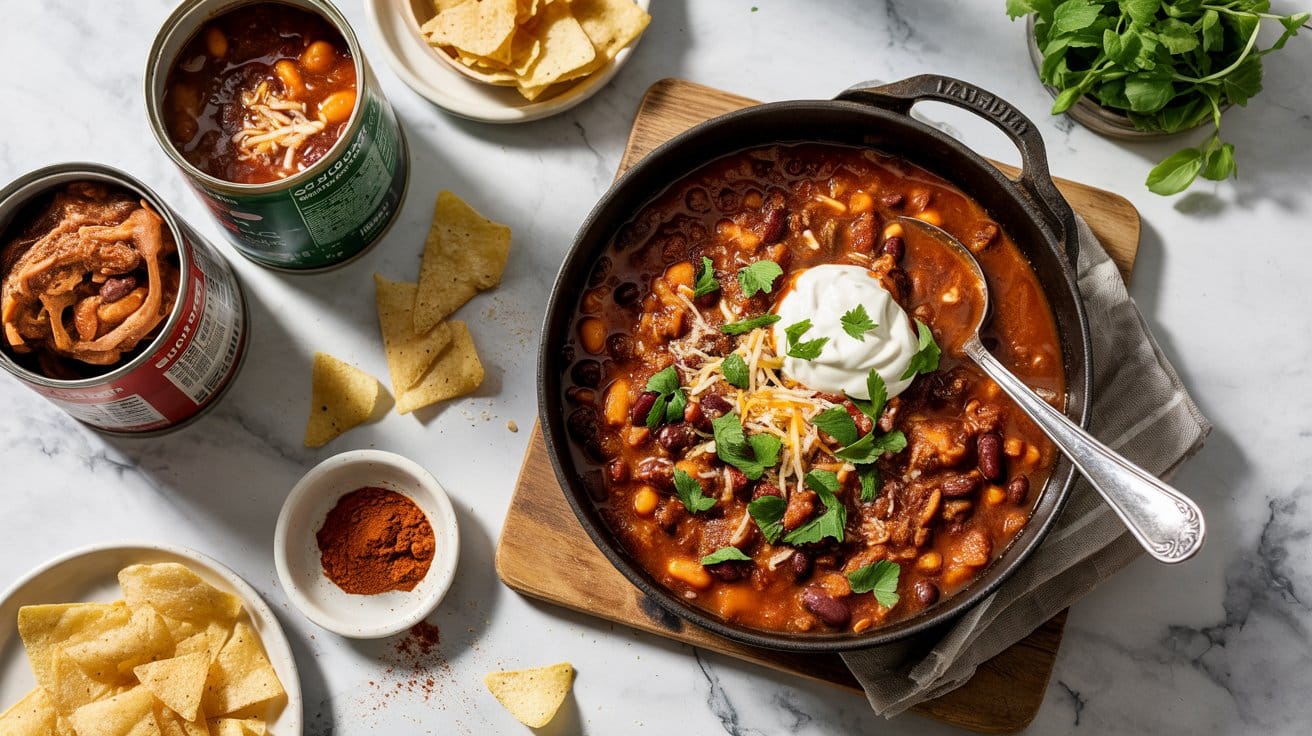
Kidney, black and pinto beans fill the pot where meat usually goes, so this chili is the most filling dinner in the list. Chili powder, cumin and smoked paprika toast with the onion for 1 minute before the tomatoes go in, and a 30 to 40 minute simmer thickens it.
Skip the bell pepper if the crisper is empty, because the beans and tomatoes carry the pot without it.
Three kinds of beans give three textures: kidney beans stay firm, black beans turn creamy, and pinto beans fall in between. Smoked paprika adds the smoky flavor that meat or bacon usually brings, so the chili tastes deep without either.
Chickpeas replace one of the beans, and fire-roasted canned tomatoes add a charred note. If the chili powder jar is empty, chili powder substitutes made from other cupboard spices fill in.
Rinsing the canned beans washes away some of the thick canning liquid and salt, so the chili tastes cleaner. Mash a scoop of beans against the side of the pot near the end if the chili is thinner than you like.
The starch from the mashed beans thickens it without flour.
As written the chili has no meat, and the optional cheese or sour cream on top are its only dairy, so leaving them off makes it vegan.
Ingredients
- 1 tablespoon olive oil
- 1 medium onion, chopped
- 3 cloves garlic, minced
- 1 bell pepper, diced (optional)
- 1 (15-ounce) can kidney beans, drained and rinsed
- 1 (15-ounce) can black beans, drained and rinsed
- 1 (15-ounce) can pinto beans, drained and rinsed
- 1 (28-ounce) can diced tomatoes
- 2 tablespoons chili powder
- 1 teaspoon ground cumin
- 1 teaspoon smoked paprika
- ½ teaspoon salt
- ¼ teaspoon black pepper
- 1 cup vegetable broth or water
- Cilantro, shredded cheese or sour cream, for serving (optional)
Instructions
- Soften the vegetables. Heat the oil in a large pot over medium heat and cook the onion for about 5 minutes. Add the garlic and bell pepper and cook 3 minutes more.
- Toast the spices. Stir in the chili powder, cumin, paprika, salt and pepper and cook for 1 minute.
- Add the liquid. Pour in the tomatoes and broth and bring to a gentle simmer.
- Simmer with the beans. Stir in all three beans, reduce the heat to low, and simmer uncovered for 30 to 40 minutes, stirring occasionally, until thick.
- Taste and serve. Adjust the seasoning and add your toppings.
A pot this size feeds a crowd, and the flavor deepens after a night in the fridge.
Serve it over rice, with tortilla chips or beside cornbread. Chili keeps 3 to 4 days in the fridge, the FoodKeeper window for soups and stews, and it freezes well, as the freezer section below explains.
8. Mexican Rice & Beans
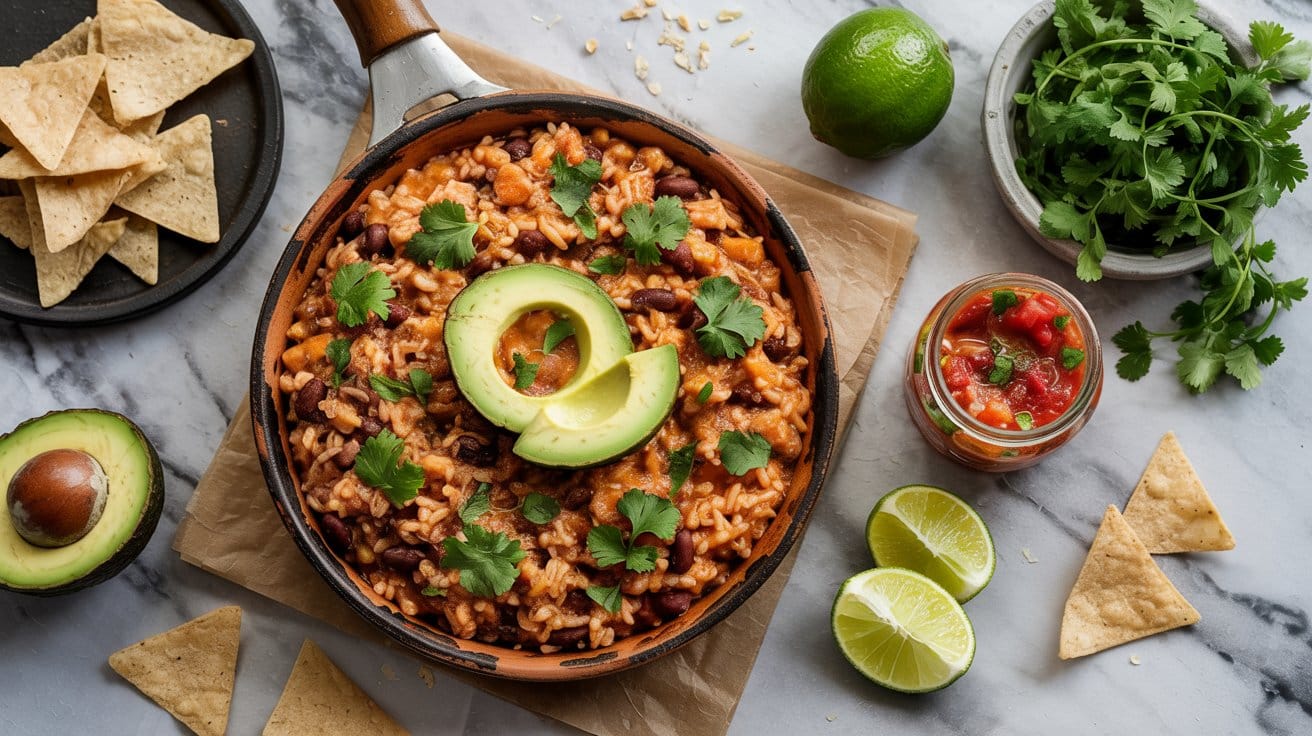
Rice toasts in oil for 2 minutes, then cooks in broth, tomatoes, black beans and taco seasoning in one covered pan, so the rice absorbs the seasoned liquid as it steams. The tomato juices count as liquid, so the pan gets 1 ½ cups of broth, and brown rice needs its own package time and water instead of the 18 to 20 minutes here.
Keep the lid on while it simmers, because lifting it lets out the steam the rice needs.
Toasting the dry rice in oil coats each grain, which helps the cooked rice stay in separate, fluffy grains instead of clumping. Taco seasoning adds chili, cumin, garlic and onion in one packet, and the tomatoes give the rice its red color and tang.
Pinto or kidney beans replace the black beans, and a milder or spicier taco seasoning changes the heat. With no packet in the cupboard, taco seasoning substitutes use spices you already own.
Rinse the rice first, as the recipe says, to wash off the loose surface starch. Do not stir once the lid is on, because stirring breaks the grains and releases starch that turns the rice sticky.
Five minutes of resting, covered, lets the last steam finish the top layer.
Ingredients
- 1 cup long-grain white rice, rinsed
- 1 tablespoon olive oil
- 1 small yellow onion, finely chopped
- 2 cloves garlic, minced
- 1 (15-ounce) can black beans, drained and rinsed
- 1 (14.5-ounce) can diced tomatoes, with their juices
- 1 packet taco seasoning
- 1 ½ cups vegetable broth
- Salt and pepper, to taste
- Chopped fresh cilantro, for garnish (optional)
Instructions
- Soften the onion. Heat the oil in a medium saucepan over medium heat and cook the onion for 3 to 4 minutes. Add the garlic and cook 1 minute more.
- Toast the rice. Add the rinsed rice and stir for 2 minutes to coat the grains in oil.
- Add the liquid. Pour in the broth, tomatoes with their juices, black beans and taco seasoning, stir, and bring to a boil.
- Cover and simmer. Reduce the heat to low, cover, and simmer for 18 to 20 minutes without lifting the lid, until the liquid is absorbed.
- Rest and fluff. Let the pan sit covered for 5 minutes, fluff with a fork, and season with salt and pepper.
Spoon the rice into tortillas with salsa, or serve it beside the chili. Cooked rice keeps 4 to 6 days in the fridge, according to FoodKeeper, but cool it quickly in a shallow container and reheat it until it is steaming hot.
9. Spanish Migas
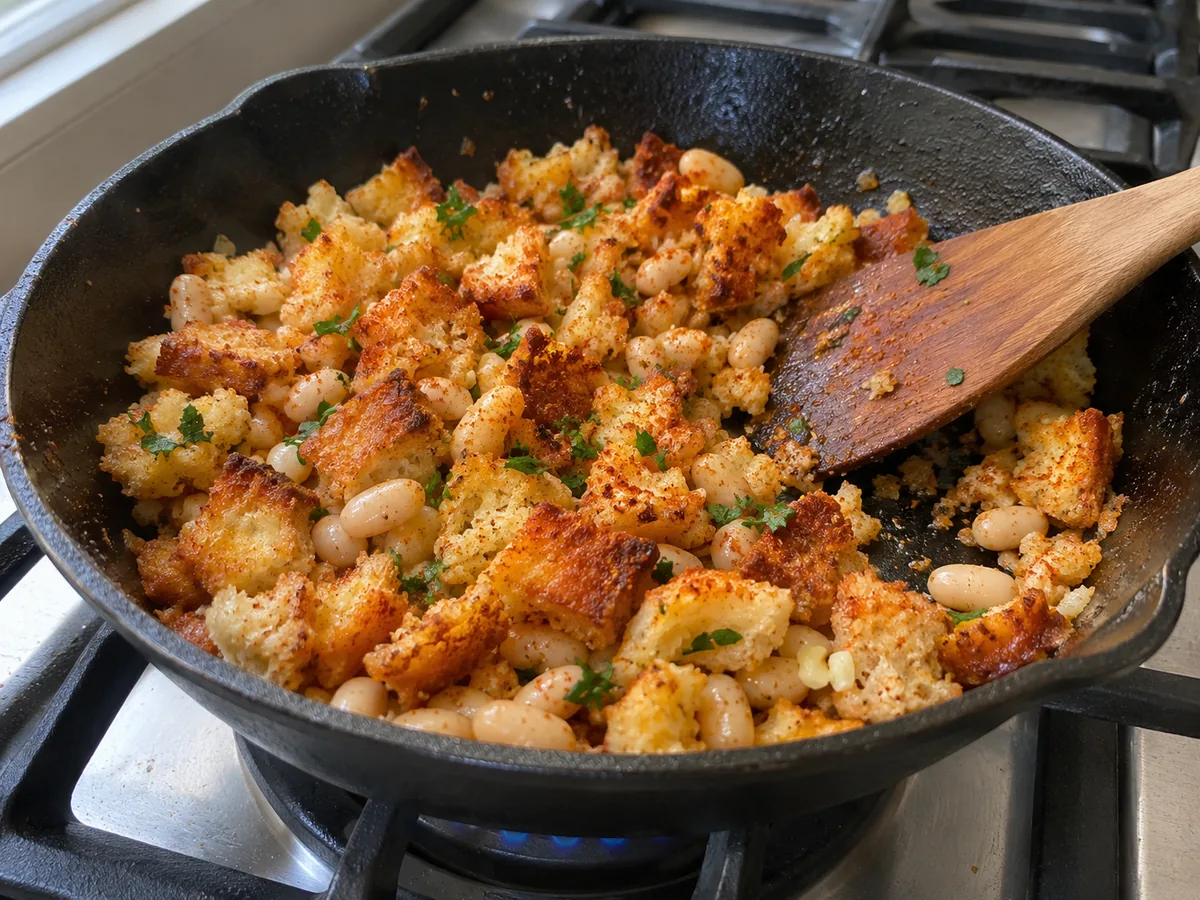
Stale bread, garlic, smoked paprika and a can of white beans cook in olive oil in one skillet, so the bread supplies the crunch and the beans supply the filling. Garlic goes in for about 1 minute and the paprika for a few seconds, because both scorch quickly in hot oil.
Migas began as a Spanish way to use up stale bread, and the pan turns it into golden, crisp crumbs. Garlic and smoked paprika flavor the oil, and the white beans add creamy bites against the crunch.
Stir the smoked paprika in quickly and add the bread right after it. Paprika that scorches turns bitter, and the whole skillet takes on that taste.
Chickpeas replace the white beans, and gluten-free bread or croutons keep the dish gluten-free.
Hard, dry bread makes the best crumbs, because soft bread absorbs the oil and turns greasy. Tear the bread into pieces about the size of a thumbnail so they crisp evenly.
If the loaf is still fresh, leave the slices out for a few hours or toast them lightly first.
Ingredients
- 4 cups stale bread crumbs or croutons, roughly broken into small pieces
- 3 tablespoons extra-virgin olive oil
- 4 cloves garlic, minced
- 1 teaspoon smoked paprika
- 1 can (15 ounces) white beans, drained and rinsed
- ½ teaspoon salt
- ¼ teaspoon black pepper
- 1 tablespoon fresh parsley, chopped (optional)
Instructions
- Warm the garlic. Heat the oil in a large skillet over medium heat and cook the garlic for about 1 minute, until fragrant and not browned.
- Add the paprika. Stir it in quickly so it releases its aroma without burning.
- Crisp the bread. Add the bread crumbs or croutons, toss them in the oil, and cook for 5 to 7 minutes, stirring often, until golden and crisp.
- Warm the beans. Fold in the white beans and cook for 3 to 4 minutes, just long enough to heat them through. Season with salt and pepper.
- Serve. Sprinkle with parsley and eat immediately.
Serve it right away, because the crumbs soften as the beans give off steam. A few drops of lemon juice or sherry vinegar at the table cut through the olive oil.
Leftover migas turn soft overnight, so cook only what you will eat.
10. Pappa al Pomodoro
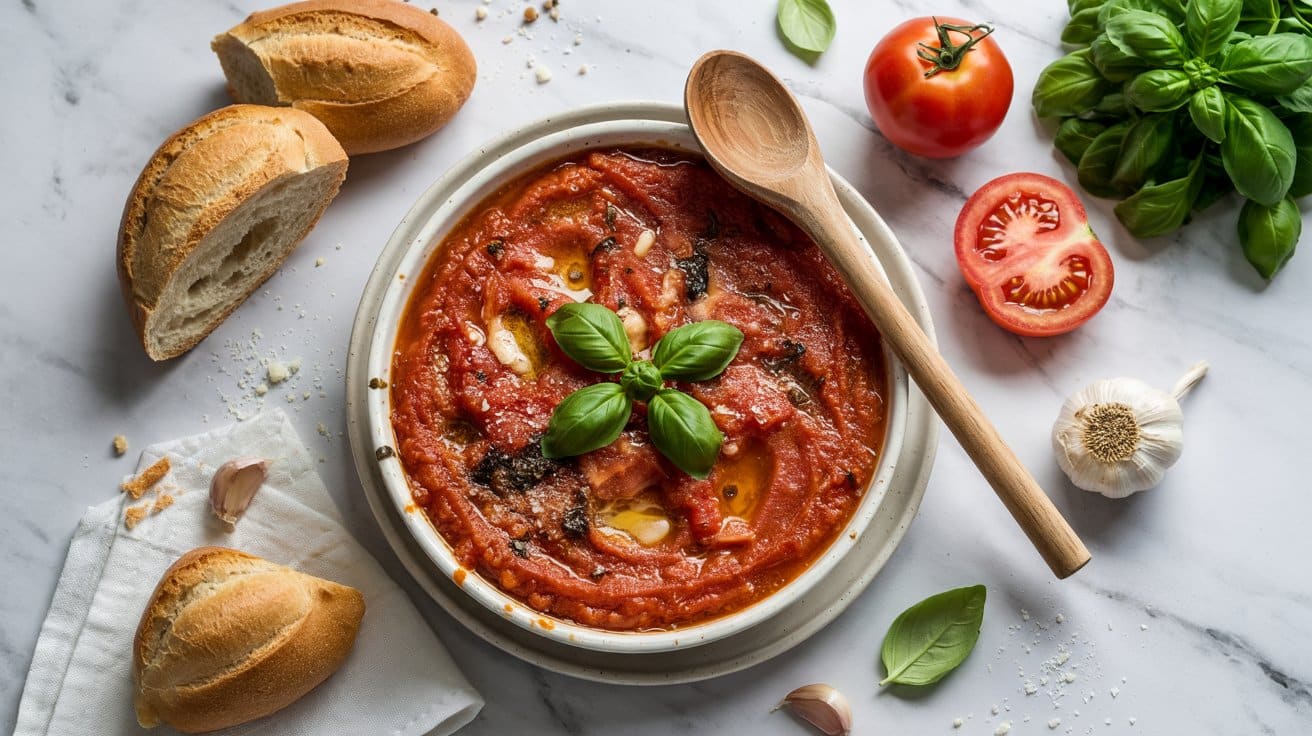
Stale bread simmers in tomatoes and broth until it breaks down into a thick, spoonable soup, which is why day-old bread suits it. Canned whole peeled tomatoes, crushed by hand, replace the fresh tomatoes of the classic version, so the pot needs nothing from the crisper.
Olive oil, onion, garlic and thyme build the base, and a drizzle of oil at the table finishes it.
Pappa al pomodoro is a Tuscan bread and tomato soup made to use up leftover bread, and its texture sits between a soup and a porridge. The bread should break down fully, so use a plain, sturdy loaf without seeds or a sweet crumb.
Gluten-free bread keeps the soup gluten-free, and vegetable broth keeps it vegetarian.
Crush the whole peeled tomatoes by hand in a bowl, or press them with a spoon, to get uneven pieces that cook down into a rustic sauce. Warm the broth before adding it, as the recipe says, so the soup keeps simmering instead of stalling.
Basil, thyme and good olive oil give it its Tuscan smell.
Ingredients
- 1 can (28 ounces) whole peeled tomatoes, crushed by hand
- 4 cups stale country bread, cut into small cubes
- 4 cups vegetable or chicken broth, warmed
- 3 cloves garlic, minced
- ¼ cup extra-virgin olive oil, plus more for drizzling
- 1 medium onion, finely chopped
- 1 tablespoon fresh thyme leaves or 1 teaspoon dried thyme
- Salt, to taste
- Freshly ground black pepper, to taste
- Fresh basil leaves, for garnish (optional)
Instructions
- Soften the onion and garlic. Heat ¼ cup of olive oil in a large pot over medium heat and cook the onion and garlic for about 4 minutes.
- Cook the tomatoes. Add the crushed tomatoes and thyme, season lightly with salt and pepper, and cook for 10 minutes, until they break down into a sauce.
- Add the bread and broth. Stir in the bread cubes and warm broth and simmer for 15 to 20 minutes, until the bread softens into a thick, porridge-like soup.
- Rest. Adjust the salt and pepper and let the soup sit off the heat for a few minutes.
- Serve. Drizzle with olive oil and add basil if you have it.
The soup thickens as it stands, so thin it with hot broth or water when you reheat it. A generous drizzle of olive oil on top finishes the dish.
It keeps 3 to 4 days in the fridge and thickens as it cools.
11. Tuscan White Bean Skillet
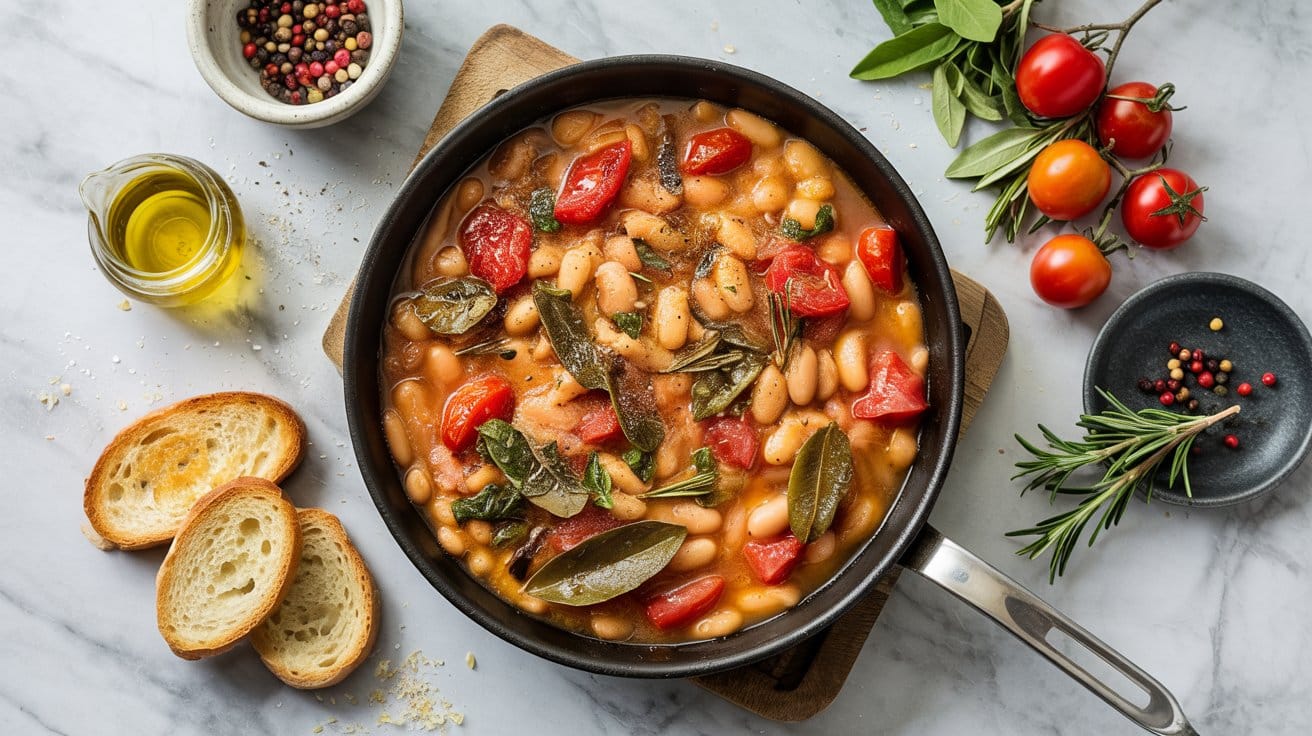
Cannellini beans warm in garlic olive oil with red pepper flakes and lemon powder, so five ingredients make a dinner in under 10 minutes of cooking. Lemon powder adds sourness without extra liquid, which keeps the beans creamy.
Bottled lemon juice added at the end can replace it, though it makes the pan wetter.
Cannellini beans are large, white and creamy inside, with a mild, nutty taste that takes up garlic and oil well. A few beans break as they warm and thicken the oil into a loose sauce.
Red pepper flakes add a gentle background heat.
Great northern or navy beans replace the cannellini beans.
Drain and rinse the beans well so the oil, not the canning liquid, carries the flavor. Let the beans warm slowly so they heat through without splitting into mush.
A splash of water loosens the pan if it dries out.
Ingredients
- 1 can (15 ounces) cannellini beans, drained and rinsed
- 3 tablespoons extra-virgin olive oil
- 2 cloves garlic, minced
- 1 teaspoon lemon powder
- ¼ teaspoon red pepper flakes
- Salt, to taste
- Fresh parsley, chopped (optional)
Instructions
- Warm the garlic. Heat the oil in a medium skillet over medium heat until shimmering, then cook the garlic for about 1 minute, until fragrant and not browned.
- Add the beans. Stir in the cannellini beans, lemon powder and red pepper flakes and cook for 5 to 7 minutes, until the beans are warm and have taken up the flavors.
- Season. Add salt to taste, and a splash of water or more olive oil if the beans look dry.
- Plate. Transfer to a serving dish and add parsley if you have it.
- Serve. Eat warm with crusty bread or a green salad.
The skillet makes a quick topping for toasted bread, or a side for roast chicken or fish. As a main dish it is light, so serve it with crusty bread, as the recipe suggests, or over rice or pasta.
Leftover beans keep 3 to 4 days in a covered container in the fridge.
12. Red Lentil Dal
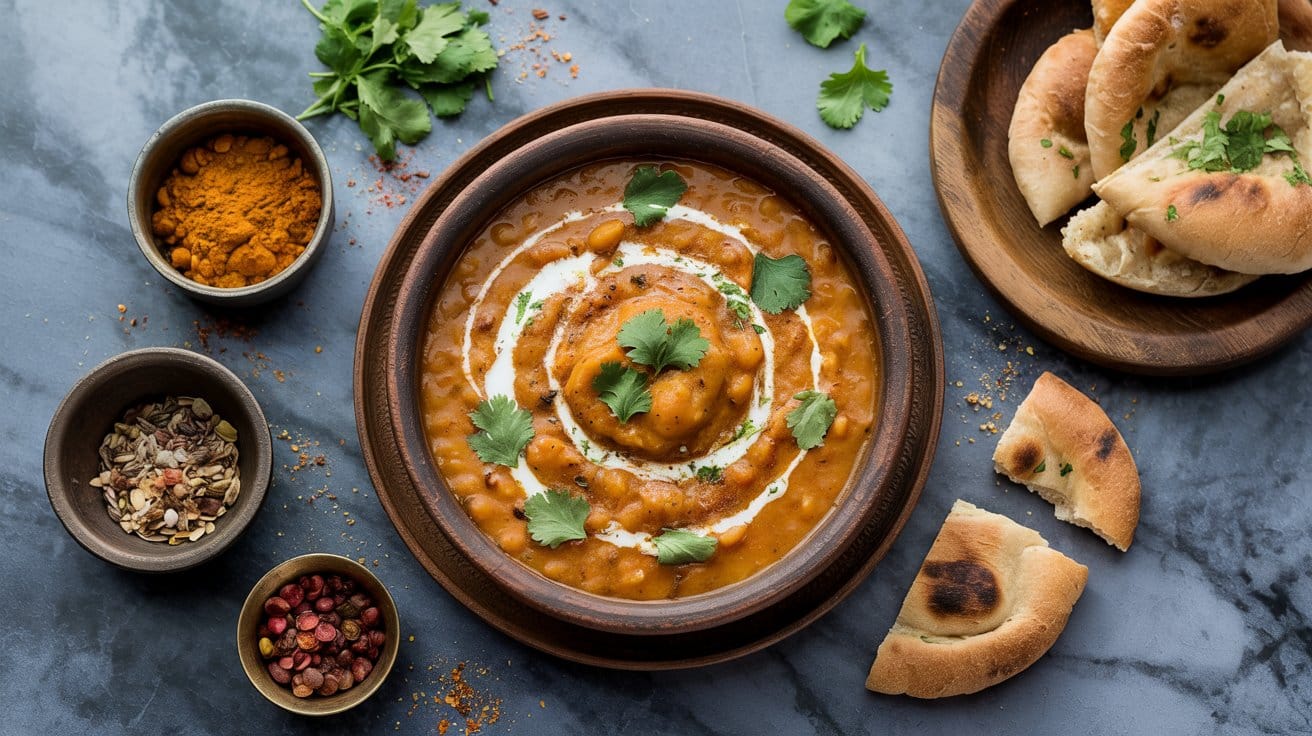
Red lentils are split and hulled, so they simmer into a thick, creamy dal in 20 to 25 minutes. Curry powder and turmeric bloom in the onion for a minute first, and canned tomatoes add the acid that keeps the pot from tasting flat.
Add salt at the end and taste first, since broth already carries some.
Red lentils are split, so they cook fast and break down into a creamy, almost porridge-like dal with no soaking. Curry powder and turmeric give the golden color and warm, earthy flavor, while the tomatoes add a mild tang.
Yellow lentils replace red lentils, and garam masala replaces curry powder.
Rinse the lentils until the water runs mostly clear, and look them over for small stones. Stir the pot every few minutes near the end, because lentils settle and catch on the bottom.
If the dal gets too thick, thin it with hot water to keep it simmering.
The dal is vegan as written and is usually served over rice or with flatbread, which makes it a full dinner.
Ingredients
- 1 cup red lentils, rinsed and drained
- 1 tablespoon vegetable oil, or another neutral oil
- 1 medium onion, finely chopped
- 2 cloves garlic, minced
- 1 tablespoon curry powder
- ½ teaspoon ground turmeric
- 1 can (14 ounces) chopped tomatoes
- 3 cups vegetable stock, or water
- Salt, to taste
- 1 tablespoon dried cilantro, for garnish
- Juice of half a lemon (optional)
Instructions
- Soften the onion. Heat the oil in a large saucepan over medium heat and cook the onion for about 5 minutes, until soft and translucent.
- Bloom the spices. Stir in the garlic, curry powder and turmeric and cook for 1 minute, stirring so they do not burn.
- Add the lentils. Add the rinsed lentils, tomatoes and stock and bring to a gentle boil.
- Simmer. Reduce the heat and simmer uncovered for 20 to 25 minutes, stirring occasionally, until the lentils are soft and the dal has thickened.
- Finish. Season with salt, stir in the lemon juice if using, and serve with dried cilantro over rice or with flatbread.
Dal thickens as it cools, so add a splash of water when you reheat it. Lemon juice stirred in at the end lifts the flavor, which is why the recipe lists it.
It keeps 3 to 4 days in the fridge, like other soups and stews.
13. Moroccan Chickpea Stew
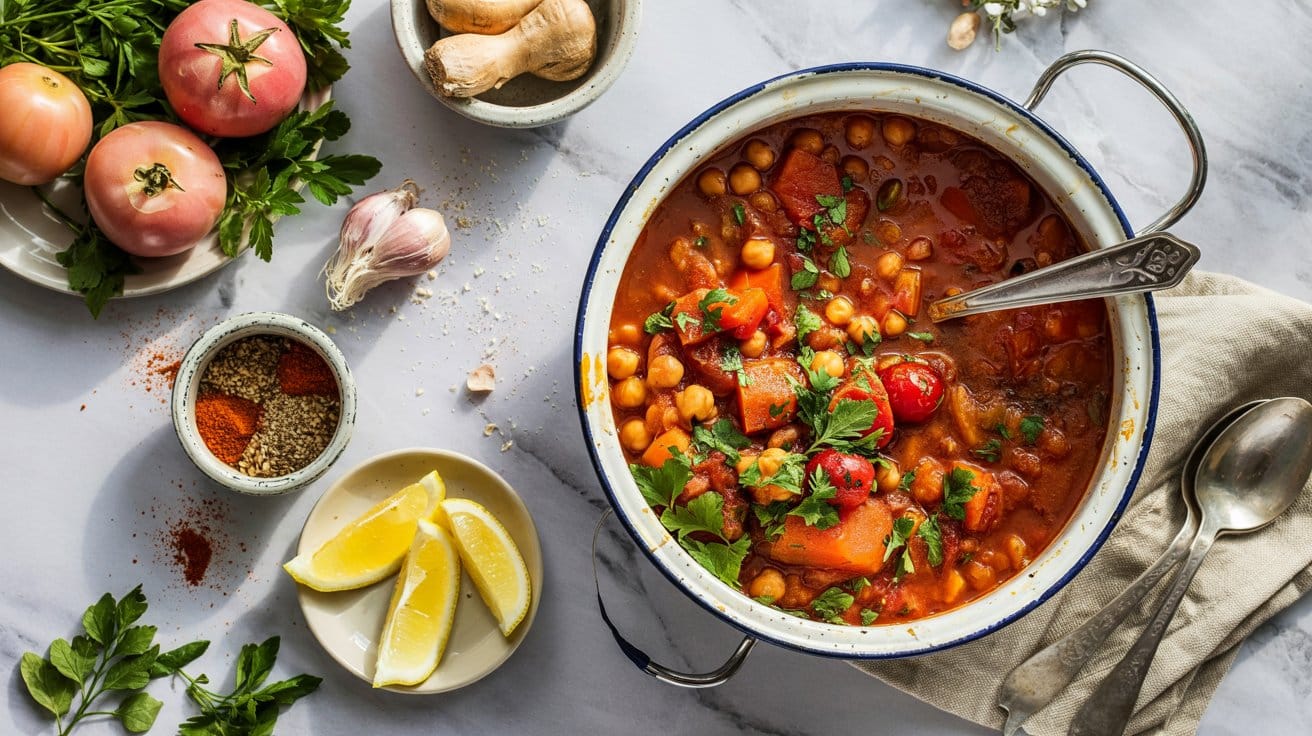
Two cans of chickpeas simmer in canned tomatoes with cumin, cinnamon and harissa or smoked paprika, so the spices carry the stew and the chickpeas make it filling. Cook the spices for only 1 to 2 minutes, since they turn bitter once they scorch.
Raisins are optional and add a sweet contrast to the heat.
Cumin, cinnamon and harissa make a warm, lightly sweet, gently hot stew. Only a quarter teaspoon of cinnamon goes in, so it adds warmth without a dessert-like taste.
The chickpeas soften as they simmer, and some break down to thicken the pot.
Smoked paprika is the simplest swap when there is no harissa, and other harissa paste substitutes work too. Couscous or quinoa can replace the rice.
Harissa brands vary in heat, so taste the stew after 10 minutes of simmering and add more only if it needs it. Rinse the canned chickpeas well to remove the starchy liquid, which can make the stew foam.
Ingredients
- 2 tablespoons olive oil
- 1 medium onion, chopped
- 3 cloves garlic, minced
- 1 tablespoon harissa paste or 1 teaspoon smoked paprika
- 1 teaspoon ground cumin
- ¼ teaspoon ground cinnamon
- 1 (28-ounce) can diced tomatoes
- 2 (15-ounce) cans chickpeas, drained and rinsed
- ¼ cup raisins (optional)
- Salt and black pepper, to taste
- Cooked rice, for serving
Instructions
- Soften the onion. Heat the oil in a large pot over medium heat and cook the onion for about 5 minutes, until translucent.
- Cook the spices. Stir in the garlic, harissa or paprika, cumin and cinnamon and cook for 1 to 2 minutes, until fragrant and not burnt.
- Add the tomatoes. Pour in the diced tomatoes with their juices, bring to a simmer, and cook for 10 minutes.
- Add the chickpeas. Stir in the drained chickpeas and the raisins if using, and simmer gently for 10 more minutes.
- Season and serve. Add salt and black pepper to taste and serve hot over cooked rice.
Serve it over rice, couscous or quinoa, or scoop it up with flatbread. Stews like this keep 3 to 4 days in the fridge and taste deeper the next day, which makes it a good dinner to cook in a double batch.
14. Tuna-Stuffed Rice Bowls
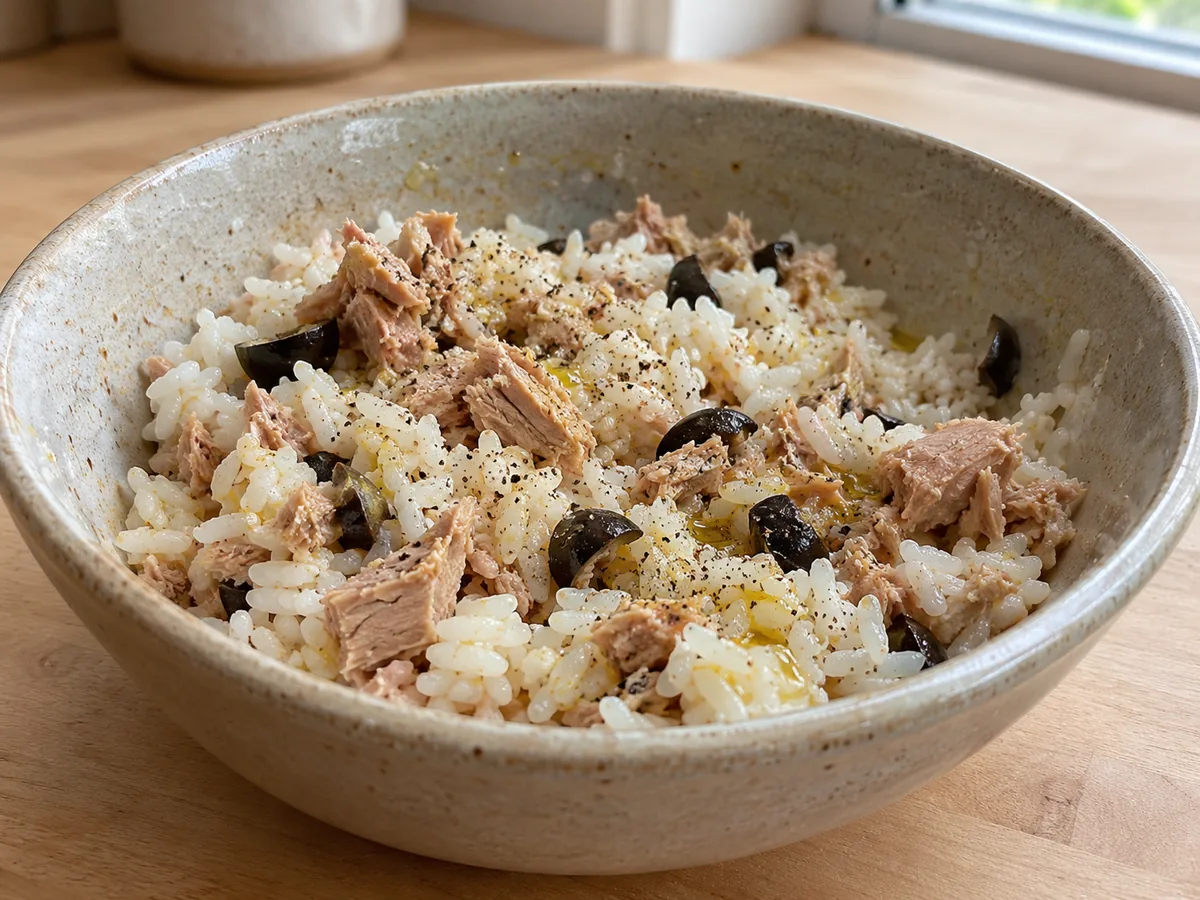
Canned tuna, rice, olives and olive oil are mixed in one bowl, so the only thing you cook is the rice. Keeping a little of the oil from the tuna can in the mix adds flavor, and lemon powder gives a sour edge without fresh lemon.
Leftover tuna from an opened can of tuna goes into a covered container in the fridge.
Tuna packed in olive oil is moister and richer than tuna packed in water, and keeping a little of the oil in the bowl seasons the rice. Olives add salt and a briny bite, and the lemon powder brightens it.
Canned salmon replaces the tuna, and capers replace the olives.
Use warm or room-temperature rice, because hot rice melts the oil into the grains and cold rice stays clumpy. Flake the tuna with a fork until no large pieces remain, so each bite has some.
Taste before salting, since olives and tuna both carry salt.
The rice is the only thing that gets cooked, so this is the dinner for a hot evening when the stove should be on as briefly as possible.
Ingredients
- 1 ½ cups cooked white or brown rice, cooked from dry rice by the package directions
- 1 (5-ounce) can tuna in olive oil, drained slightly with some oil kept
- 2 tablespoons extra-virgin olive oil
- 1 teaspoon lemon powder
- ¼ cup pitted black or green olives, roughly chopped
- Salt and freshly ground black pepper, to taste
- Chopped fresh parsley or green onions (optional)
Instructions
- Fluff the rice. Fluff the cooked rice with a fork and move it to a mixing bowl.
- Add the tuna. Add the tuna and break it up gently with a fork.
- Dress it. Stir in the olive oil and lemon powder until the rice and tuna are evenly coated.
- Add the olives. Mix in the chopped olives, then season with salt and pepper.
- Serve. Divide between bowls and top with parsley or green onions if you have them.
Canned tuna keeps 3 years unopened, according to FoodKeeper, so this is a dinner you can plan around a full cupboard. Store leftovers in one covered container in the fridge and eat them within 3 to 4 days, the shorter of the tuna salad and cooked rice windows.
15. Pantry Ramen Stir-Fry
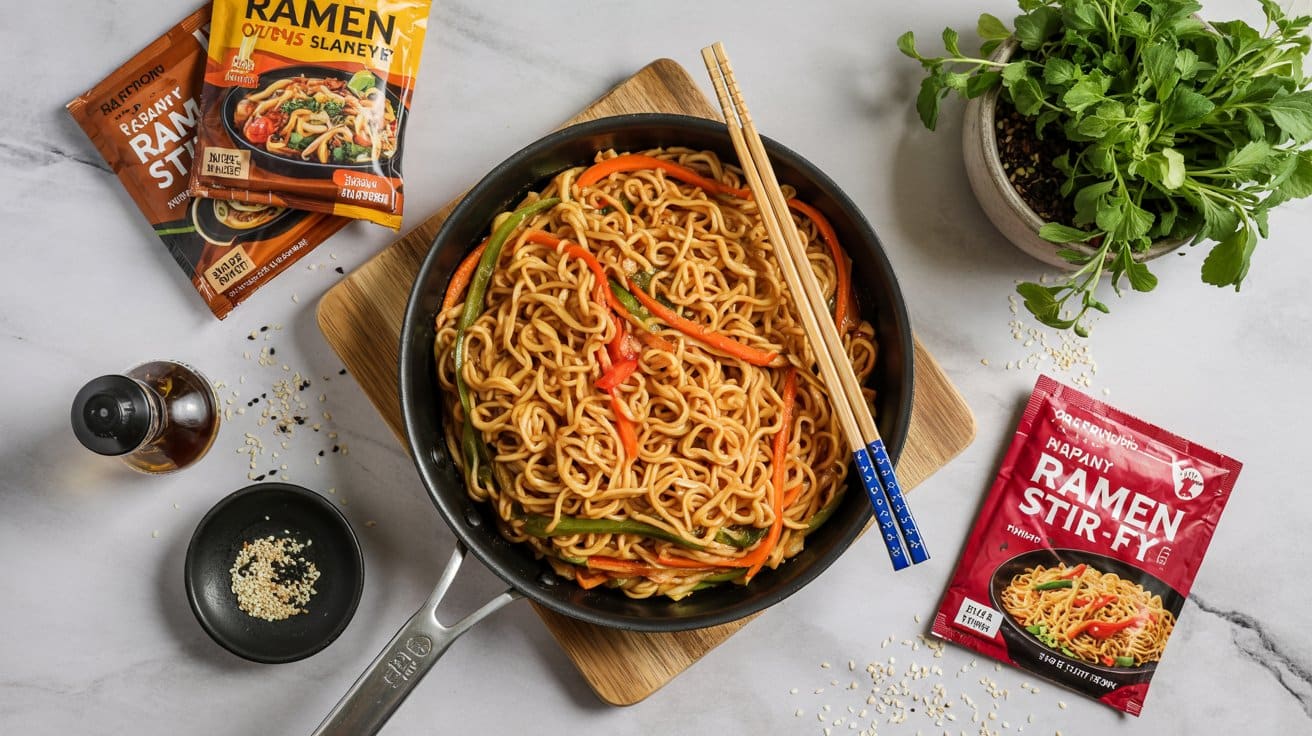
Two packs of instant ramen fry in a hot skillet for 2 to 3 minutes until slightly crisp, then get tossed in a peanut butter sauce, so the seasoning packets stay in the cupboard. Garlic powder and scallion powder stand in for fresh aromatics, and sesame oil supplies the toasted flavor.
Frying the boiled ramen noodles for 2 to 3 minutes gives them a chewy, slightly crisp edge that plain boiled ramen lacks. The peanut sauce is salty, nutty and a little garlicky, and the sesame oil adds a toasted note.
Skipping the seasoning packets keeps the salt in check, because instant ramen packets are high in sodium.
Rice noodles with tamari make the dish gluten-free, and sunflower seed butter makes it nut-free.
Boil the ramen for the shortest time on the package, because the noodles cook again in the skillet and overcooked ones turn mushy. Drain them well so the pan fries them instead of steaming them.
A hot skillet or wok gives the best browning.
Ingredients
- 2 packages instant ramen noodles (discard the seasoning packets or save them for another use)
- 3 tablespoons natural peanut butter, creamy or chunky
- 2 teaspoons soy sauce, regular or low sodium
- 1 teaspoon sesame oil
- ½ teaspoon garlic powder
- ½ teaspoon scallion powder, or fresh scallions
- 1 tablespoon vegetable oil, for stir-frying
- ¼ cup water, to thin the sauce
- Crushed peanuts, sliced green onions or sesame seeds, to garnish (optional)
Instructions
- Cook the noodles. Boil the ramen according to the package until just tender, then drain.
- Whisk the sauce. In a small bowl, whisk the peanut butter, soy sauce, sesame oil, garlic powder, scallion powder and water until smooth, adjusting the water to the thickness you like.
- Crisp the noodles. Heat the vegetable oil in a large skillet or wok over medium-high heat and stir-fry the noodles for 2 to 3 minutes, until slightly crisp.
- Add the sauce. Pour the peanut sauce over the noodles and toss continuously until they are coated and hot.
- Serve. Eat immediately, topped with peanuts, green onions or sesame seeds.
Peanut butter is the base, so this dinner has the same peanut allergy note as the other peanut noodles (5 and 16).
Eat the noodles right away, because the crisp edges soften as they sit.
16. Gochujang Peanut Noodles
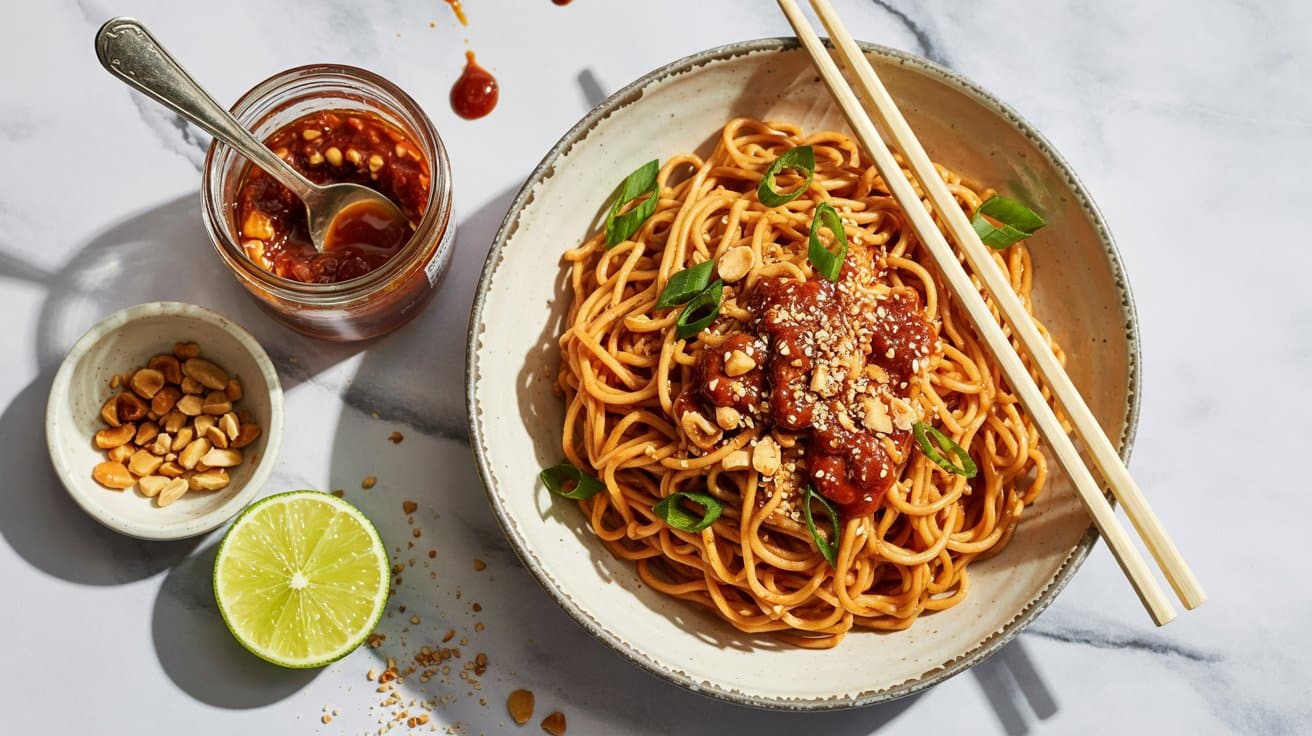
Gochujang brings fermented chili heat and some sweetness, peanut butter adds body, and honey and rice vinegar balance them, so the sauce is whisked cold and only the noodles are cooked. Gochujang is salty and hot, so taste the sauce before adding the full 3 tablespoons if your jar runs strong.
A few tablespoons of warm water loosen it to coat thin rice noodles.
Gochujang is a Korean chili paste made from chilies, glutinous rice and fermented soybeans, so it tastes sweet, salty and deeply savory at the same time, with the heat building slowly. Peanut butter softens that heat and gives the sauce body.
Sambal oelek is one of several gochujang substitutes, though the sauce loses the fermented sweetness. Soy sauce can be swapped for tamari.
Brands of gochujang differ in heat and sweetness. Whisk the sauce until it is completely smooth, then add water by the spoonful.
Thin rice noodles cook in minutes and take up the sauce quickly.
Ingredients
- 6 ounces rice noodles, thin or medium width, uncooked
- 3 tablespoons gochujang
- 2 tablespoons creamy peanut butter
- 2 tablespoons soy sauce
- 1 tablespoon rice vinegar
- 1 tablespoon honey
- 1 teaspoon toasted sesame oil
- 2 cloves garlic, minced
- ¼ teaspoon ground ginger, or 1 teaspoon grated fresh ginger
- 2 tablespoons warm water
- 1 tablespoon toasted sesame seeds, for garnish
- 2 green onions, thinly sliced, for garnish (optional)
Instructions
- Cook the noodles. Prepare the rice noodles by the package directions, then drain and set aside.
- Whisk the sauce. In a medium bowl, whisk the gochujang, peanut butter, soy sauce, vinegar, honey, sesame oil, garlic, ginger and warm water until smooth.
- Coat the noodles. Toss the noodles with the sauce, adding a little more warm water if it feels thick.
- Garnish. Divide between bowls and sprinkle with sesame seeds and green onions.
- Serve. Eat right away.
Soy sauce, sesame oil and gochujang all carry salt, so skip extra salt. Serve the noodles right away, because thin rice noodles firm up and clump as they cool.
Some gochujang brands contain wheat, so check the label for a gluten-free bowl.
17. Coconut Chickpea Curry
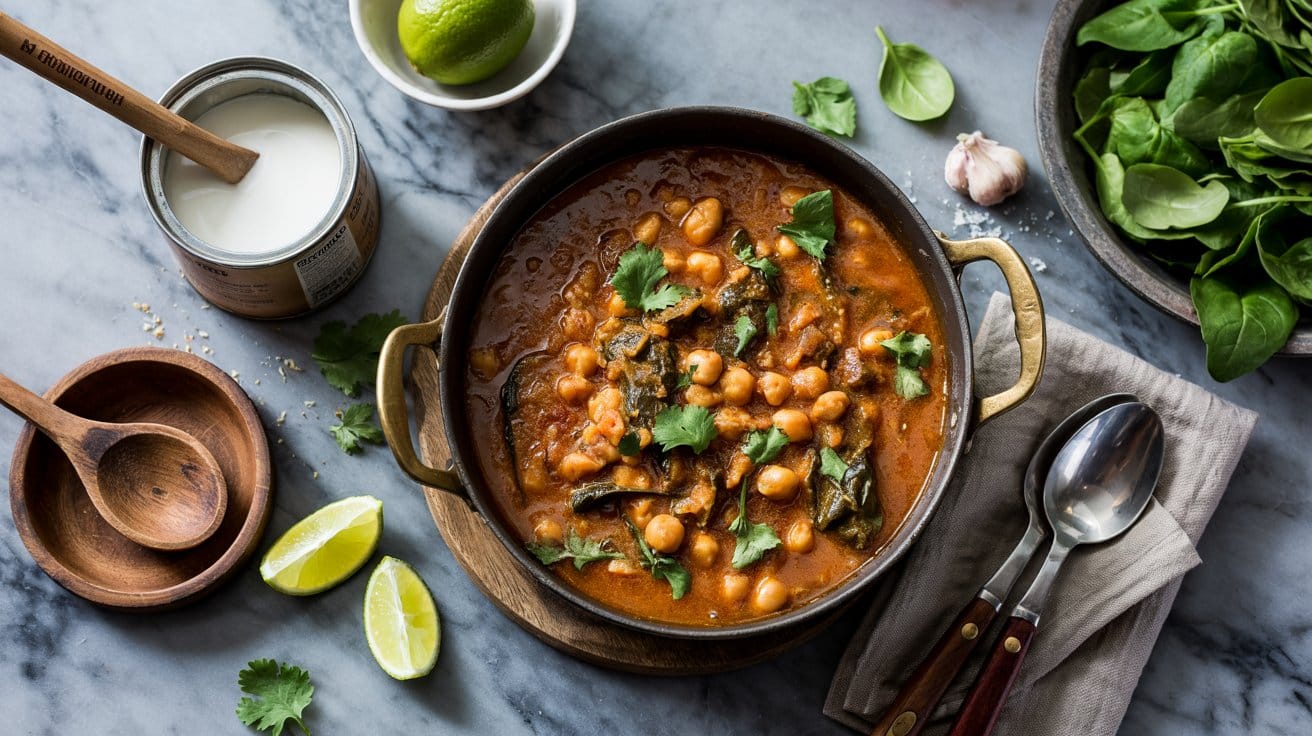
Curry powder, ginger and garlic cook in oil for about a minute, then canned tomatoes, coconut milk and two cans of chickpeas simmer for 15 to 20 minutes, so the sauce is ready once it thickens slightly. Coconut milk softens the heat of the curry powder, and the dish is vegan as written.
Ground ginger replaces the fresh root, which lasts only a few days at room temperature.
Curry powder is a blend of ground spices, usually turmeric, coriander, cumin and chili, and toasting it in oil for 30 seconds brings out its flavor. Coconut milk rounds off the spice with a creamy sweetness, and the tomatoes add acid.
Lentils or white beans replace the chickpeas, and one of the coconut milk substitutes such as almond milk gives a lighter, thinner sauce.
Cover the pan as the recipe says, so the chickpeas simmer gently and the sauce does not reduce too fast. Mash a few chickpeas against the side of the pan if you want a thicker curry.
The sauce is ready when it coats the back of a spoon.
Ingredients
- 1 tablespoon olive oil
- 1 small onion, finely chopped
- 2 garlic cloves, minced
- 1 teaspoon ground ginger, or 1 tablespoon grated fresh ginger
- 2 tablespoons curry powder
- 1 can (14 ounces) diced tomatoes
- 1 can (14 ounces) coconut milk
- 2 cans (15 ounces each) chickpeas, drained and rinsed
- Salt, to taste
- Fresh cilantro, chopped (optional)
- Cooked rice, for serving
Instructions
- Soften the onion. Heat the oil in a large skillet over medium heat and cook the onion for 4 to 5 minutes, until translucent.
- Add garlic and ginger. Stir them in and cook for about 1 minute, until fragrant and not browned.
- Toast the curry powder. Add it and cook for 30 seconds, stirring constantly.
- Add the liquid. Pour in the tomatoes and coconut milk, stir, and bring to a gentle simmer.
- Simmer the chickpeas. Add the drained chickpeas, cover, and simmer for 15 to 20 minutes, stirring occasionally, until the sauce thickens slightly.
- Season and serve. Add salt to taste and serve hot over cooked rice with cilantro if you like.
Every ingredient is plant-based as written, so this is the dinner to cook for a vegan guest. Leave out the salt until you taste, because canned chickpeas and tomatoes both carry some.
An opened can of coconut milk keeps 4 days in the fridge, according to FoodKeeper.
18. Miso Soup with Soba Noodles
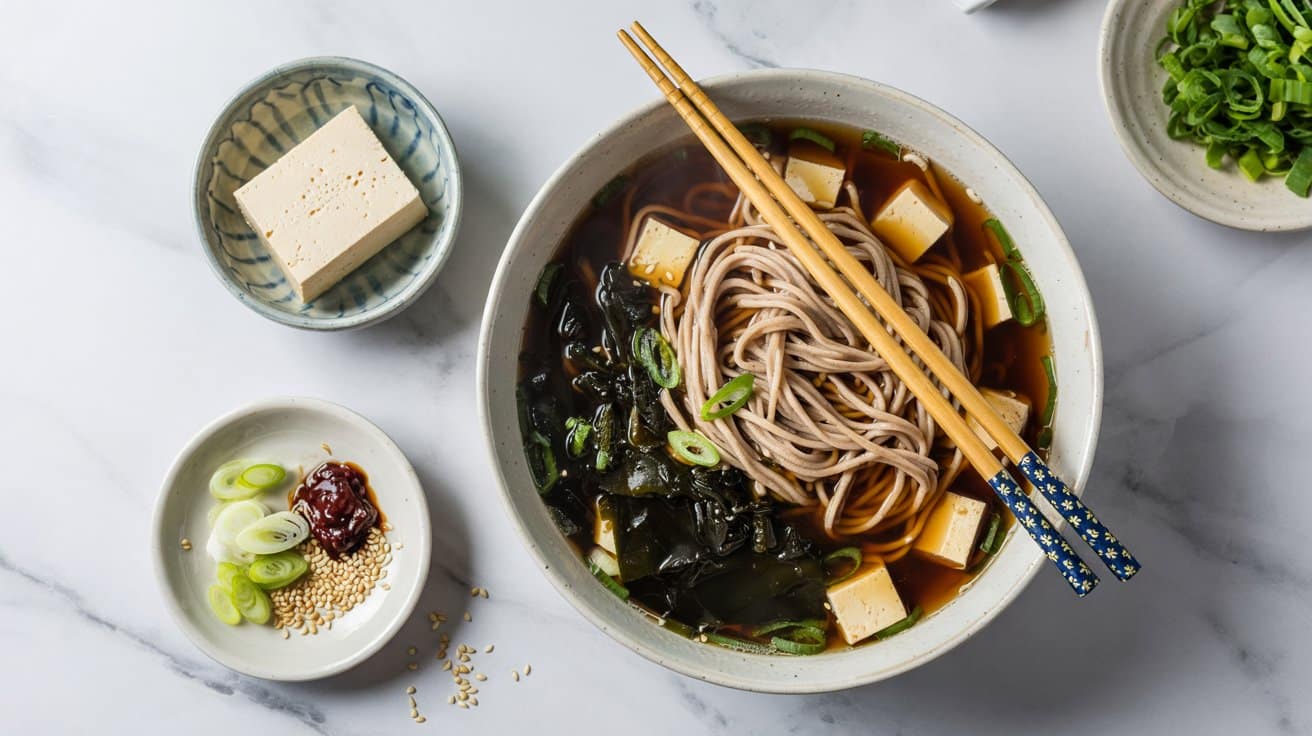
Soba cooks in a separate pot and goes into the bowl, and miso is whisked into the broth after the heat drops to low, because boiling dulls the flavor and aroma of miso. Dried wakame soaks in the broth for about 5 minutes, and 3 tablespoons suits a 4-cup pot.
Taste after the miso and soy sauce go in, and stir in a spoonful more miso if the broth is thin.
Miso is a fermented soybean paste with a salty, savory, slightly sweet flavor, and wakame adds a mild taste of the sea. Soba are buckwheat noodles with a nutty taste and a firm bite, and cooking them in their own pot keeps the broth clear.
Regular miso is a refrigerated food, so this is the third and last recipe here that needs one chilled ingredient. USDA FoodKeeper gives it 1 year in the fridge. Check the package of your instant miso paste for its own storage line. Silken tofu from a sealed shelf-stable carton works here, and the soup is still good with the tofu left out.
White or yellow miso gives a milder, sweeter soup, and rice noodles replace the soba for a gluten-free bowl, since some soba contains wheat. If the jar is empty, a few miso paste substitutes work in a pinch.
If the miso clumps, dissolve it in a ladle of hot broth before returning it to the pot. Keep the soup below a boil from then on.
Dried wakame swells to several times its size, so measure it as the recipe says.
Soba and silken tofu turn the broth into a full dinner instead of a starter soup.
Ingredients
- 4 cups vegetable broth
- 3 tablespoons instant miso paste
- 3 tablespoons dried wakame seaweed
- 4 ounces soba noodles
- 6 ounces silken tofu, cubed
- 2 green onions, thinly sliced (optional)
- 1 tablespoon soy sauce
Instructions
- Soak the wakame. Bring the broth to a gentle boil in a medium pot, add the dried wakame, and let it soak for about 5 minutes until it expands.
- Cook the soba. Meanwhile, boil the soba for 4 to 5 minutes until tender but firm, then drain.
- Whisk in the miso. Reduce the heat to low and whisk in the miso until dissolved, without letting the soup boil.
- Warm the tofu. Add the cubed tofu carefully and warm it for 2 to 3 minutes without breaking it apart. Season with soy sauce to taste.
- Serve. Divide the soba into bowls, ladle the hot soup over it, and top with green onions.
Serve the soup right away, because soba keeps absorbing broth and goes soft in the pot. Store the noodles and the broth separately if you have leftovers, and reheat the broth gently.
Many soba brands contain wheat flour as well as buckwheat, so check the label for a gluten-free bowl.
19. Tuna Pasta Salad with Olives
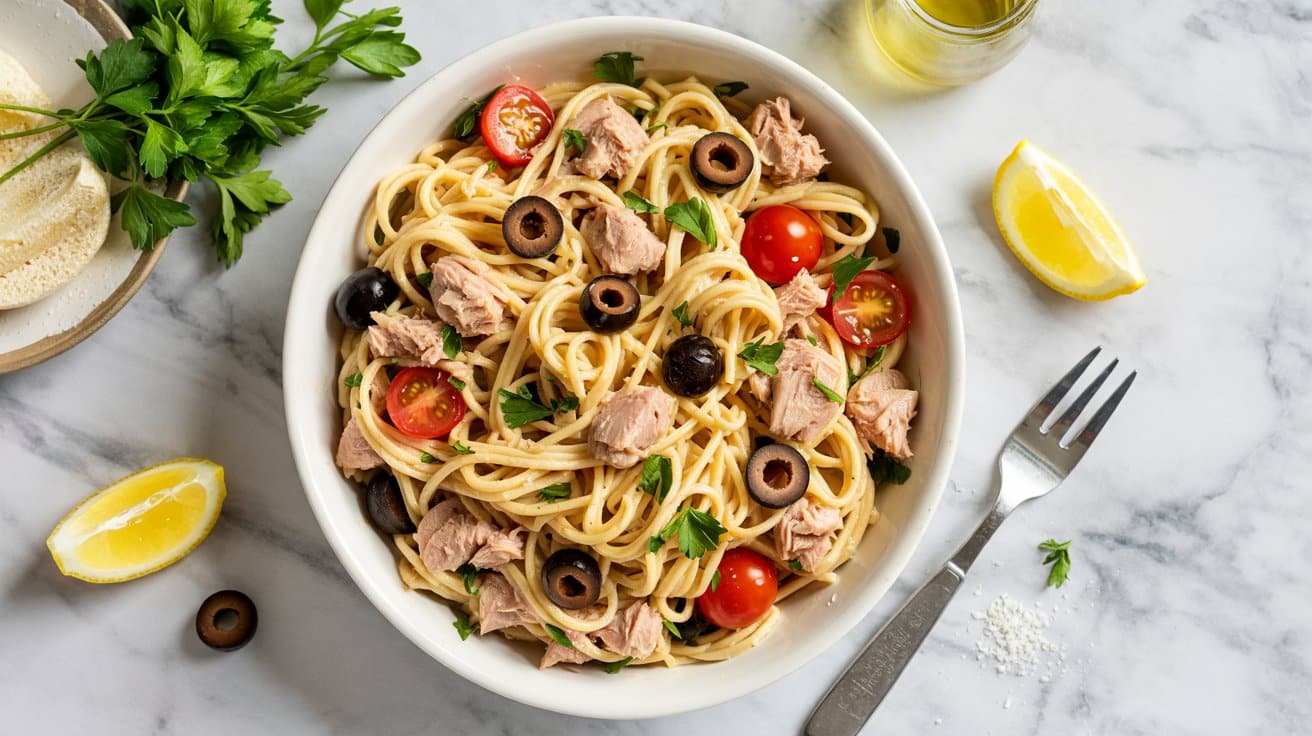
Short pasta, canned tuna and black olives are tossed in olive oil and white wine vinegar, so the dressing is two pantry bottles and no mayonnaise.
Dried herbs, salt and pepper finish the dressing.
The dressing is olive oil and white wine vinegar with dried herbs, which tastes sharp, fruity and light. Tuna and olives both bring salt, so the salad needs little more.
Once the tuna meets the pasta, the salad is perishable. Eat it right after mixing, at room temperature, and refrigerate what is left. Cooks with a working fridge can choose from pasta salads that hold up chilled.
Gluten-free pasta keeps it gluten-free, and apple cider vinegar replaces the white wine vinegar.
Rinsing the cooked pasta under cold water stops the cooking and cools it before it meets the tuna. Drain the tuna well, then flake it so it spreads through the pasta.
Short shapes such as penne or fusilli catch the olive pieces in their twists.
Ingredients
- 7 ounces (200 g) dried short pasta, such as penne or fusilli
- 1 can (5 ounces, about 150 g) tuna in oil, drained
- About 2 ounces (50 g) pitted black olives, sliced
- 3 tablespoons olive oil
- 1 tablespoon white wine vinegar
- 1 teaspoon dried mixed herbs, such as oregano, thyme and basil
- ½ teaspoon salt, adjusted to the saltiness of the olives
- ¼ teaspoon black pepper
Instructions
- Cook and cool the pasta. Boil it in salted water until just tender, drain well, and rinse briefly under cold water.
- Mix the tuna and olives. In a large bowl, combine the drained tuna and sliced olives.
- Add the pasta. Add the cooled pasta and sprinkle the dried herbs, salt and pepper over the top.
- Dress it. Drizzle with the olive oil and vinegar and toss gently until everything is coated.
- Taste and serve. Adjust the seasoning and serve at room temperature as a quick lunch or light dinner.
With no mayonnaise, this salad is easy to carry to a picnic, but tuna and pasta still need to stay cold. Refrigerate leftovers within 2 hours and eat them within 3 to 4 days, the FoodKeeper window for tuna salad.
20. Lentil & Vegetable Soup
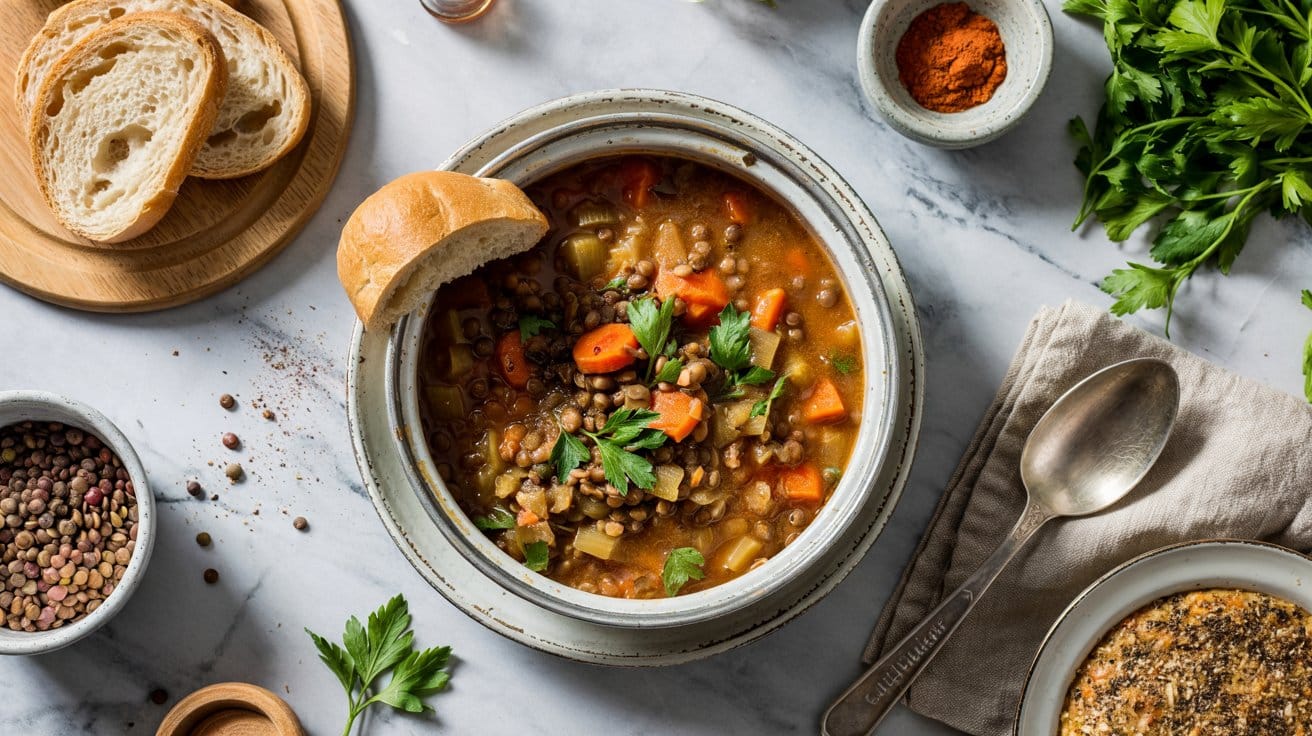
Dried lentils and dried mixed vegetables simmer in broth and canned tomatoes for 35 to 40 minutes, so nothing needs soaking and only an onion needs chopping. Use brown or green lentils, which take that full time, because red lentils cook faster and break down.
Italian seasoning supplies the herb base.
Brown or green lentils hold their shape in the soup instead of dissolving, which gives it a hearty, slightly peppery bite. Italian seasoning and tomatoes make a savory, herby broth, and the dried vegetables add small pieces of carrot, peas, corn and green beans.
Split peas or small white beans replace the lentils, and vegetable broth keeps the soup vegetarian.
Rinse and pick over the lentils first. Taste the broth before salting, since vegetable broth and canned tomatoes both carry sodium.
Simmer with the lid on, and add a cup of water if the soup gets too thick.
Ingredients
- 1 cup dried lentils, rinsed and picked over
- 1 cup dried mixed vegetables, typically a blend of carrots, peas, corn and green beans
- 1 (14.5-ounce) can diced tomatoes, with juices
- 6 cups vegetable broth, or chicken broth
- 2 teaspoons Italian seasoning
- 1 medium onion, finely chopped
- 2 cloves garlic, minced
- 2 tablespoons olive oil
- Salt and black pepper, to taste
Instructions
- Soften the onion. Heat the oil in a large pot over medium heat and cook the onion for about 5 minutes, until translucent. Add the garlic and cook 1 minute more.
- Add everything else. Add the lentils, dried vegetables, tomatoes with their juices and Italian seasoning, then pour in the broth and stir.
- Simmer. Bring to a boil, reduce the heat to low, cover, and simmer for 35 to 40 minutes, until the lentils and vegetables are tender.
- Season. Add salt and pepper to taste, and thin with a little more broth or water if the soup is too thick.
- Serve. Eat warm.
The soup keeps 3 to 4 days in the fridge, and Purdue Extension gives soups and stews 2 to 3 months in a 0°F freezer. Cool it in shallow containers before refrigerating or freezing.
It is a good pot to make once and eat from all week.
Which Spices Do These Dinners Use?
Dried spices do most of the seasoning when the fridge is empty. Six of them show up again and again, so a few jars cover many of the 20 dinners.
The table lists where each one is used.
| Spice | Dinners | What it does |
|---|---|---|
| Red pepper flakes | 1, 5, 11 | Clean, direct heat |
| Smoked paprika | 7, 9, 13 | Smoky depth, no meat |
| Cumin | 7, 13 | Earthy, warm base |
| Curry powder | 12, 17 | Turmeric-gold, mild heat |
| Garlic powder | 2, 15 | Stands in for fresh garlic |
| Dried herbs | 2, 19, 20 | Basil, oregano, Italian blend |
Ground spices lose strength as they sit, so a jar that has been open for years tastes weaker than a new one. Smell a spice before you measure it, and add a little more if the smell is faint.
Keep the jars in a cool, dark cupboard away from the stove, since heat and light weaken them. Taco seasoning (8) usually contains salt, so taste that pot before adding more.
What Can You Serve With a Pantry Dinner?
Most of these dinners are complete on their own, and the rest only need something starchy or crisp beside them. Crusty bread is the easiest partner for the soups, the bean skillet and the stews, and the bread sides you can make fast cover what to bake when the loaf is gone.
A can of corn heated with butter or oil, or one of the canned corn sides, goes next to the chili (7) or the Mexican rice (8).
For the dal, the curries and the chickpea stew, rice, couscous or flatbread from the cupboard does the job. The ideas in what to serve with lentils also suit the lentil dishes (12 and 20).
For the pasta dinners (1 to 4 and 19), a can of white beans or chickpeas on the side, one of the side dishes that start with a can of beans, or a bowl from the bean salads that serve cold adds protein without cooking anything more.
Which of These Dinners Can You Freeze?
Soups and stews freeze well. Purdue Extension gives them 2 to 3 months in a freezer kept at 0°F, so the three-bean chili (7), red lentil dal (12), Moroccan chickpea stew (13), coconut chickpea curry (17) and lentil soup (20) can be made in a big pot and frozen in portions.
Cool the pot first and divide it into shallow containers, 3 inches deep or less, because shallow containers cool faster in the fridge or freezer. Reheat the food to 165°F on a food thermometer before you eat it.
The pasta, noodle, rice and bread dinners (1 to 5, 8, 9, 11, 14 to 16 and 19) are best eaten the day you cook them. The sources for this page give no freezer time for them, and in the fridge FoodKeeper gives cooked pasta 3 to 5 days and cooked rice 4 to 6 days.
What Can the Freezer Add to a Pantry Dinner?
An empty fridge often still comes with a freezer, and a bag of frozen vegetables stretches several of these dinners. Frozen peas, spinach, corn and green beans go in straight from the bag, with no washing or chopping.
Stir peas into the tomato pasta (2) for the last 2 minutes, spinach into the dal (12) or lentil soup (20) at the end, and corn into the chili (7) or the Mexican rice (8). The curry (6) already takes frozen vegetables, as its recipe notes.
Sources
- USDA FoodKeeper: storage times for pantry foods, canned goods, cooked leftovers, cheese, hummus and miso
- Just One Cookbook: miso soup, why miso should not boil
- Love and Lemons: miso soup, dried wakame and miso amounts for a 4-cup pot
- Purdue Extension: Storing Leftovers, shallow containers, freezer times for soups and stews, reheating to 165°F
Frequently Asked Questions
Seventeen do. The three exceptions are Pecorino Romano in the cacio e pepe, hummus in the hummus pasta and miso in the miso soup. FoodKeeper keeps a hard cheese block 6 months unopened and 3 to 4 weeks once opened, commercial hummus 3 months unopened and 7 days once opened, and miso 1 year, all in the fridge.
FoodKeeper gives soups and stews 3 to 4 days in the fridge, cooked rice 4 to 6 days, cooked pasta and pasta salad 3 to 5 days, and tuna salad 3 to 4 days. A dish that mixes several of these, such as the tuna rice bowl, follows the shortest window.
Tuna is in dinners 14 and 19. Pappa al pomodoro and the lentil soup allow chicken broth, so use vegetable broth to keep them vegetarian. Cheese appears in dinners 1 and 2 (Parmesan, optional) and 3 (Pecorino, required), and honey is in dinners 5 and 16, where maple syrup can replace it.
Starch released by the pasta thickens the water. Stirred into oil, cheese or hummus, that starchy water binds the sauce into a coating that clings to the noodles, which a splash of plain water does not do.
A drained can of beans or chickpeas fits the one-pot tomato pasta and the Thai curry. Canned salmon replaces the tuna in the rice bowl, and lentils or white beans replace the chickpeas in the coconut curry.

Carrie is a food writer and editor with more than 15 years of experience. She has worked for some of the biggest names in the food industry, including Bon Appétit, Food & Wine, and Martha Stewart Living.
As the Editor in Chief of EpicureDelight, Carrie oversees all of the content on the site. She also manages the team of contributing writers and editors, who help to create delicious recipes, helpful tips, and informative articles that you’ll find on the site.
A native of the Chicago area, Carrie is passionate about all things food. She loves trying new restaurants and experimenting with new recipes in her kitchen. She’s also a graduate of the Culinary Institute of America, so she knows a thing or two about food!